You can create warehouses in any country, except Georgia and CIS countries: they require a separate account and business license. Previously created warehouses in Georgia and CIS countries are archived on April 24, 2024.
Create a warehouse #
-
In your personal account, go to the Logistics → Logistics management section and click Create warehouse.

-
Specify your warehouse details:
-
Warehouse name.
-
Warehouse phone number.
-
Address. Add the address manually in English or Russian.
Click Next.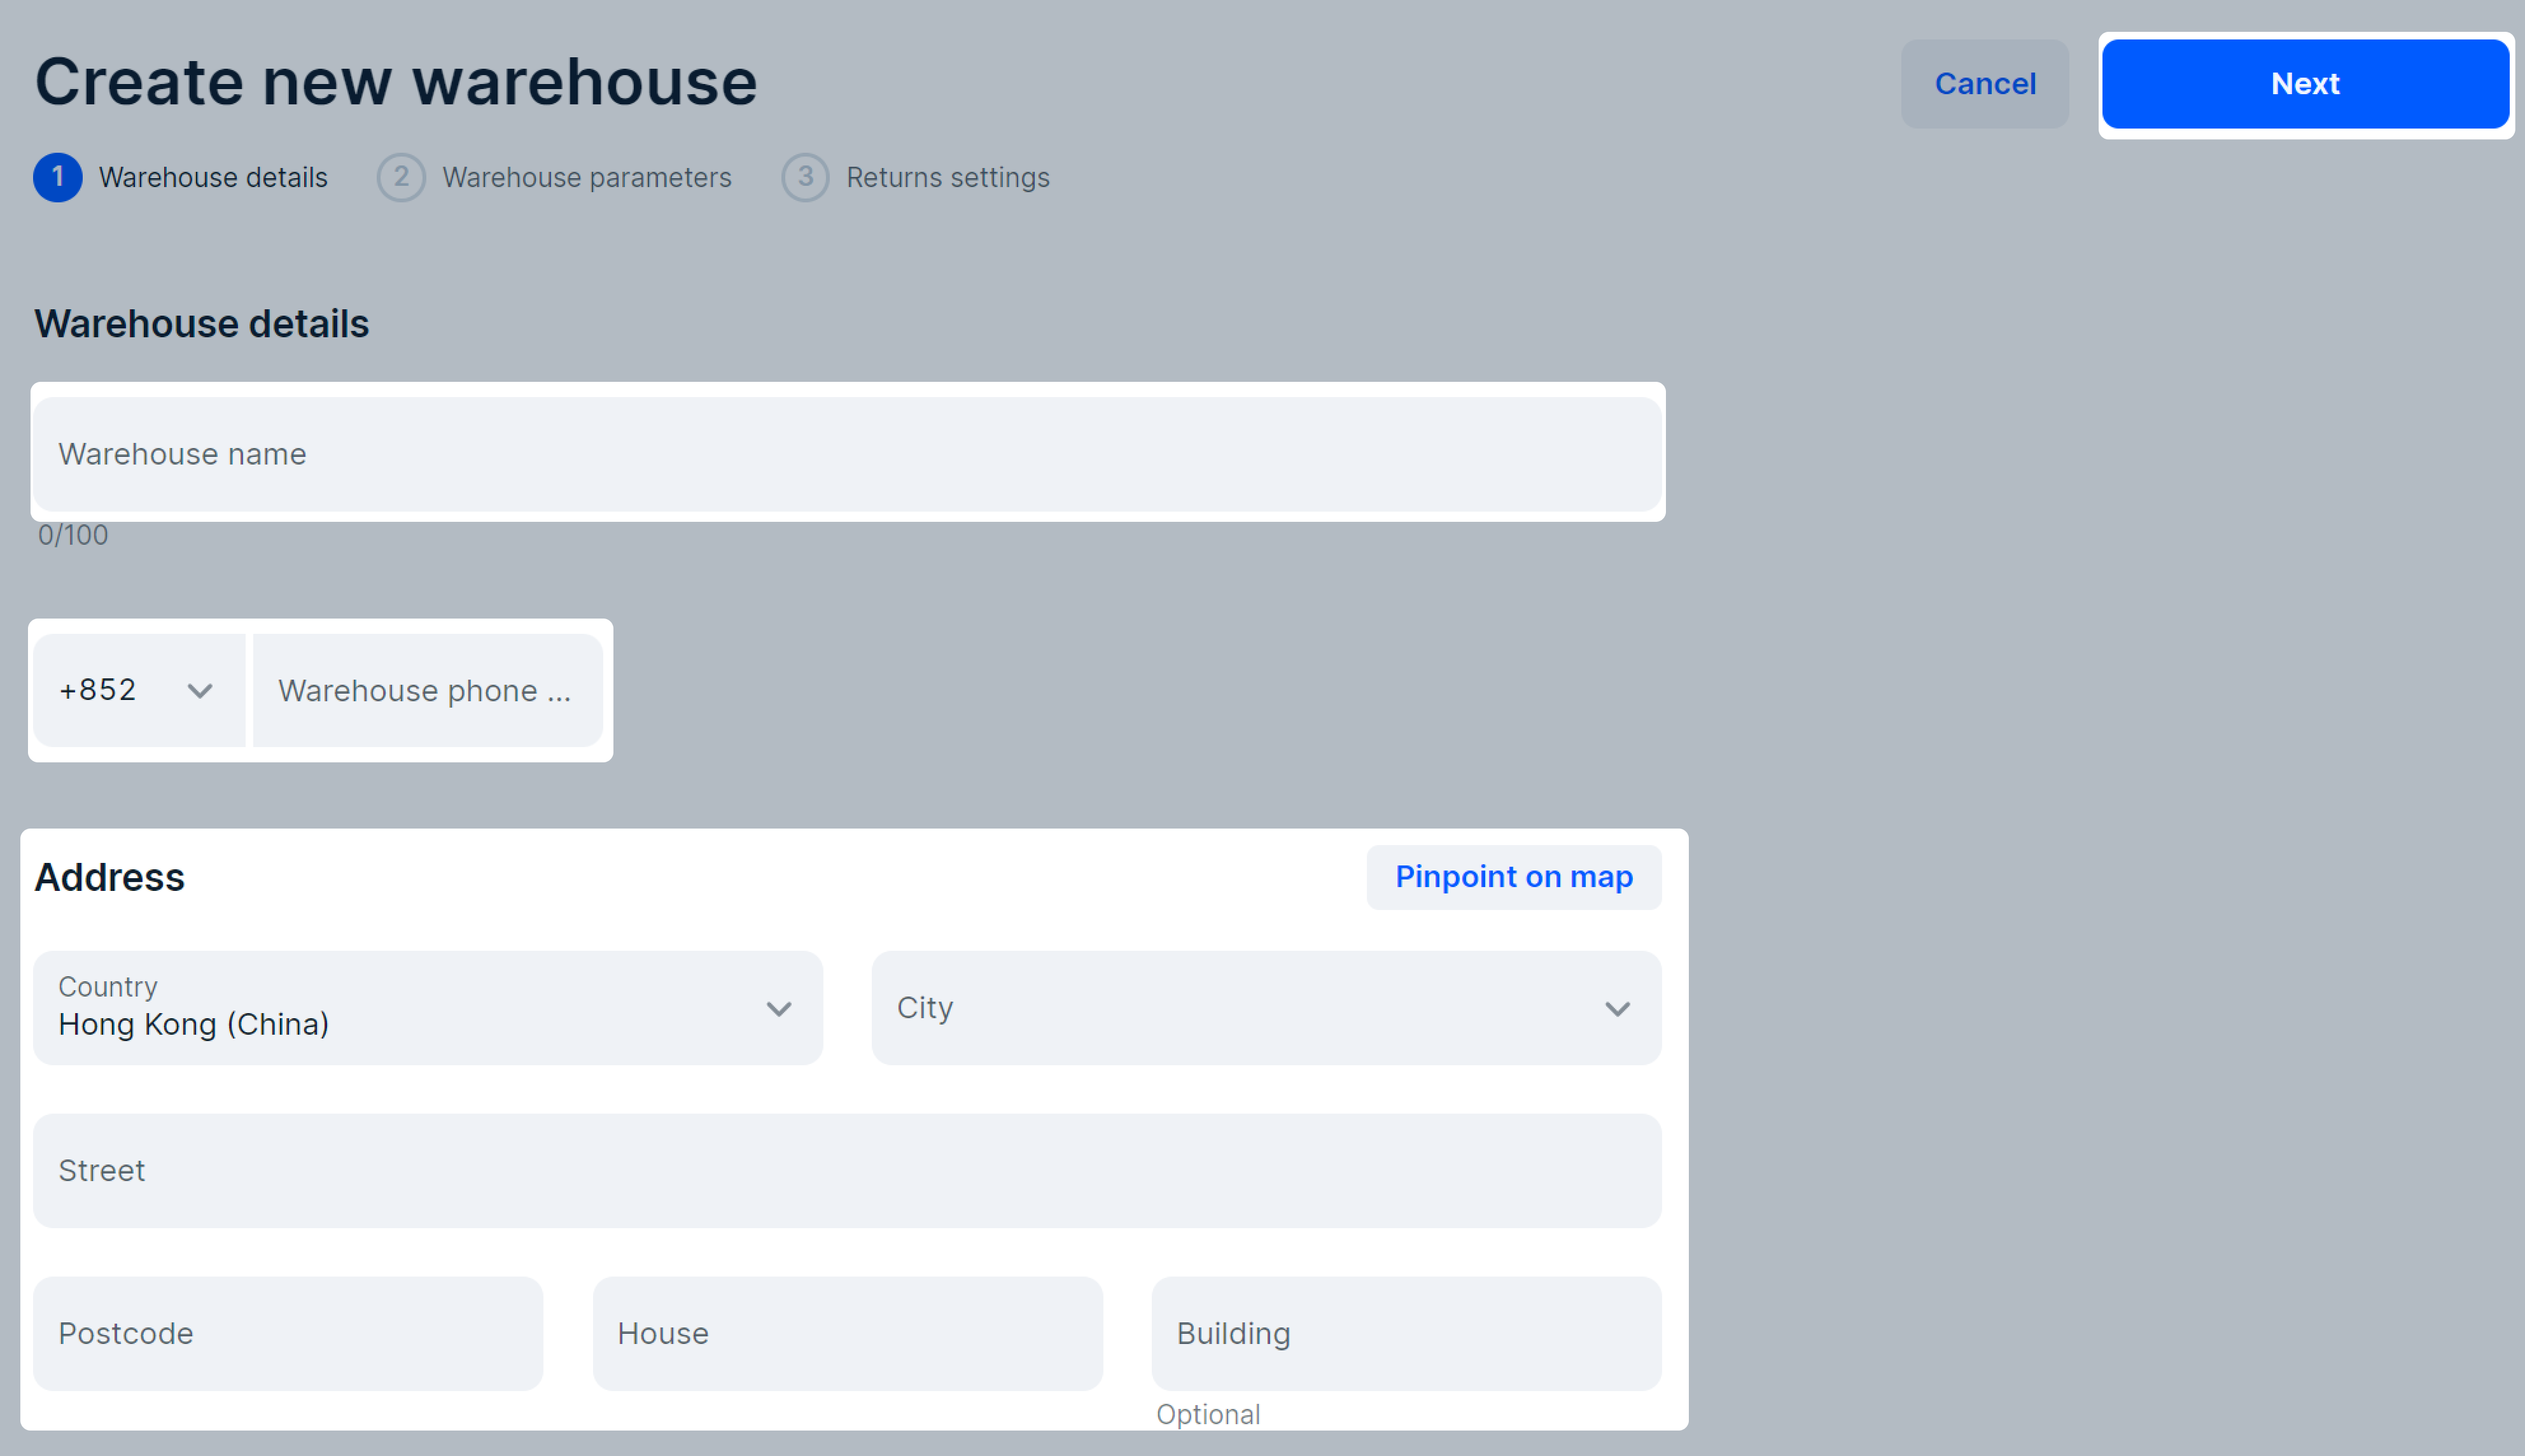
You can’t add a warehouse in countries from sanctions list: Congo, Cuba, Iran, Libya, North Korea, Palestine, Sudan, Venezuela, Syria, Zimbabwe, Yemen. -
- Specify Order preparation time including product delivery to a shipping provider and acceptance. The less time you need for order packaging, the more likely you’ll get the order: customers will choose your product if they don’t have to wait a lot.
Maximum order preparation time is 10 days. If your warehouse is working during holidays, specify it by clicking these days. Click Next.
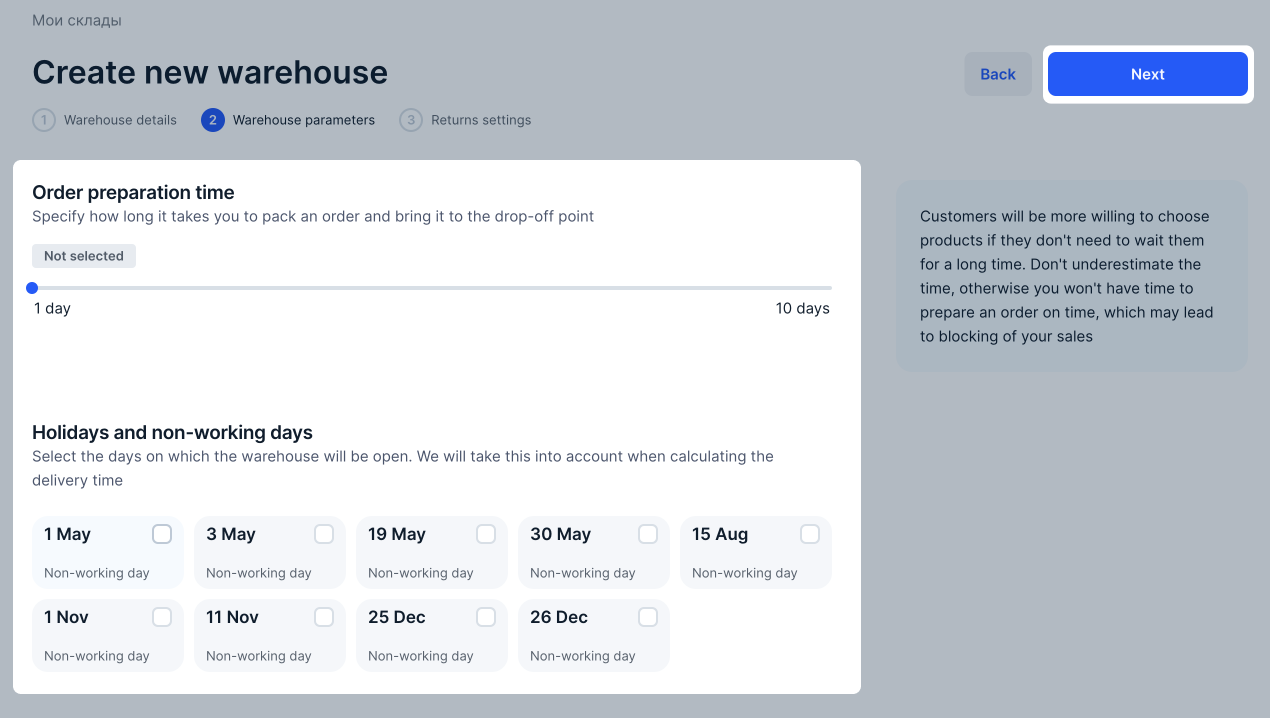
You can set only one order preparation time for a warehouse. To select a different order preparation time, create a new warehouse. This method is suitable if you order some products in small batches or manufacture them yourself.
- Specify Order preparation time including product delivery to a shipping provider and acceptance. The less time you need for order packaging, the more likely you’ll get the order: customers will choose your product if they don’t have to wait a lot.
Maximum order preparation time is 5 days. If your warehouse is working during holidays, specify it by clicking these days. Click Next.
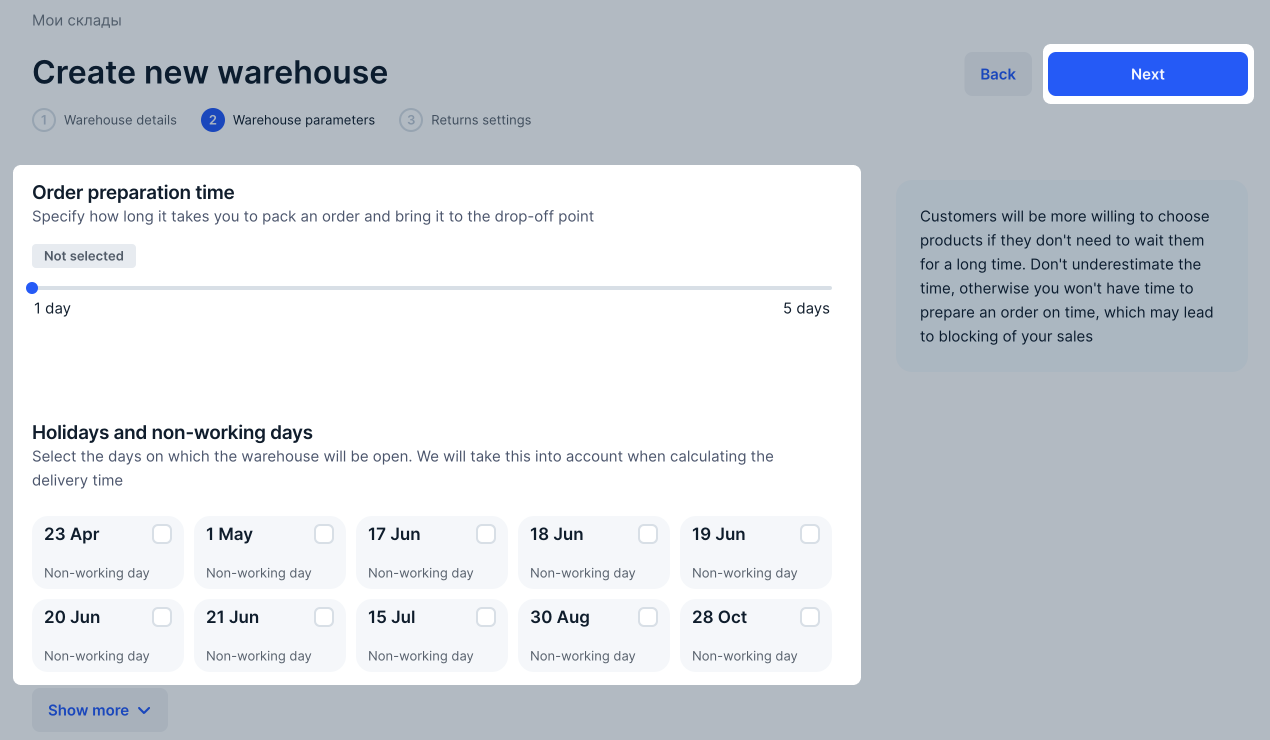
You can set only one order preparation time for a warehouse. To select a different order preparation time, create a new warehouse. This method is suitable if you order some products in small batches or manufacture them yourself.
-
Select the processing method for returns to pick-up points: dispose of products or send them back.
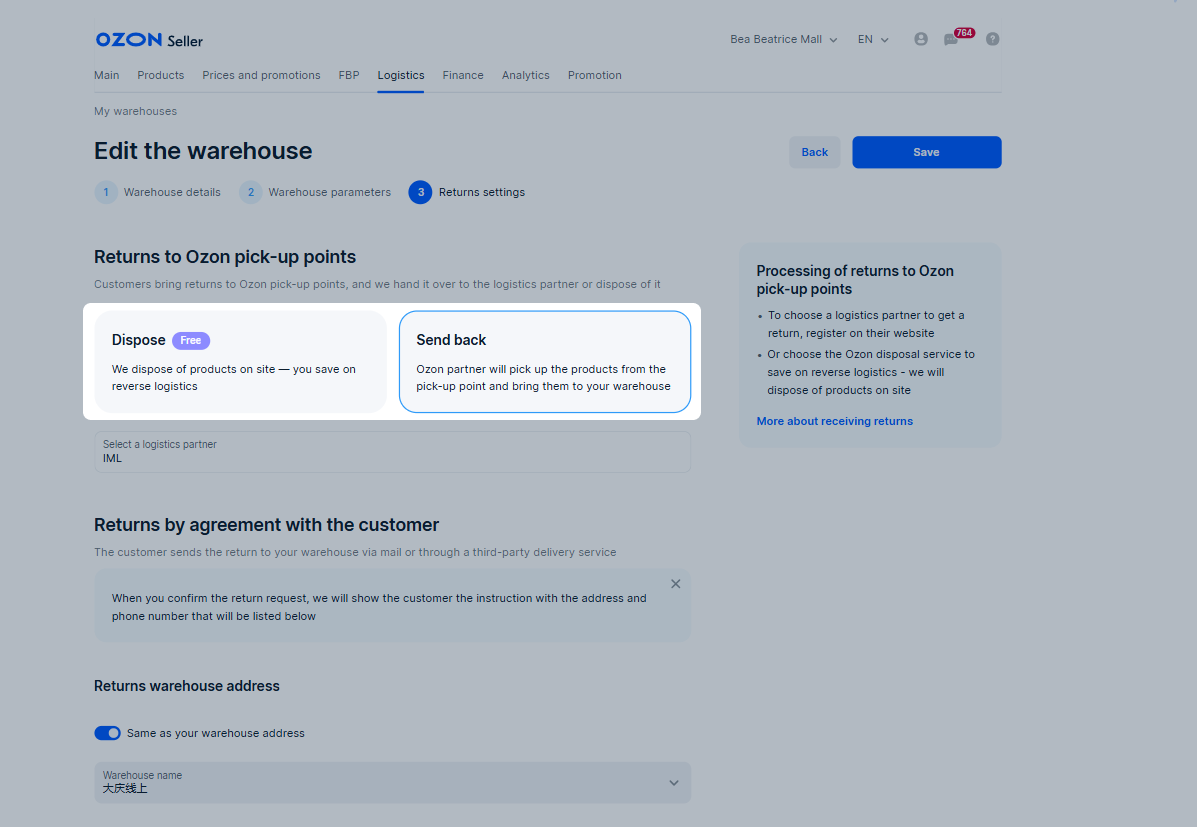
-
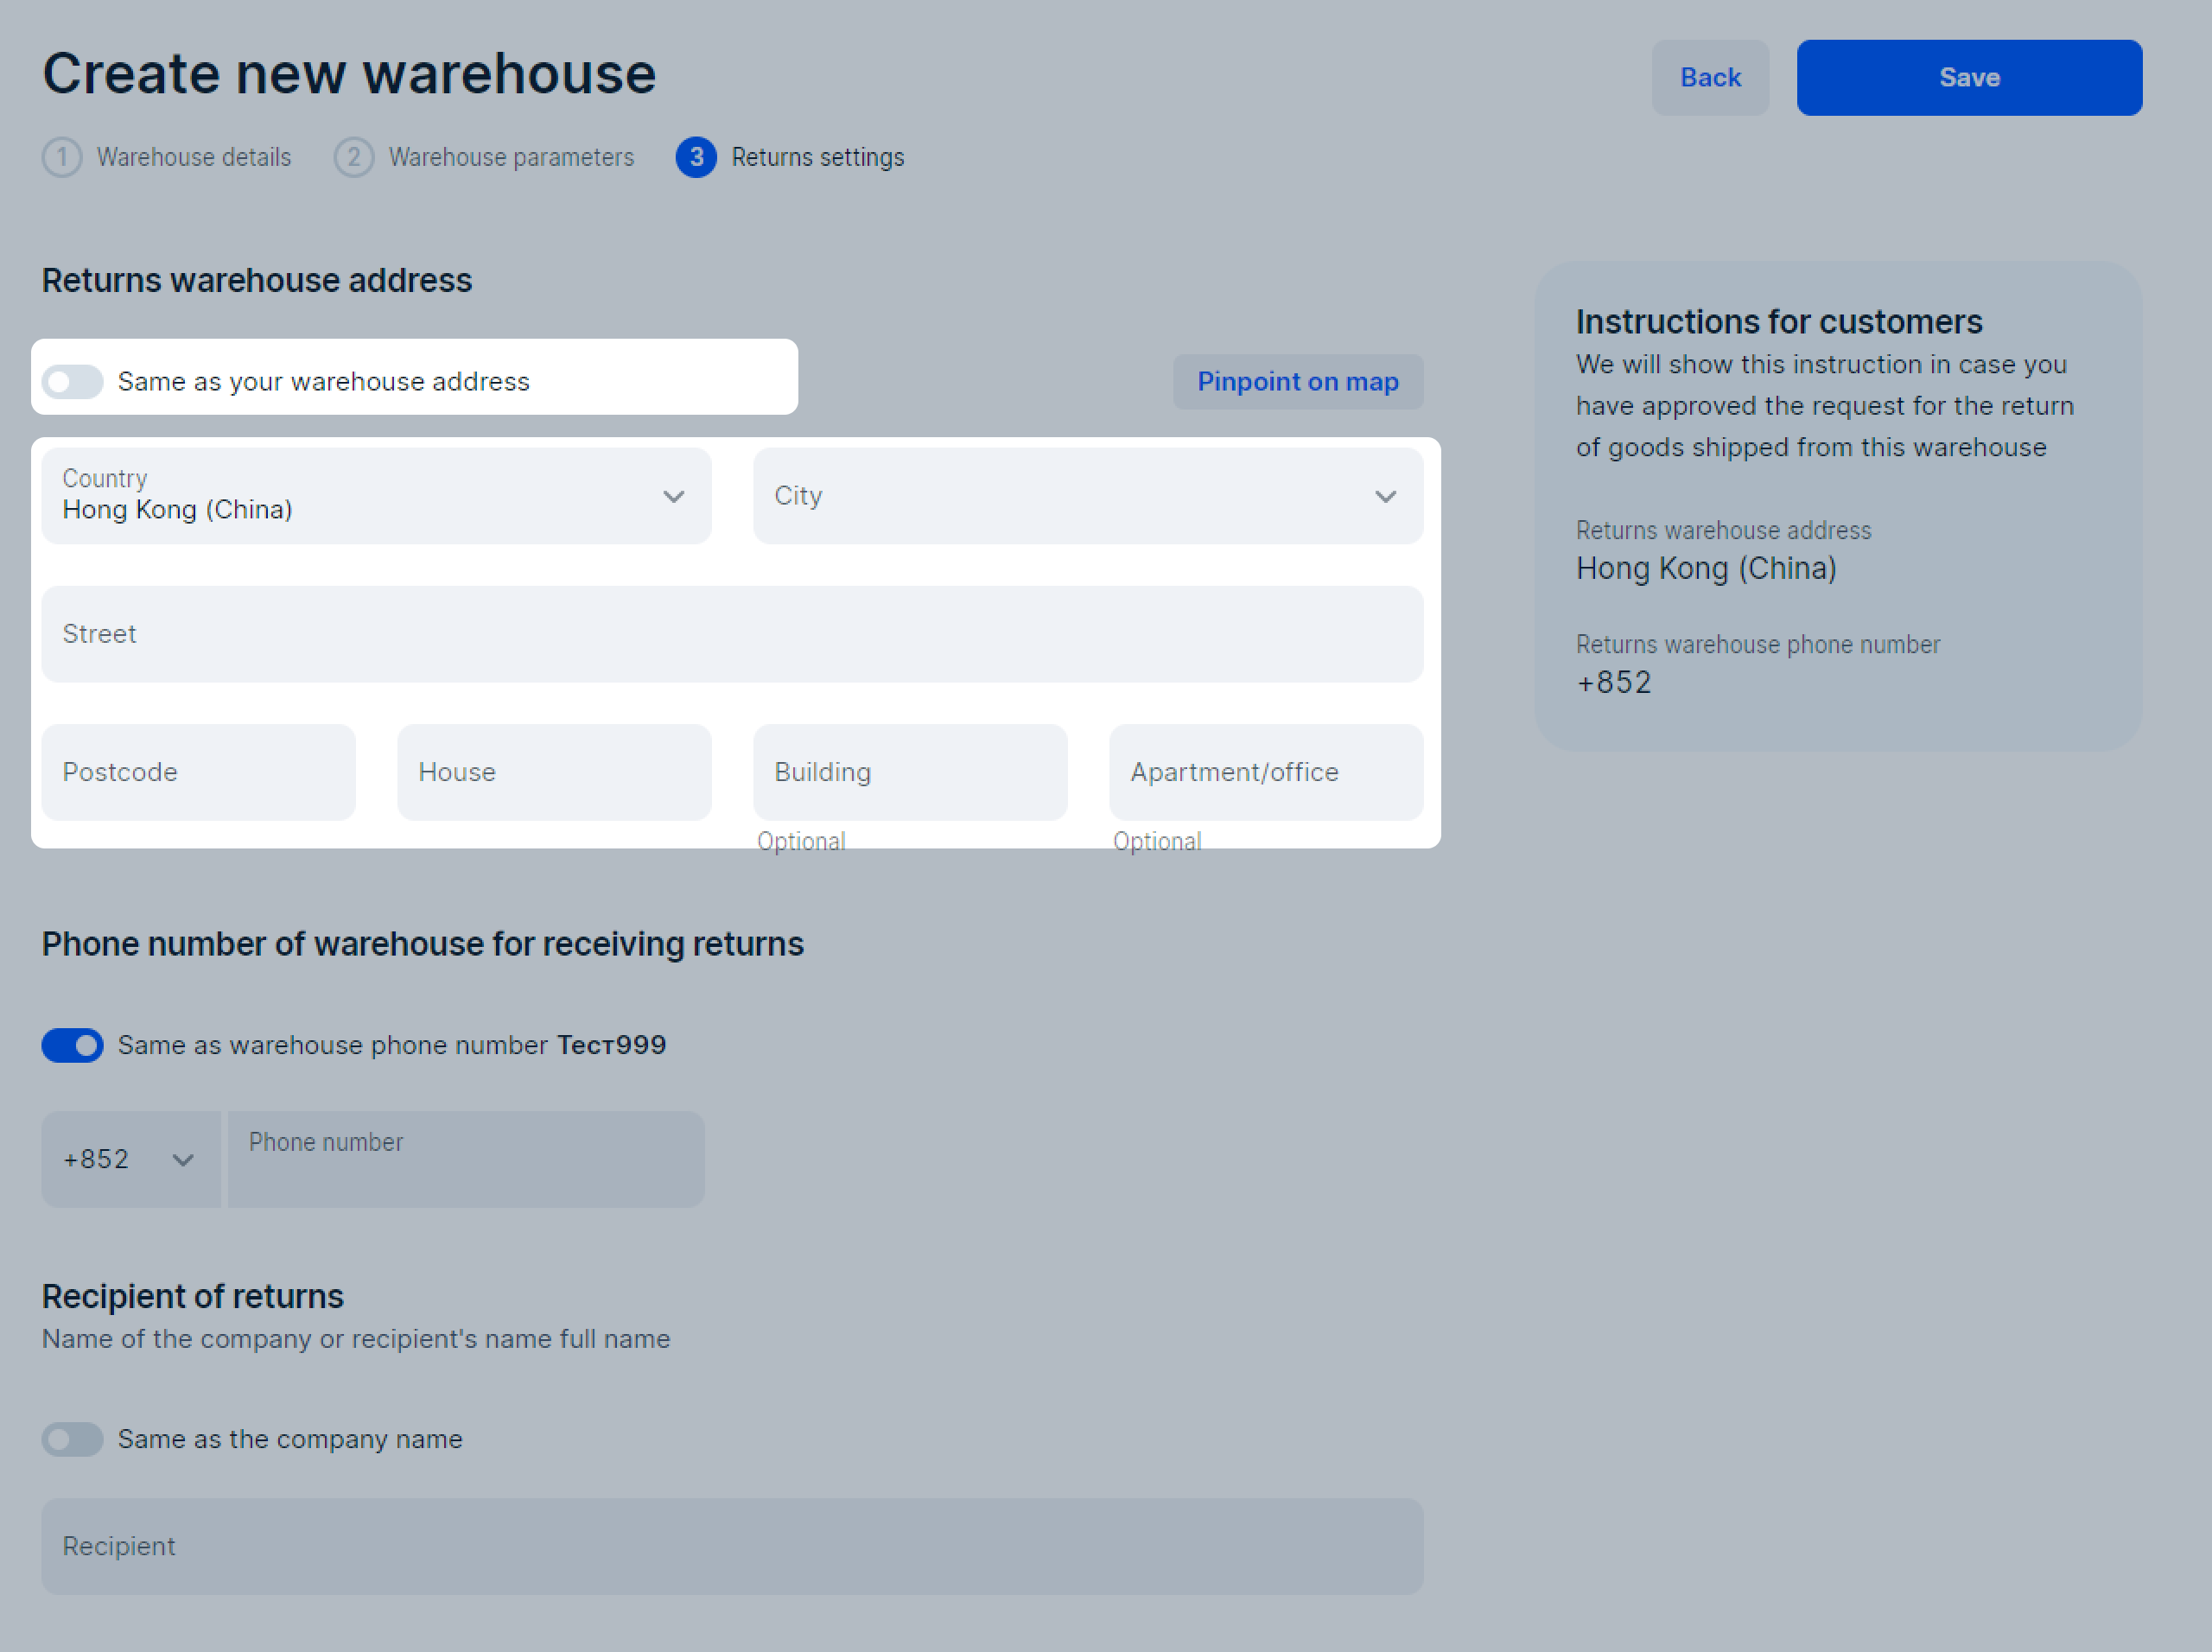
Enter the warehouse address for returns made via transport companies. These returns will be sent by the method to the seller’s warehouse.
To receive returned products to the warehouse from which they were sent, select Same as your warehouse address.
-
Enter the phone number of the return warehouse or select Same as warehouse phone number.
-
Specify the recipient or select Same as the company name.
-
Click Save.
You can create up to 300 warehouses for rFBS and FBP in one personal account. When you reach the limit, archive any of your warehouses to create a new warehouse.
Edit a warehouse #
-
Go to the Logistics → Logistics management section.
-
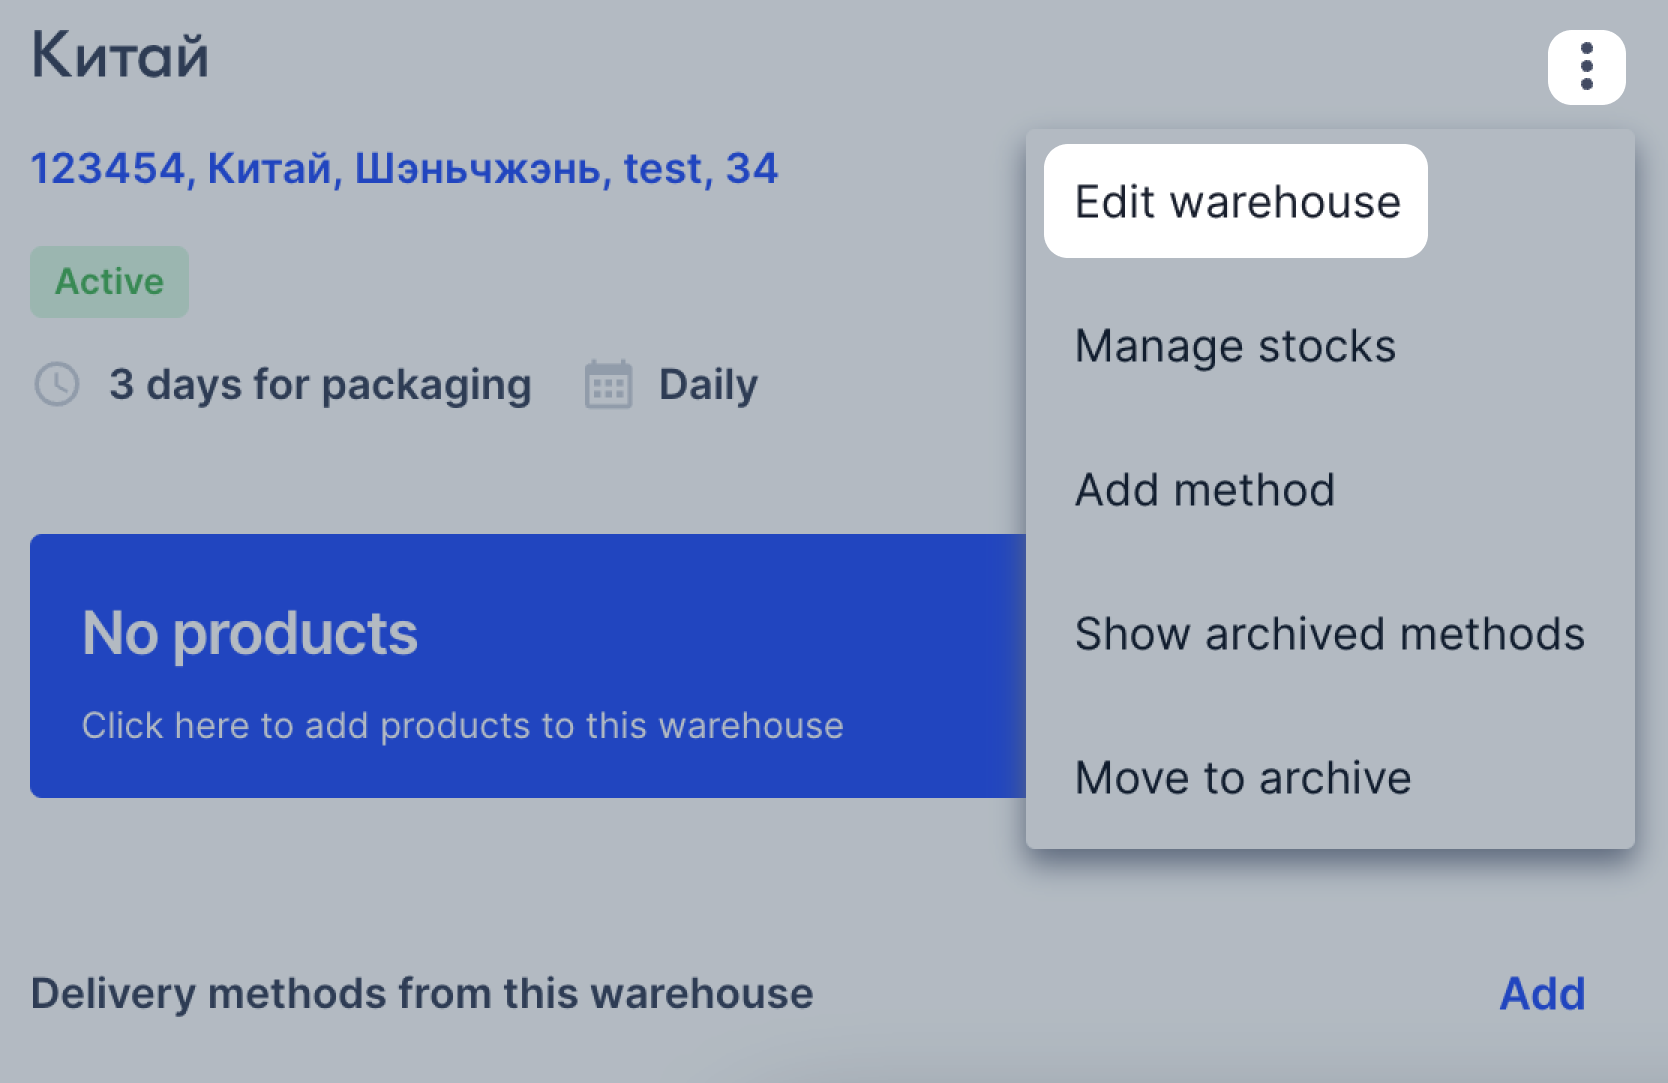
Next to the warehouse name, click
 → Edit warehouse.
-
Make the necessary changes, for example, edit preparation time. The amount of changes you can make depends on whether you’ve added delivery methods to that warehouse.
-
Click Save.
Archive the warehouse #
When there are no orders left in the warehouse in the Awaiting packaging, Awaiting shipping and In transit statuses, you can move it to the Archive tab. If necessary, you can return the warehouse to work.
To move the warehouse to archive:
-
Go to the Logistics → Logistics management → Active section.
-
Next to the warehouse name, click
 and select Move to archive.
-
If the warehouse has:
- unpaid orders and returns: deliver them using this warehouse method;
- stocks: they’ll be zeroed;
- active delivery methods: they’ll be moved to archive along with the warehouse.
If you sell the same product from different warehouses, its stocks in other warehouses won’t be zeroed when archiving. -
Click Archive.
Automatic archiving #
The warehouse will automatically go to archive if for more than 30 days:
- there are no products on sale in the warehouse;
- you didn’t bring any packages from this warehouse to the drop-off point.
You’ll get an email with the warehouse archiving date. We won’t move it to archive if you sell at least one product from it or bring at least one package for shipment before the 30 days expire.
Retrieve the warehouse from archive #
To get the warehouse back to work:
-
Go to the Logistics → Logistics management → Archive section.
-
Next to the warehouse name, click
 and select Restore from archive.
-
Click Yes, restore it.
After that, the warehouse will return to the Active tab with the same product list, but zero stocks.
To start selling from the warehouse:
-
Check that you’ve specified a shipping method for the method: click
 next to the method name and select Edit method.
 -
Update the product list, their prices, and stocks.
-
Specify the warehouse priority. Click
 → Change warehouses priority
next to the number of warehouses.
 -
Download the template and fill it in.
-
Upload the filled in template and click Apply.
If you sell the same product from other warehouses, specify the selected warehouse priority. This way the customers will see the products from this warehouse first.


