The promotion stops working in older app versions. To continue working with stencils, update the app version to 3.22 or newer.
Launch campaign
-
In the Menu → Product promotion section, tap Create campaign.
-
Enter a campaign name that will help you navigate the list quickly.
The rate management auto-strategy enables by default. Rates are assigned automatically. The system takes into account the competition in the category and changes the rates so as to show the product as often as possible within the daily budget.
-
Specify the brand and price range. You can also specify the product category.
The number of products suitable for the campaign will be displayed at the bottom of the screen.
To add new products that meet the conditions, enable Add new ones automatically.
-
Tap Continue.
-
Set a weekly budget:
- for campaigns with an auto-strategy: at least 3,500 rubles;
- for campaigns with manual rate management: at least 7,000 rubles.
-
Specify the campaign launch date. You can launch the campaign immediately after it’s created or schedule a launch date: tap Schedule and specify the date.
-
Tap Continue.
-
Check the campaign details and tap Launch campaign.
Edit campaign
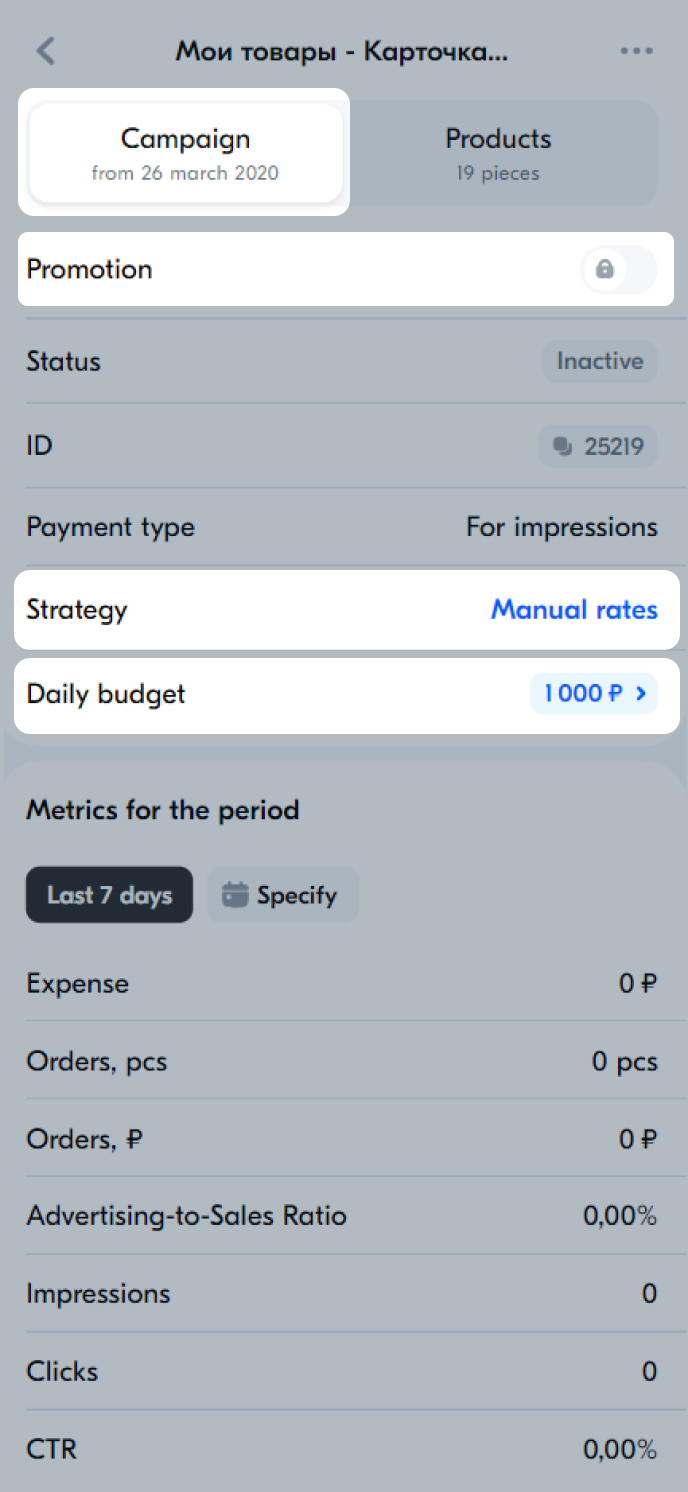
In the Menu → Product promotion section tap the campaign name. You can:
- change the budget: tap the amount in the Daily budget field and specify a different value.
- disable the campaign.
You can also change the rate, add or remove a product.
Change rate
-
In the Menu → Product promotion section tap the campaign name.
-
Go to the Products tab. To change the rate:
- For one product: tap the product row or swipe left and select Rate.
- For multiple products: tap Select multiple, select the products and tap Change rate.
-
Edit the rate value or select a competitive rate to set it. The competitive rate may vary for different products.
-
Tap Apply if you change the rate for multiple products.
Delete products
- In the Menu → Product promotion section tap the campaign name.
- Go to the Products tab. To delete:
-
One product: swipe left and select Delete or tap the product row and tap
 .
. -
Multiple products: tap Select multiple, select the products and tap Remove from campaign.
-
Add products
You can add a product to a campaign for which you set rates manually.
- In the Menu → Product promotion section tap the campaign name.
- On the Products tab tap
 at the top right.
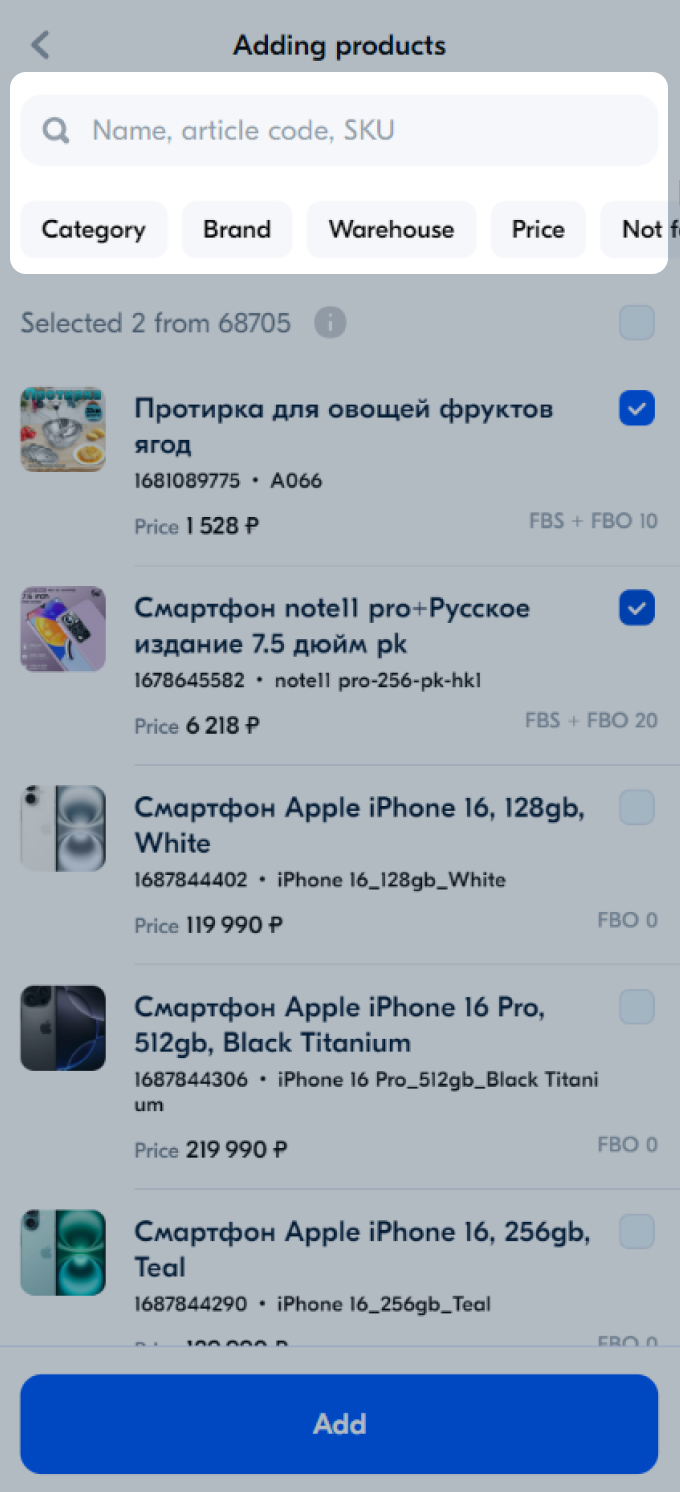
 - Select the products you want to add to the campaign. You can:
- filter the products by category, brand, warehouse, and price;
- find the products by name, article, or SKU.
- Tap Add.
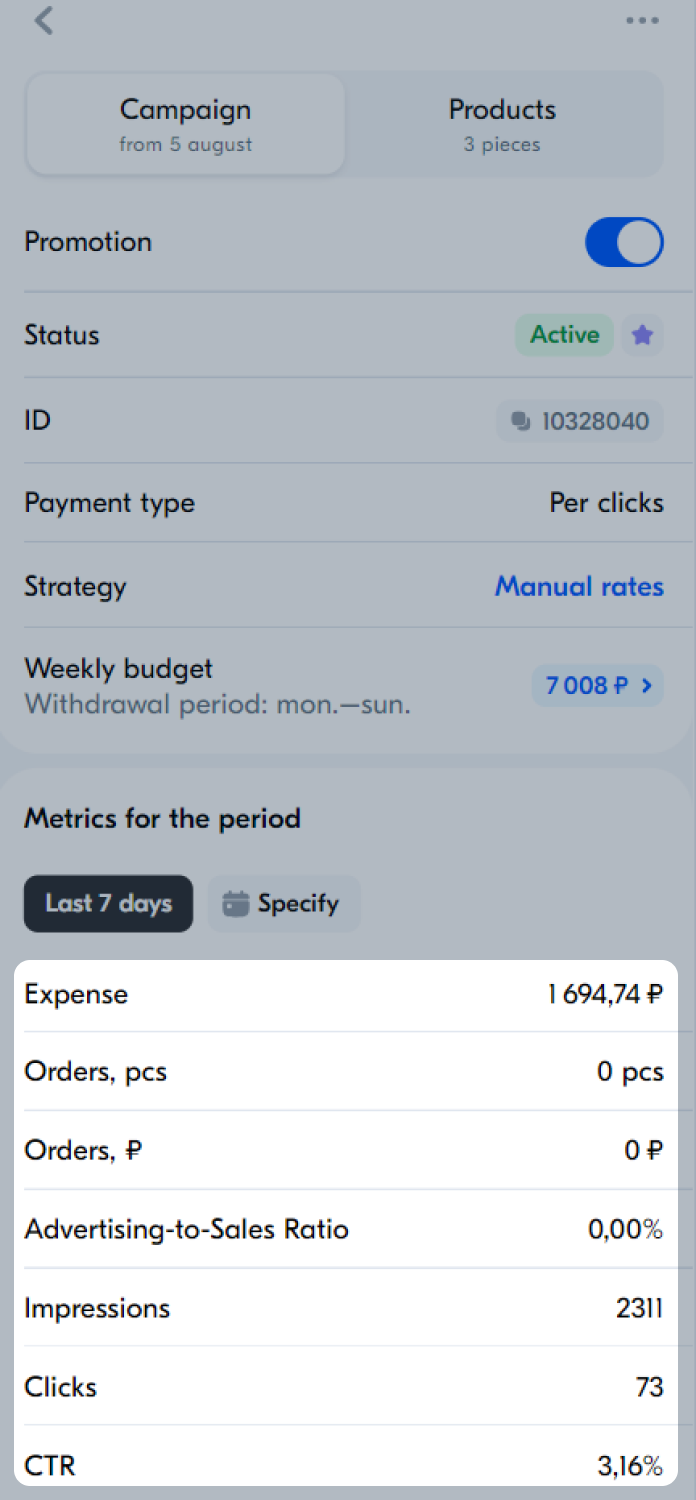
View campaign statistics
Campaign data for the entire period is displayed in the Menu → Product promotion section. To view statistics for the last 7 days, tap the campaign name and go to the Metrics tab.
The app provides statistics on the Expense, Orders, Clicks, and CTR metrics.
Detailed campaign statistics are displayed in the report. You can download it in your personal account on the website.
Launch campaign
-
In the Menu → Product promotion section, open the Stencils tab.
-
Tap Create Campaign.
-
Enter a campaign name that will help you navigate the list quickly.
-
Add products to the campaign: tap
 , select the products and tap Add.
You can filter the products by:
- category,
- brand,
- warehouse,
- price,
- participation in other campaigns.
-
Select the rate management method:
- Auto-strategy: the system takes into account the competition in the category and changes the rates to show your product as often as possible within your weekly budget. This strategy helps you get the maximum effect from the promotion.
- Manual rates: you set and change the rates yourself.
-
Set a weekly budget:
- for campaigns with auto-strategy: at least 3,500 rubles;
- for campaigns with manual rate management: at least 7,000 rubles.
-
Tap Launch campaign. Your products start participating in the auction at competitive rates.
Edit campaign
In the Menu → Product promotion section, open the Stencils tab and tap the campaign. On the Campaign tab, you can:
-
change the budget: tap the amount in the Weekly budget field and specify a different value;
-
change the strategy;
-
disable the campaign.
On the Products tab, you can change the rate, add or remove products.
Change rates
If you choose auto-strategy, you can’t change the rates. The system sets the rates automatically for each customer’s request so your product receives maximum clicks.
-
In the Menu → Product promotion section, open the Stencils tab and tap the campaign.
-
Open the Products tab. To change the rate:
- for one product: tap the product rate value;
- for multiple products: tap Select products, select the products and tap Change rate.
-
Edit the rate value or select a competitive rate to set it.
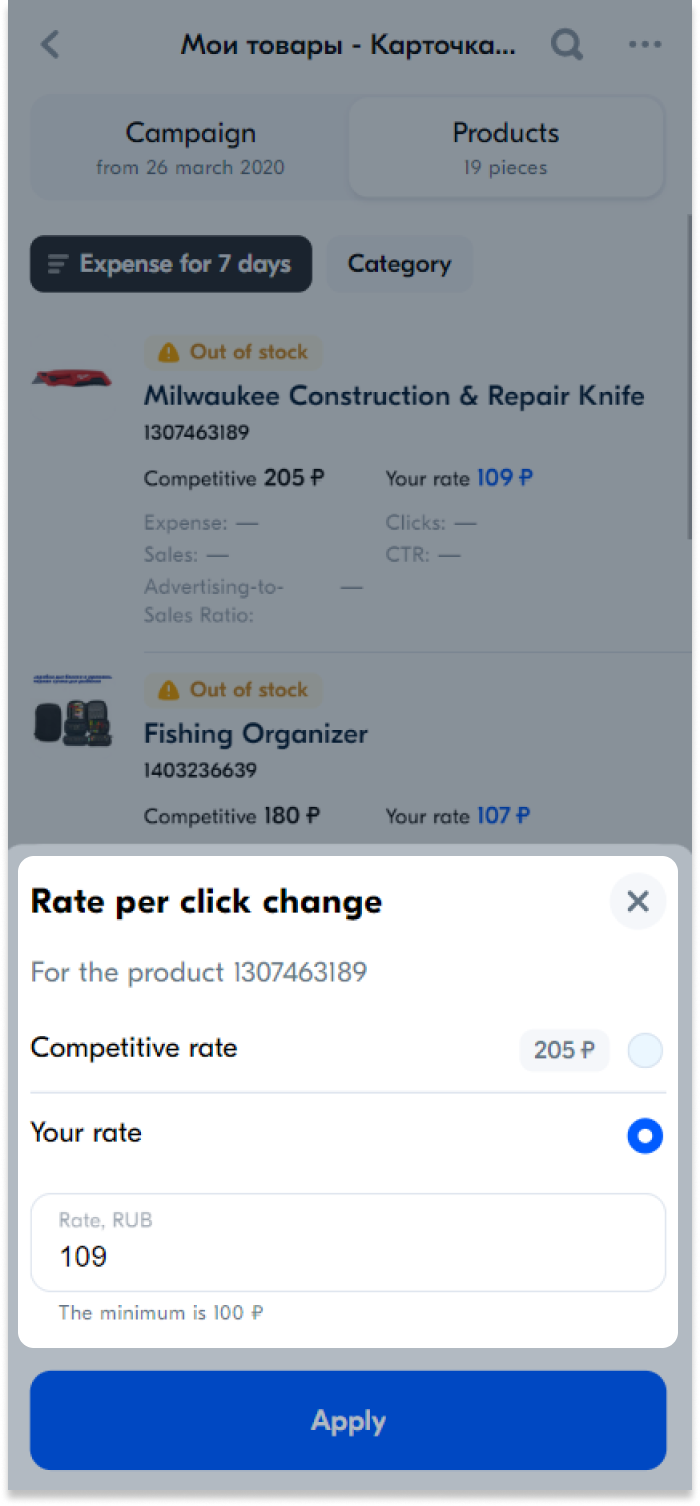
The competitive rate may vary for different products.
-
Tap Apply if you change the rate for multiple products.
Delete products
-
In the Menu → Product promotion section, open the Stencils tab and tap the campaign.
-
Open the Products tab. Tap Select products, select the products and tap
 .
.
Add products
-
In the Menu → Product promotion section, open the Stencils tab and tap the campaign.
-
On the Products tab, tap Add.
-
Select the products you want to add to the campaign. You can:
- filter the products by category, brand, warehouse, and price;
- find the products by name, article, or SKU.
-
Tap Add.
View campaign statistics
- In the Menu → Product promotion section, open the Stencils tab and tap the campaign.
- On the Campaign tab, specify the statistics period.
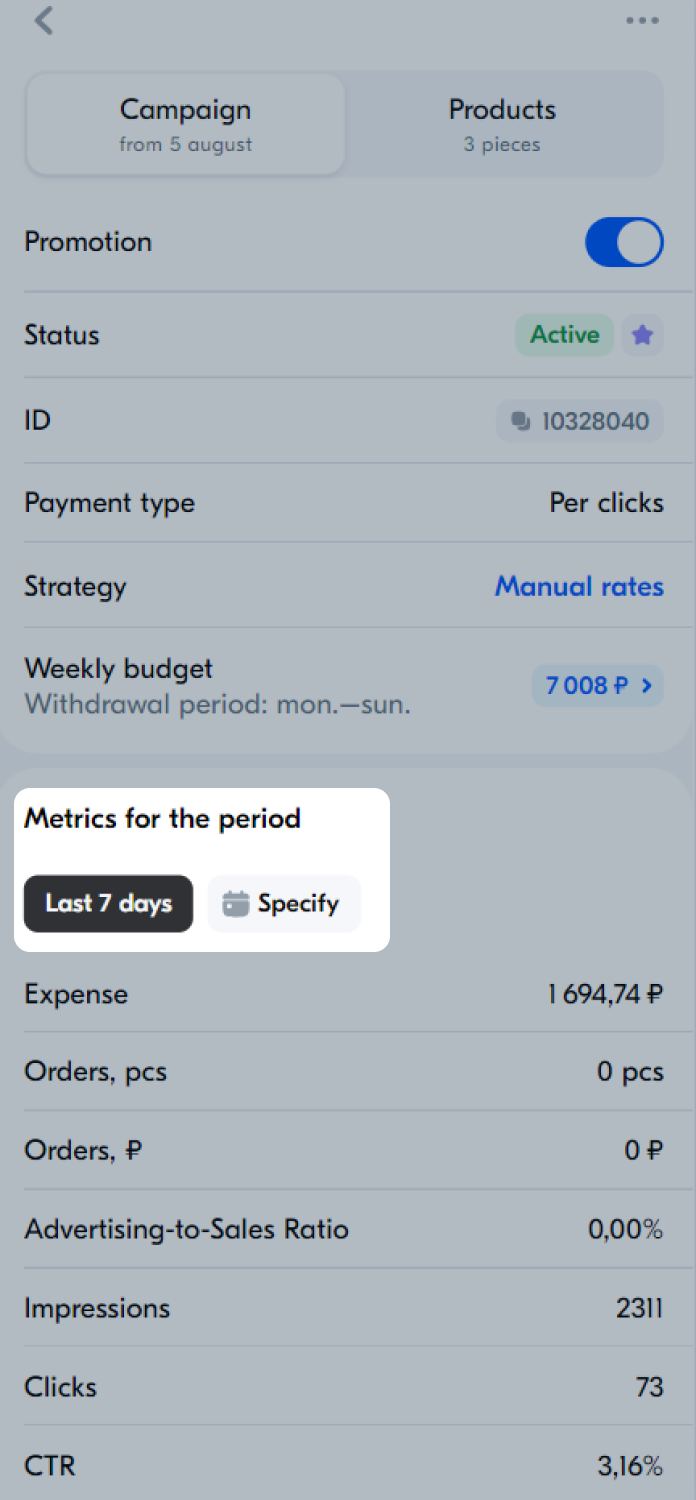
In the app, you can view the statistics on the Expense, Orders, Clicks,Impressions, Advertising-to-Sales Ratio, and CTR metrics.