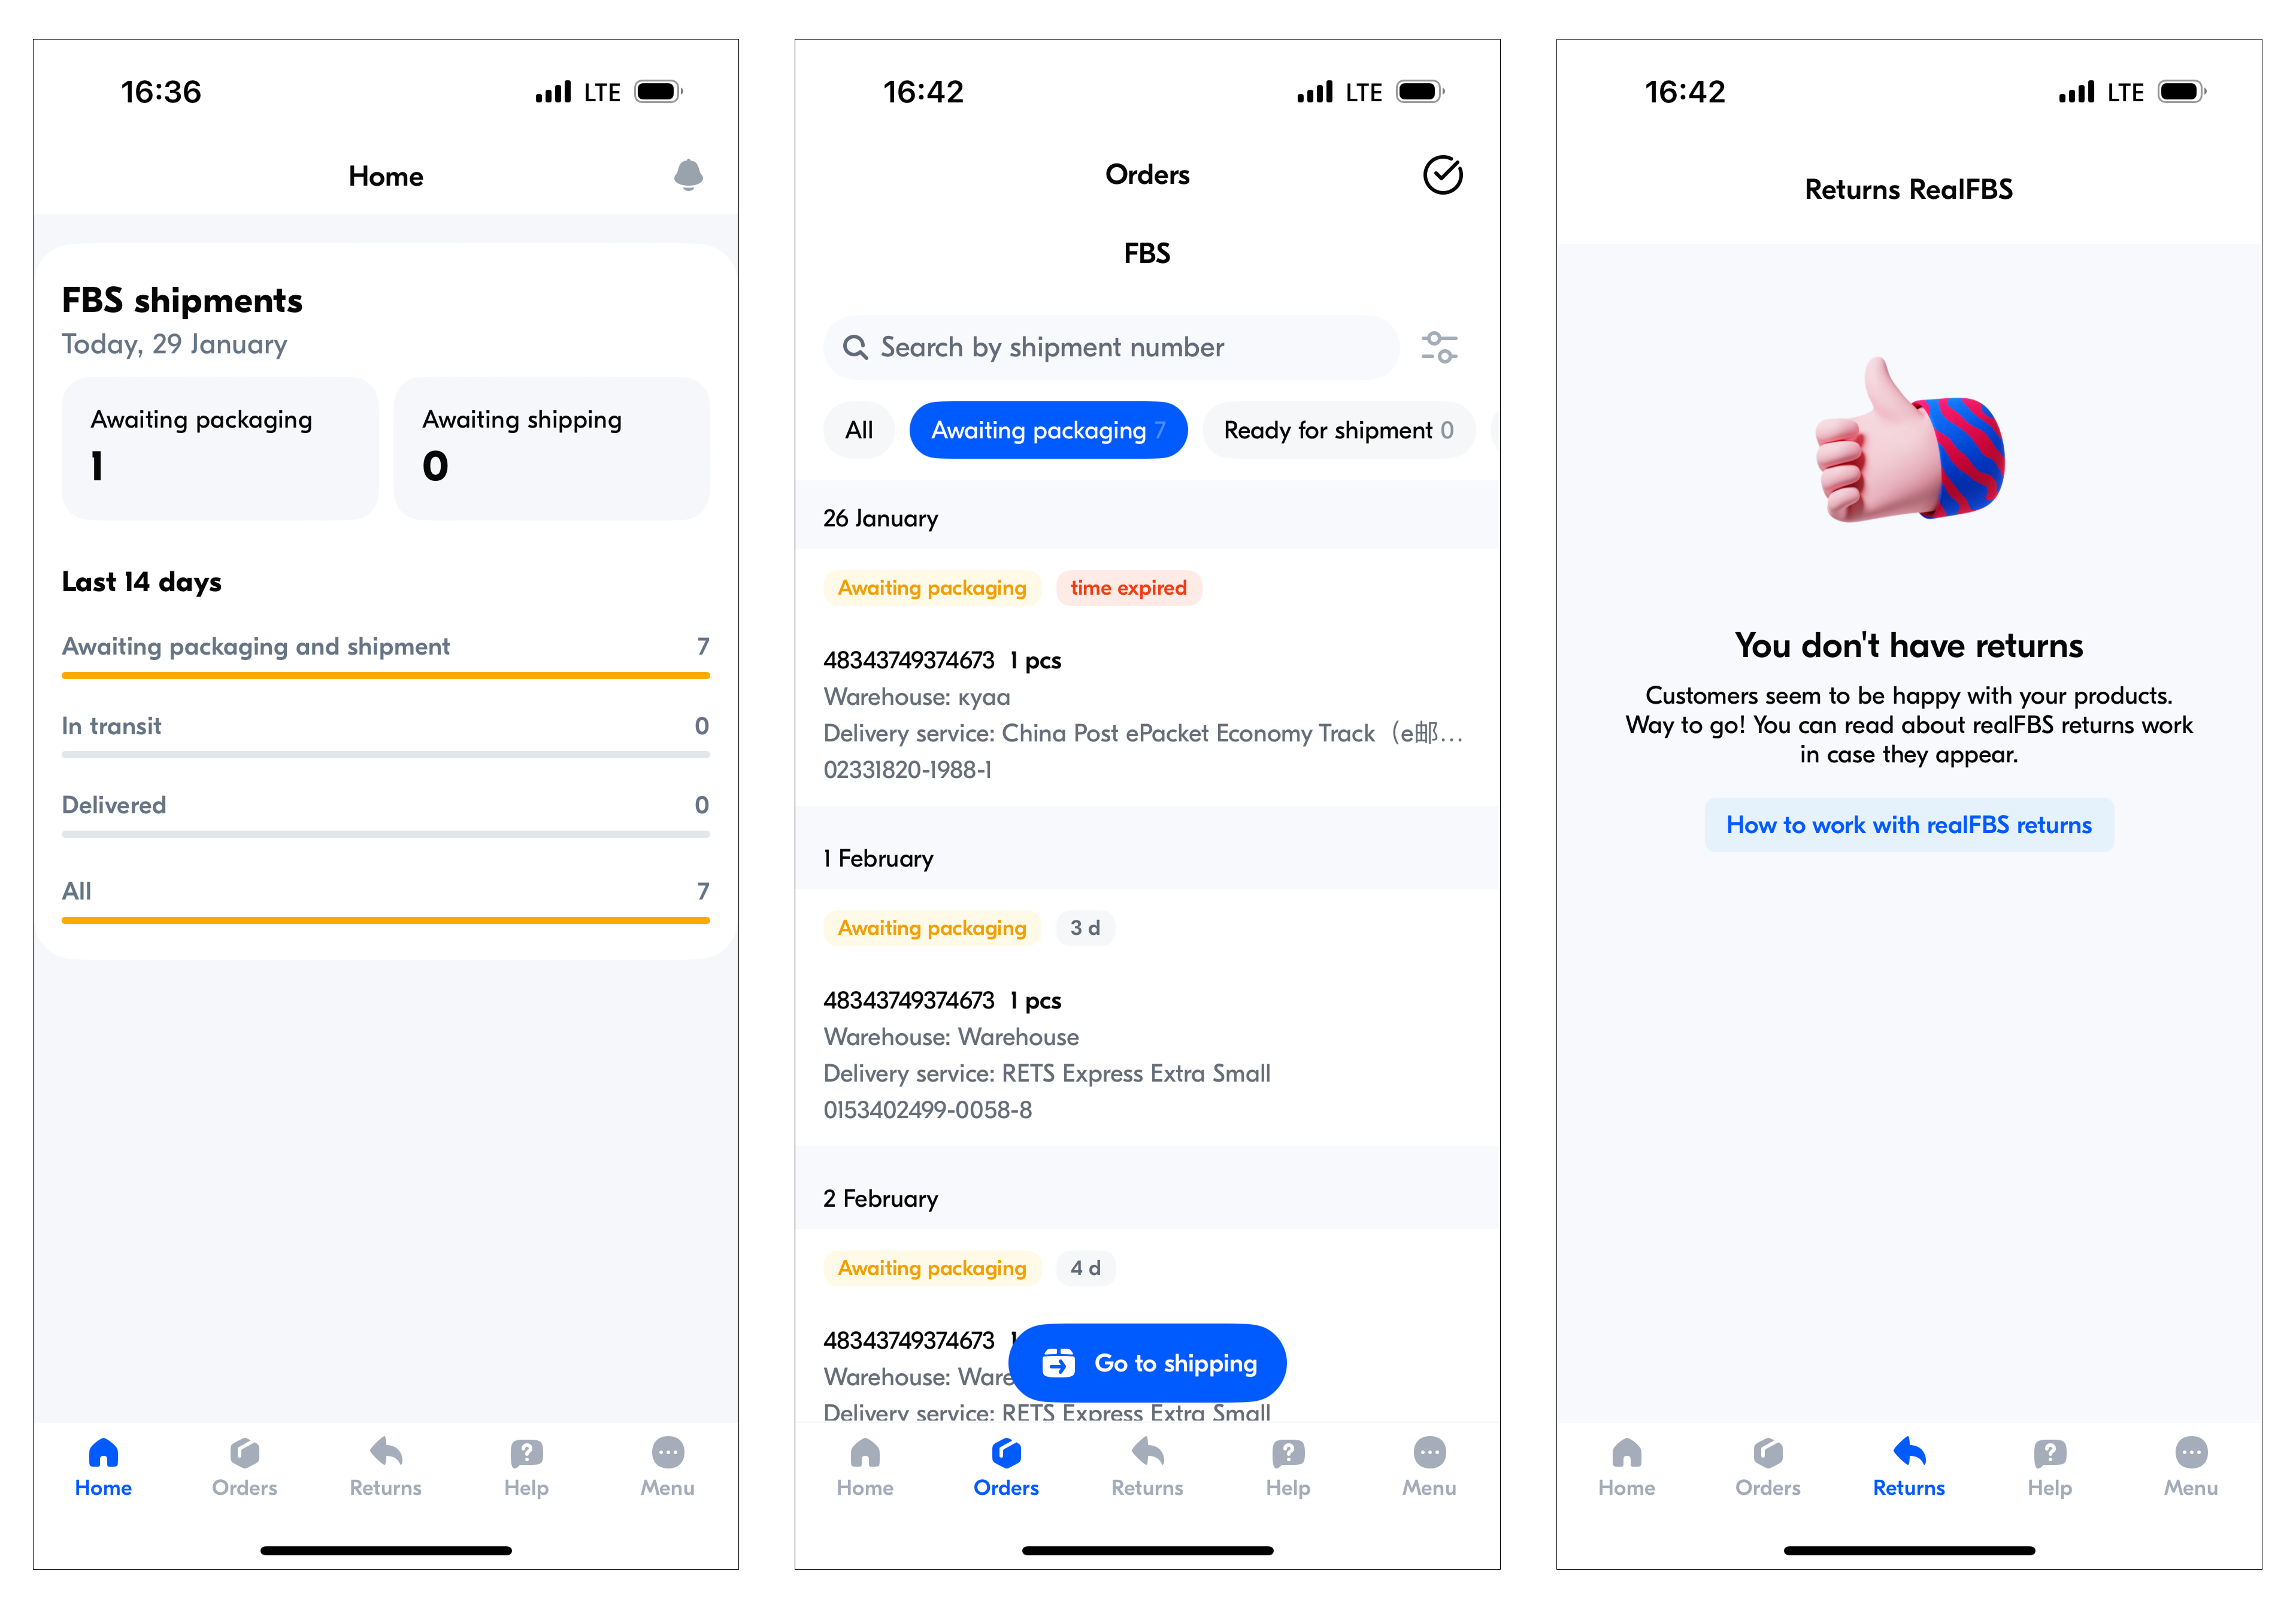
To give access to your company account, first create personal accounts for your employees and assign roles. The role defines which sections of the personal account are available to the employee.
| Functionality | Manager | Administrator | Product Manager | Financial Manager | Promotion Manager | Warehouse Manager | Courier, Assembler, and Courier Assembler |
|---|---|---|---|---|---|---|---|
| Home | ✔ | ✔ | ✔ | ✔ | ✔ | ✔ | — |
| Products | ✔ | ✔ | ✔ | — | ✔* | — | — |
| Prices | ✔ | ✔ | — | ✔ | ✔* | — | — |
| Orders | ✔ | ✔ | — | ✔ | — | ✔ | Access to orders and returns is limited and only available in the app |
| Finance | ✔ | ✔ | — | ✔ | — | — | — |
| Advertising | ✔ | ✔ | ✔ | ✔ | ✔ | — | — |
| Promotion | ✔ | ✔ | ✔ | ✔ | ✔ | — | — |
| Ratings | ✔ | ✔ | ✔ | ✔ | ✔ | — | — |
| Reviews | ✔ | ✔ | ✔ | ✔ | ✔ | — | — |
| Analytics | ✔ | ✔ | ✔** | ✔** | ✔** | ✔ | — |
| Messages from Ozon | ✔ | ✔ | ✔ | ✔ | ✔ | ✔ | — |
| Settings: employees, document flow, warehouse | ✔ | ✔ | — | — | — | — | — |
* An employee can’t edit the section content.
** An employee has limited functionality access.
Create employee account #
-
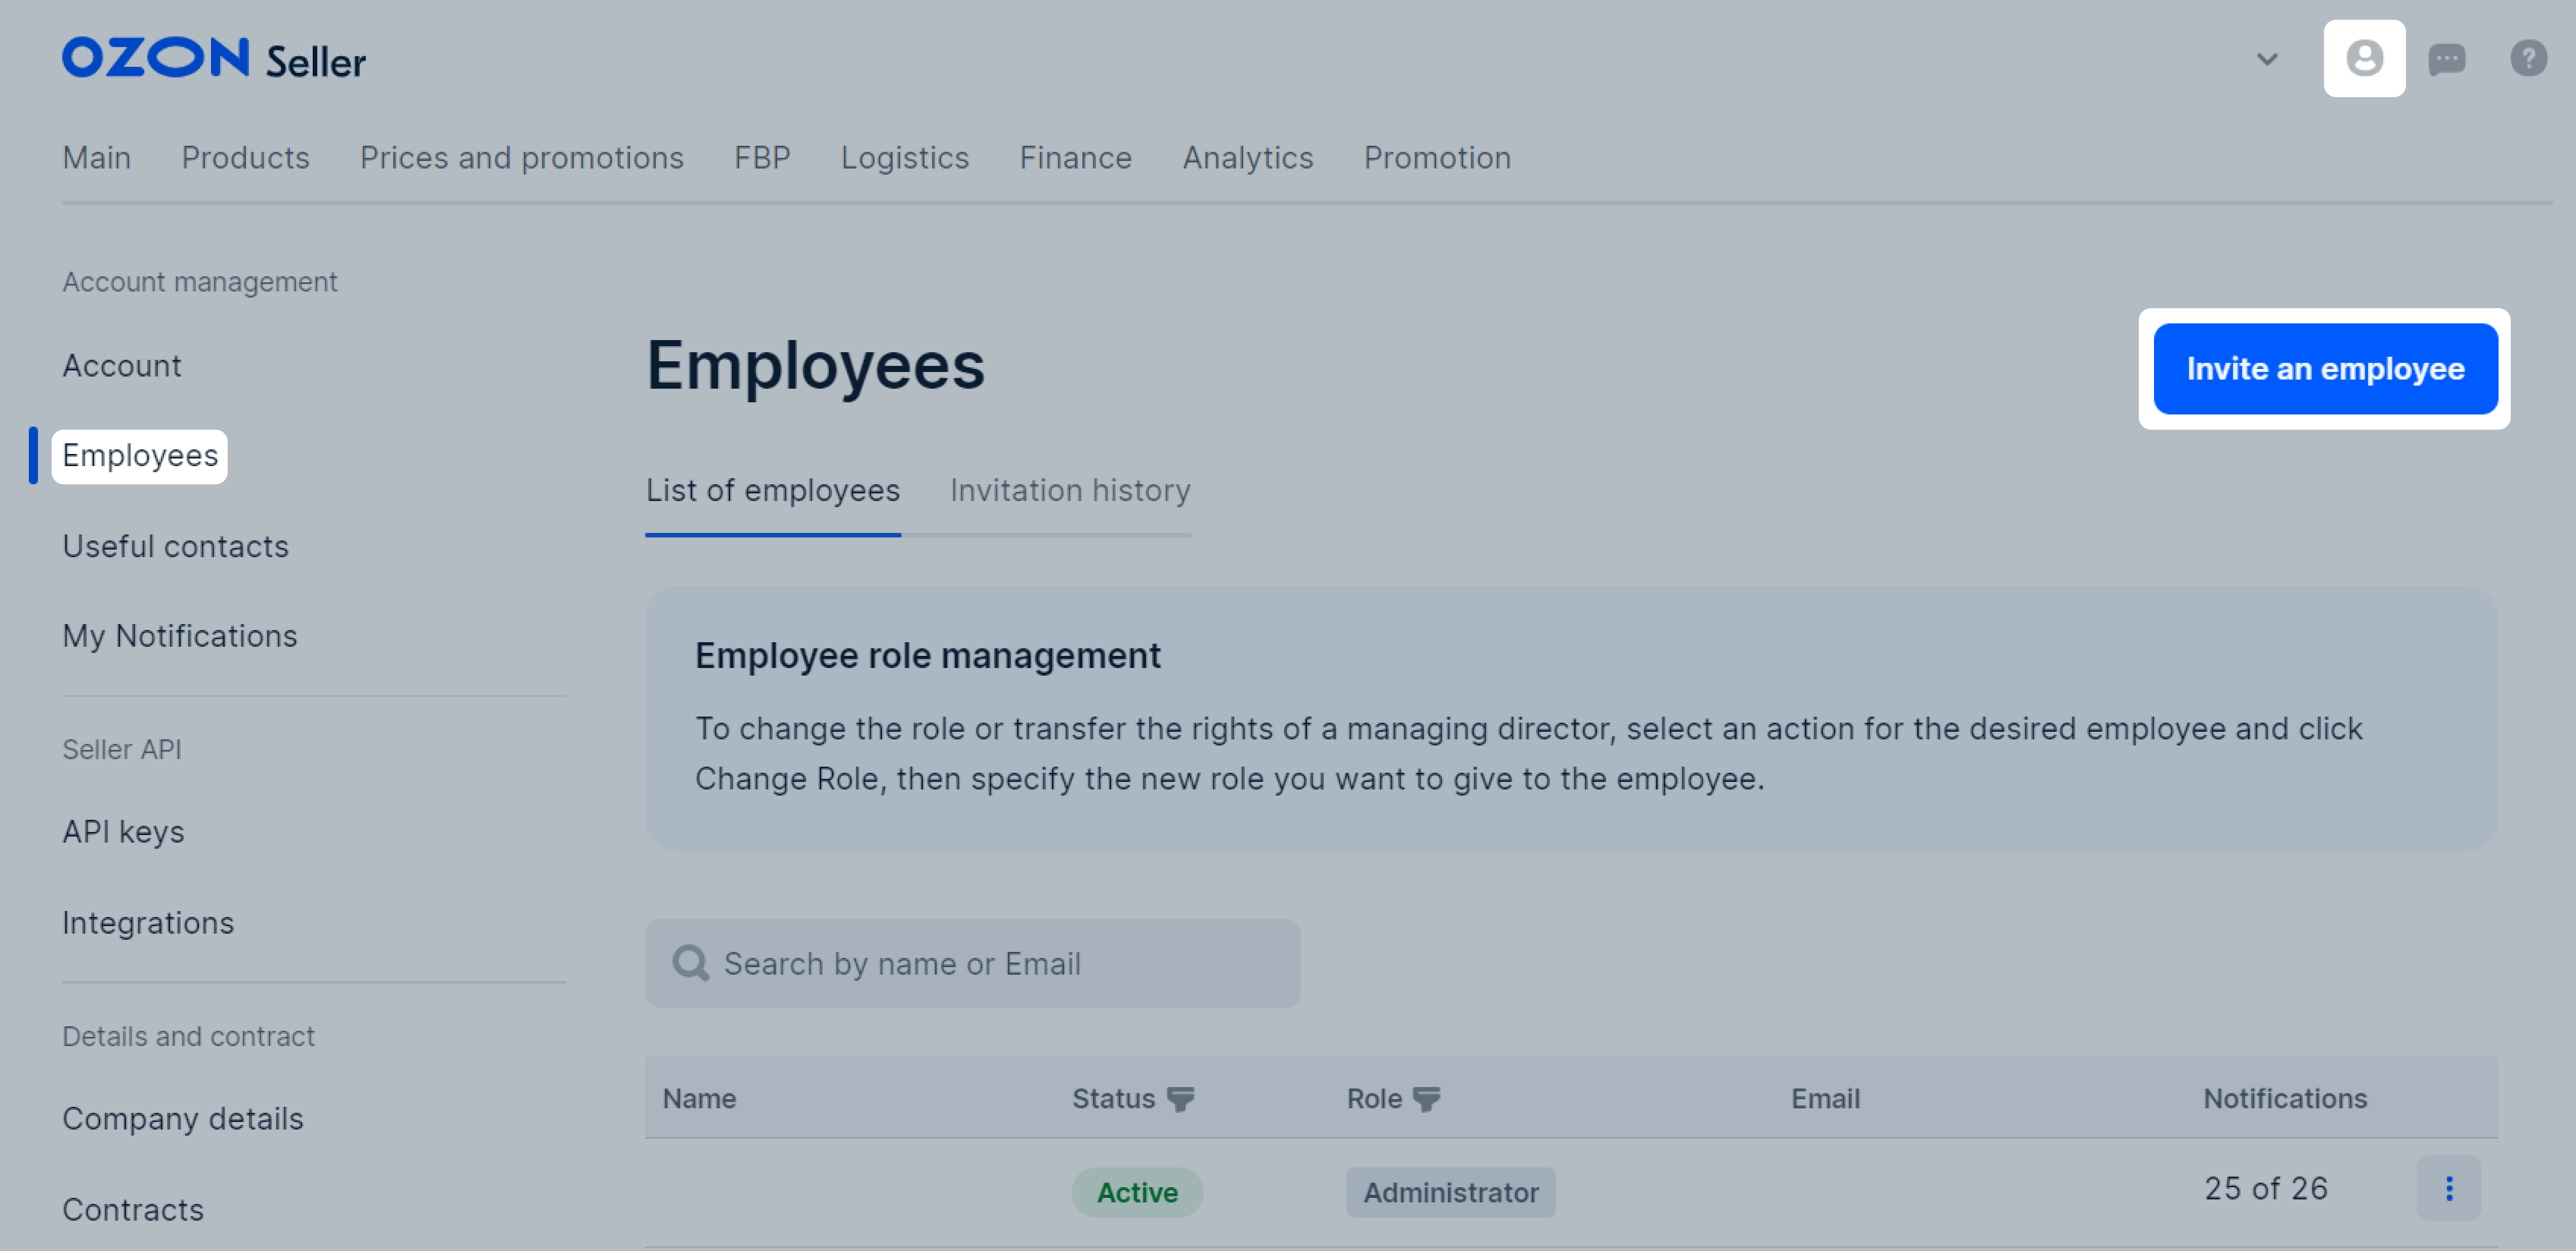
In the personal account of a company director or an employee with the “Administrator” role, click
 in the upper right corner and open the Settings → Employees section.
 -
Click Invite an employee.
-
Specify the employee’s email and their access rights and click Invite.
Don’t use an email address that ends with *.co or *.su. We won’t be able to register it in the system. -
You’ll get an email with a link to activate your account to the specified email address.
The link is valid for 24 hours.When the employee confirms registration, the “Active” tag appears in the row with their role in the Status column.
Invitations #
Invitation statuses #
On the List of employees tab:
- “Active”: the employee has access to the personal account;
- “Not activated”: the employee hasn’t clicked the link in the invitation email.
On the Invitation history tab:
- “Sent”: an invitation has been sent to the employee;
- “Accepted”: the employee has clicked the link in the email and gained access to their personal account;
- “Revoked”: the invitation was canceled before the employee accepted it.
Invitation history #
To view the invitation history, open the Settings → Employees → Invitation history tab.
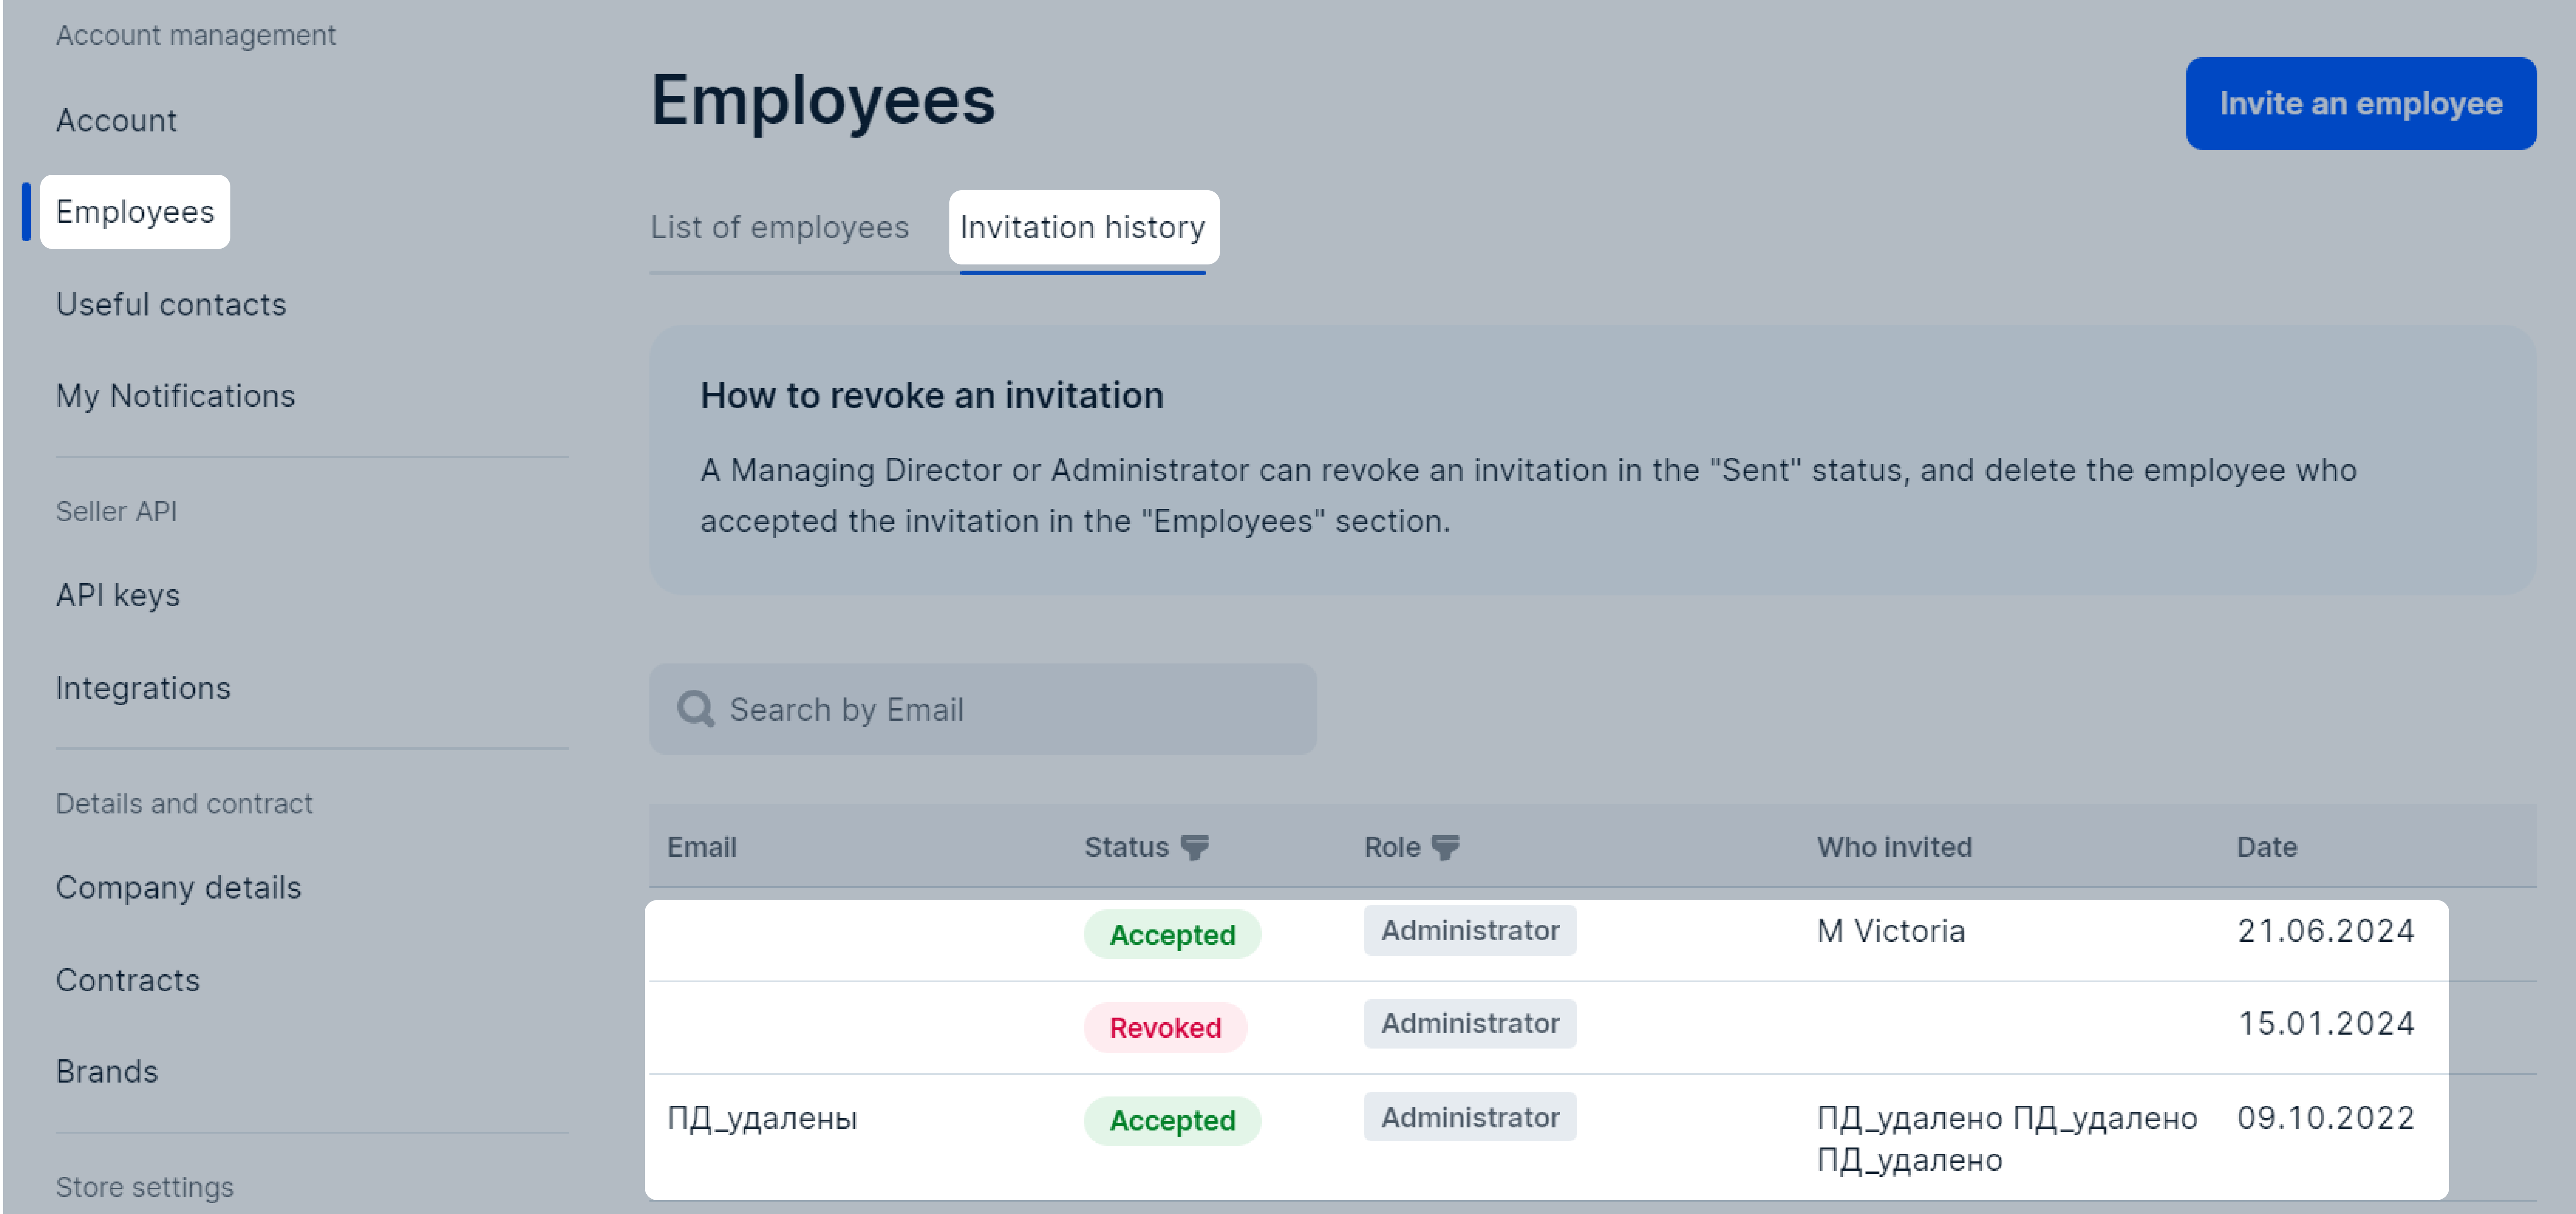
You can:
-
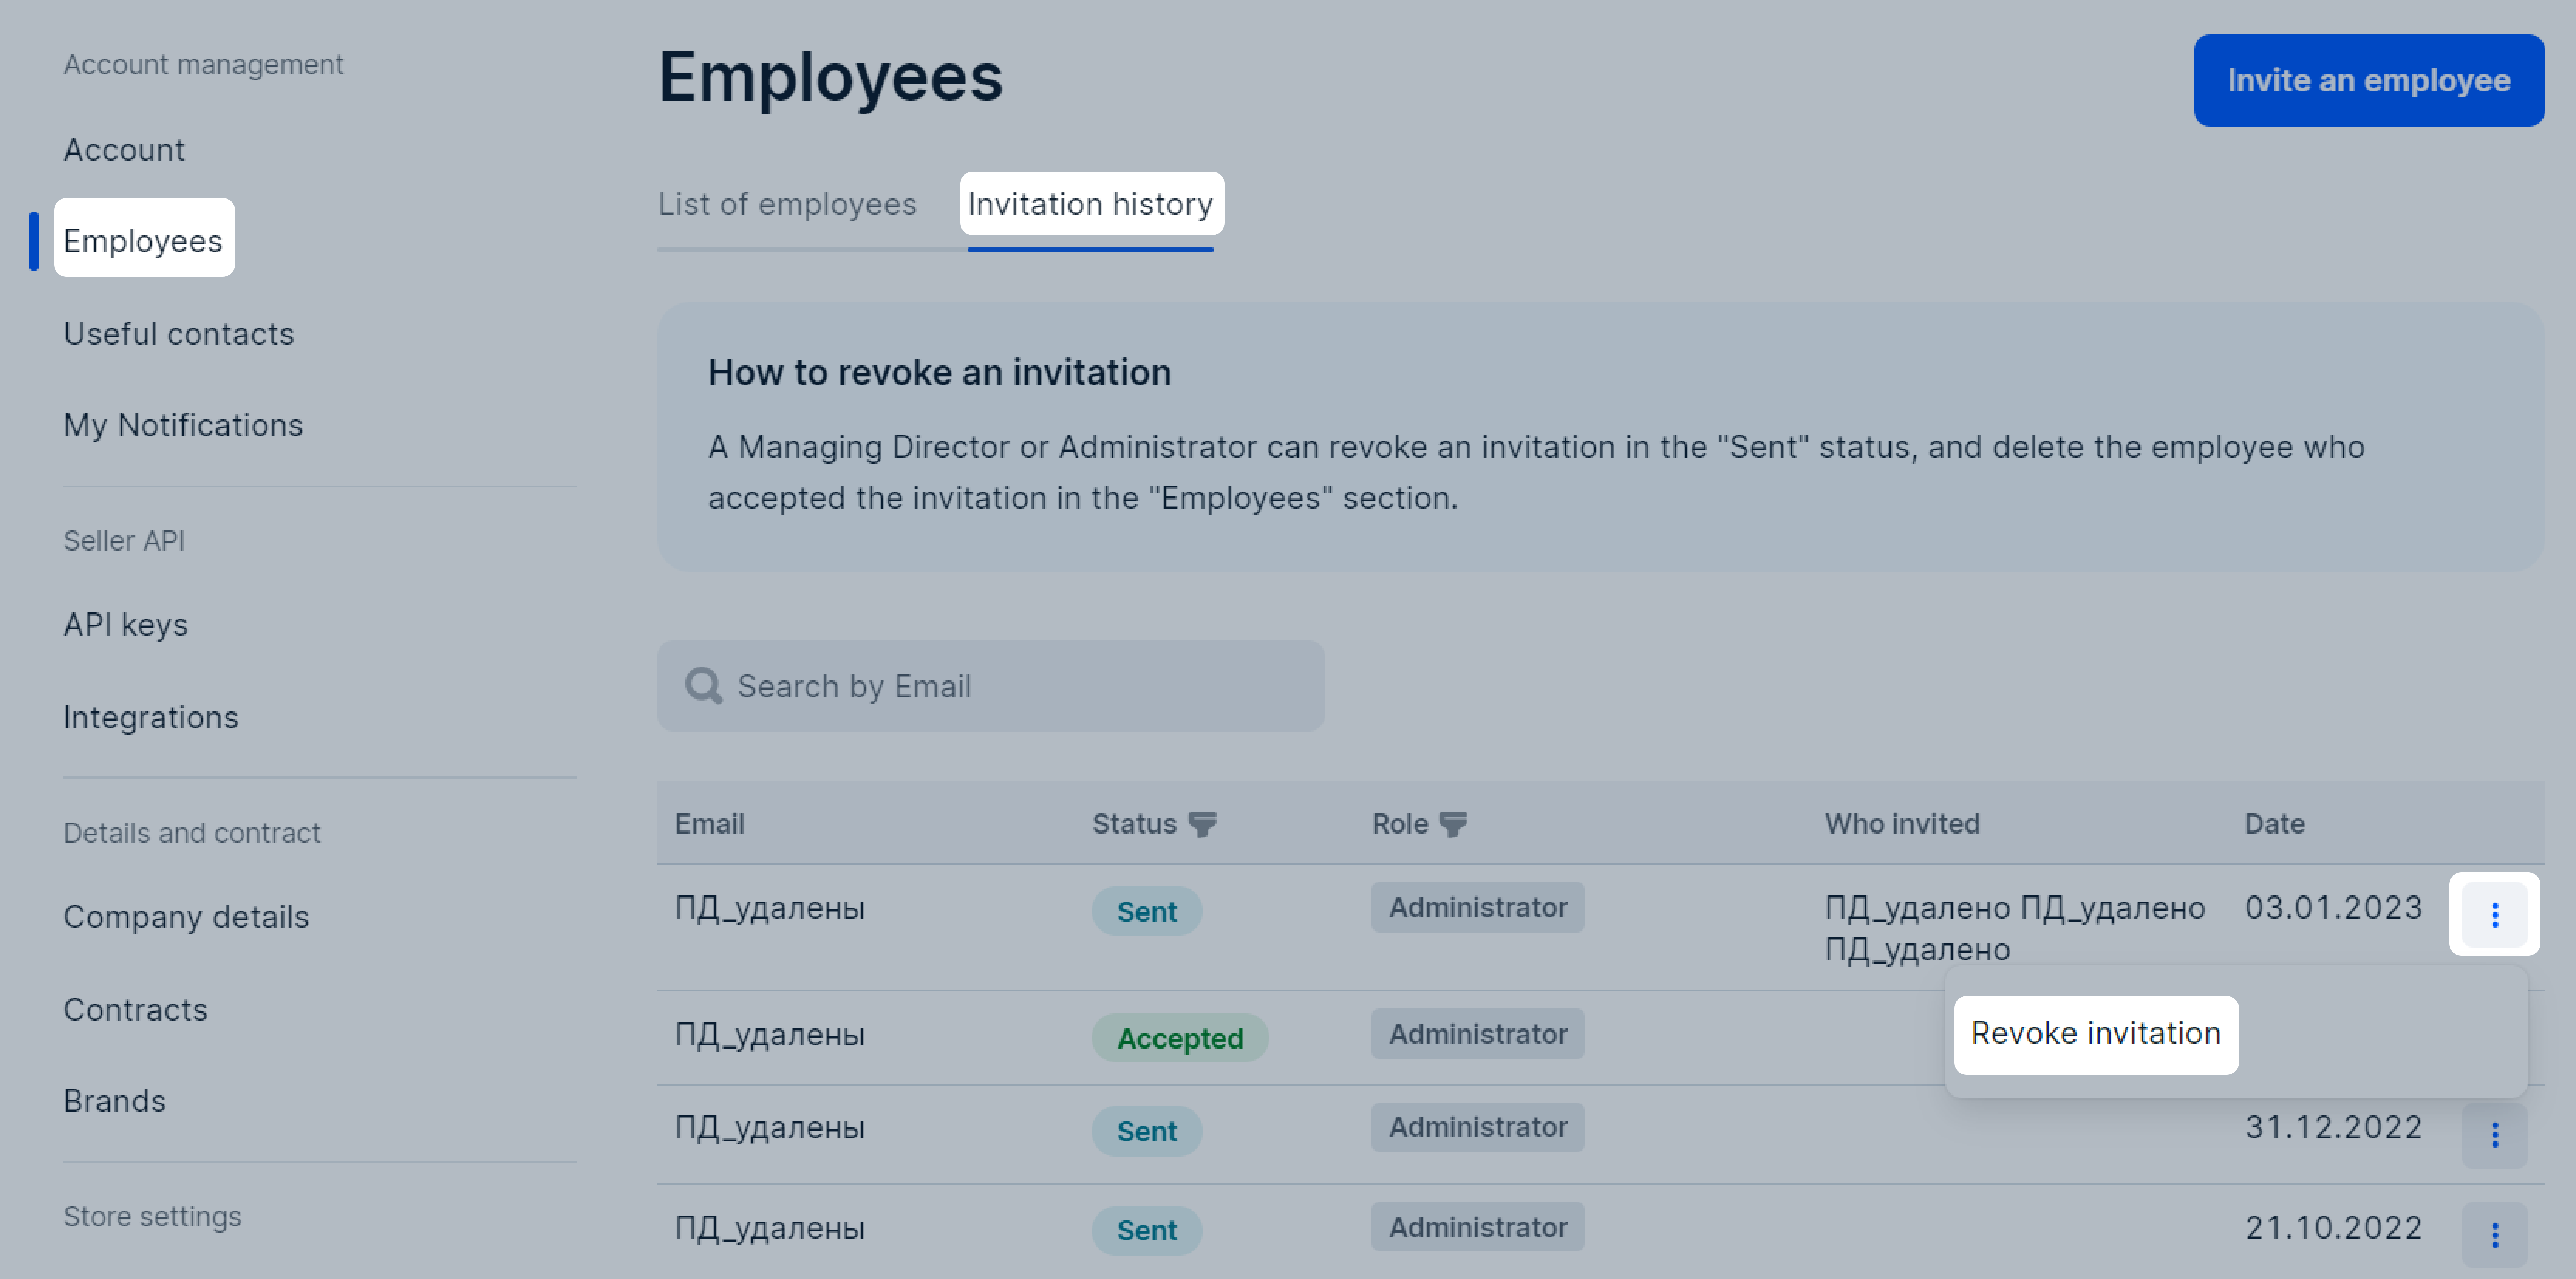
revoke invitations that aren’t yet accepted: in the user row, click
 → Revoke invitation and confirm action;
-
find an invitation by email address: enter the address in the Search by Email field;
-
filter invitations by status: click Status and select the necessary one;
-
filter invitations by an employee’s role: click Role and select the necessary one;
Delete employee account #
Only users with the “Manager” or “Administrator” roles can delete employee accounts. If you want to delete an account of the employee with management rights, the employee must first transfer their rights.
-
Open the Settings → Employees section.
-
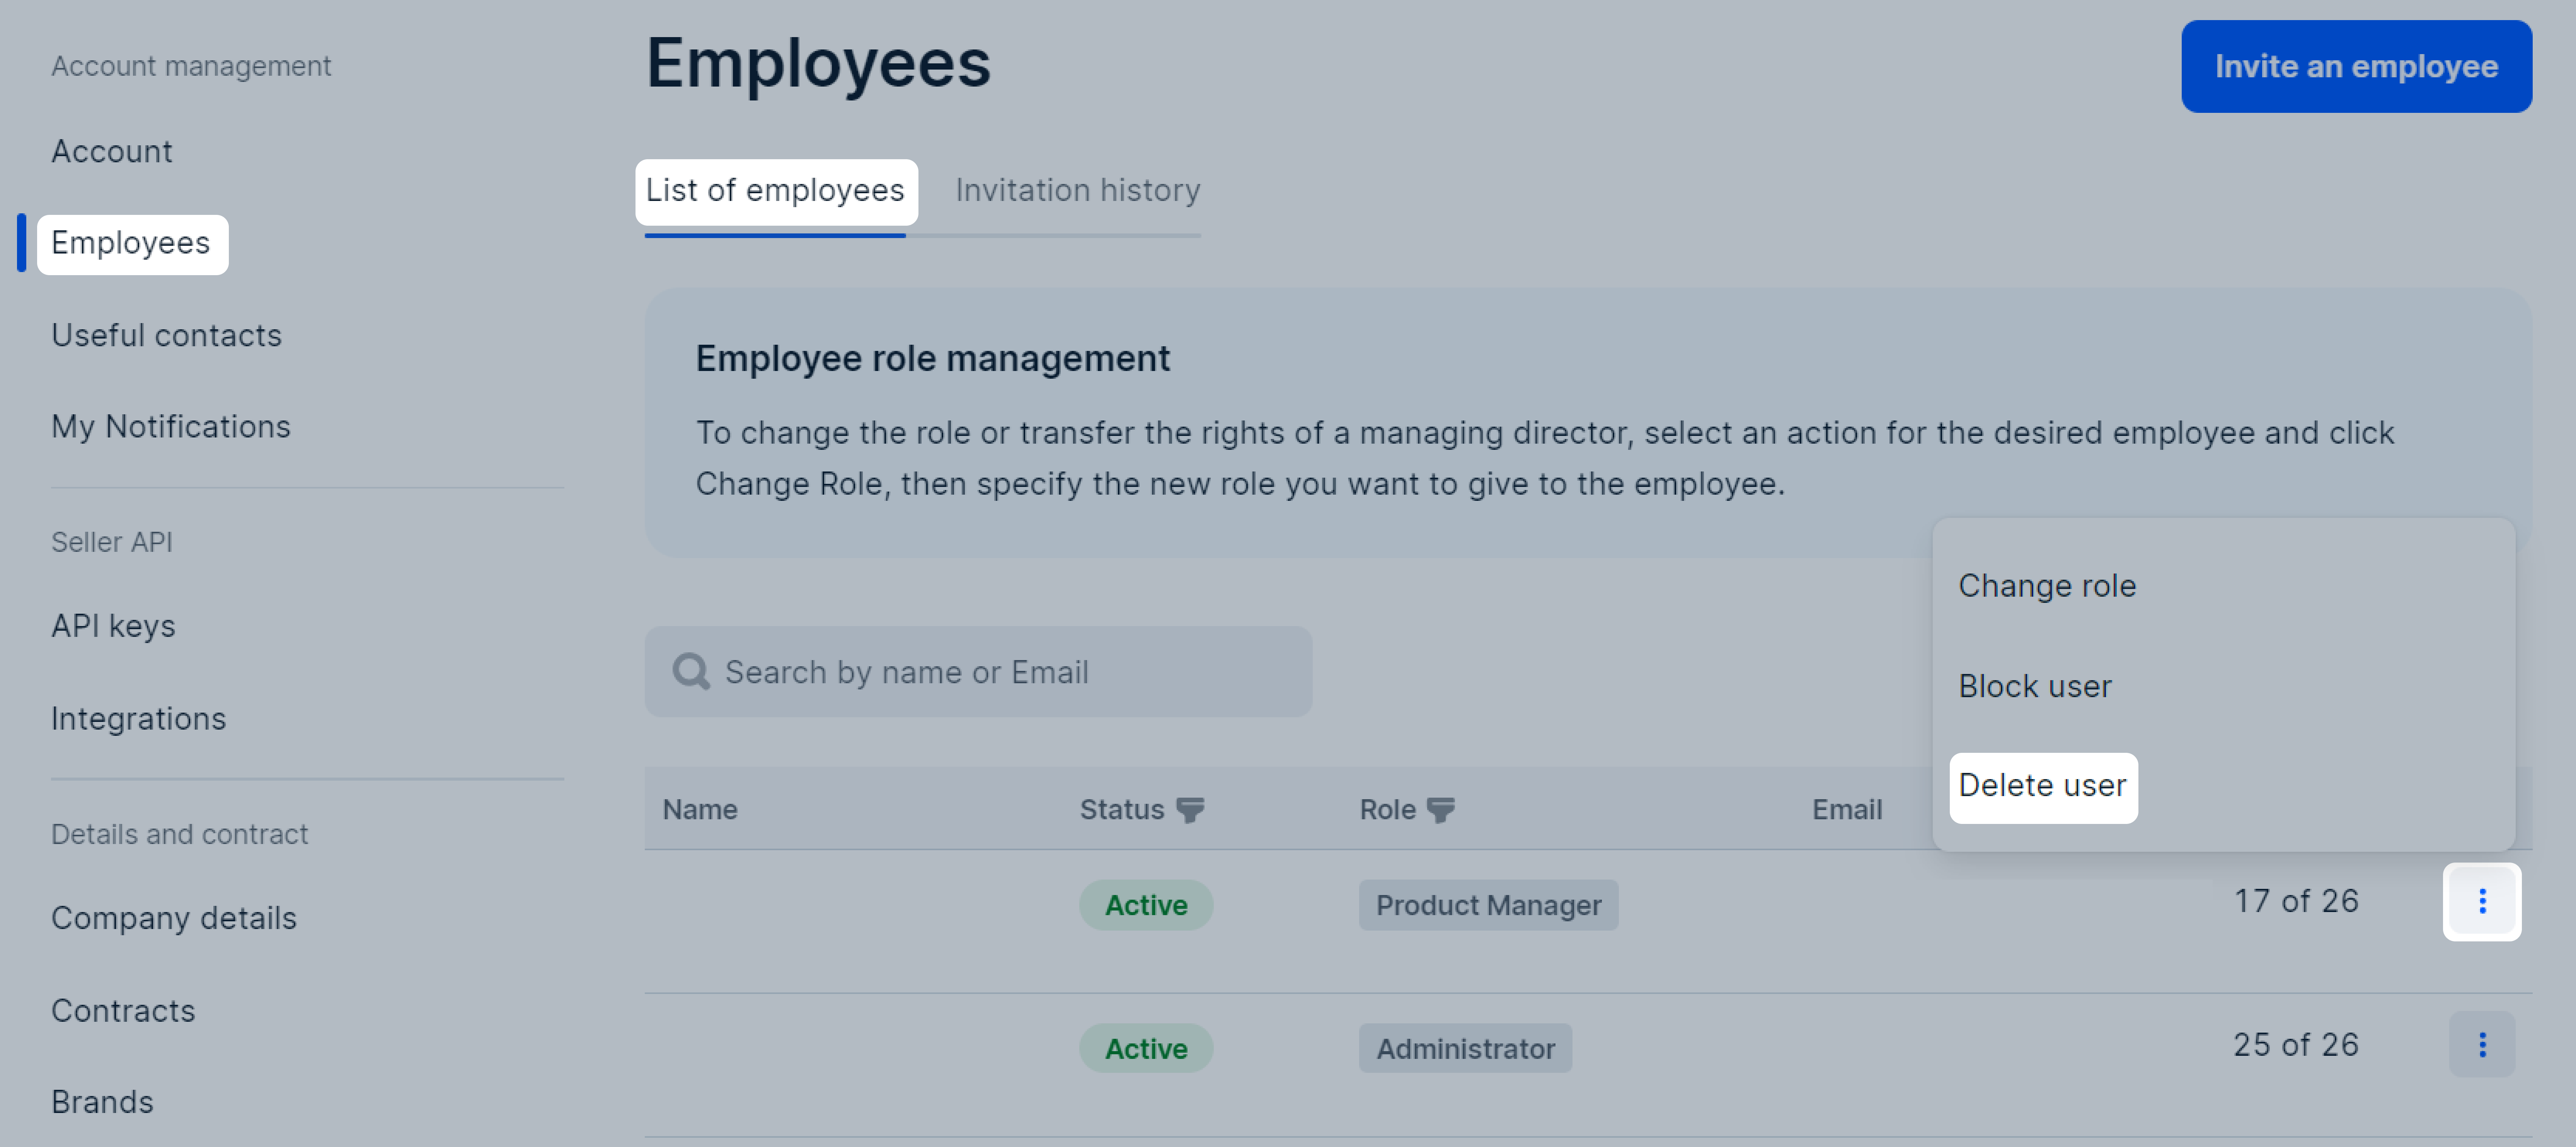
In the employee row, click
 →
Delete user → Confirm.
Change employee’s role #
-
Open the Settings → Employees section.
-
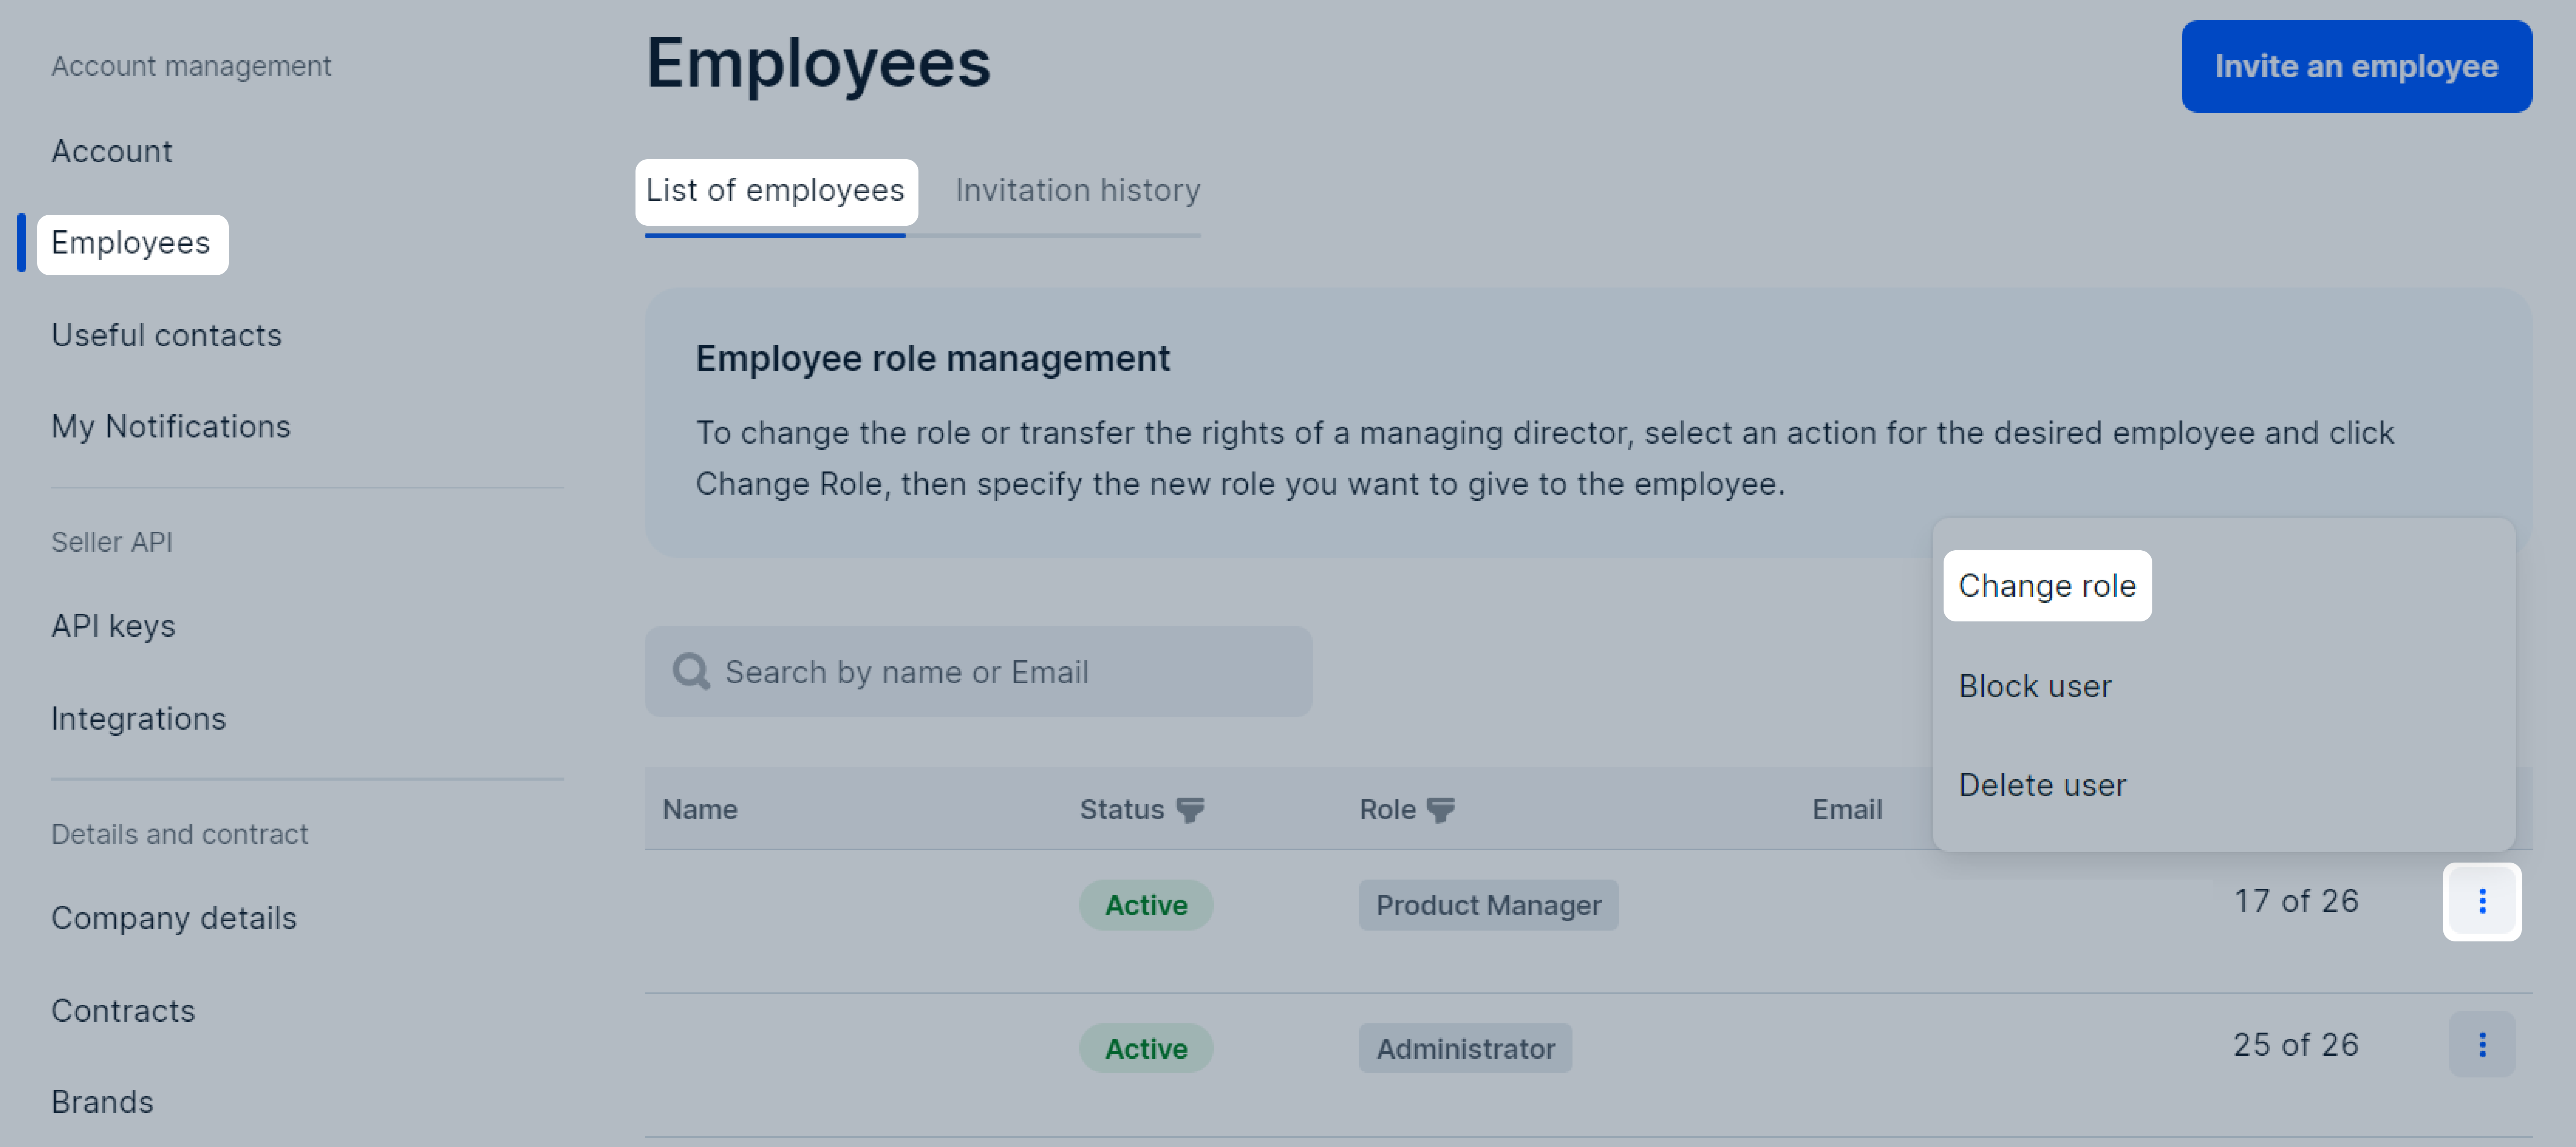
Click
 →
Change role and select a new role for the employee.
Transfer management rights to another employee #
- Open the Settings → Employees section.
- In the row with an employee name, click
 → Change role → Manager.
Only the current manager can assign the manager role to a new employee.
Restore access #
To restore access to the manager account, open the Settings → Account section and contact our support team.
To create a request:
- Specify:
- new email address;
- your company’s legal form.
- Attach documents:
- a copy or photo of your passport or power of attorney;
- your photo with a passport open on 2–3 pages.
We’ll check the information and if everything’s correct, restore access to your personal account.
To restore access to your personal account for any other role, create a new account with a different email address, and delete the old account.
Data available to the “Courier”, “Assembler”, and “Courier assembler” roles #
The “Courier”, “Assembler”, and “Courier assembler” roles are available to sellers who work under the realFBS scheme. You can assign them to any number of employees. Each role must be assigned to a separate account.
Learn more about creating accounts
Several roles can’t be combined in the same account.
Employees with the “Courier”, “Assembler”, and “Courier assembler” roles can work with their personal accounts only in the Ozon Seller app. They only have access to specific sections and limited data in them:
- Home: the number of orders and returns in different statuses;
- Orders;
- Returns;
- Help;
- Menu.
