1. Make sure your products have barcodes and the barcodes aren’t longer than 100 characters.
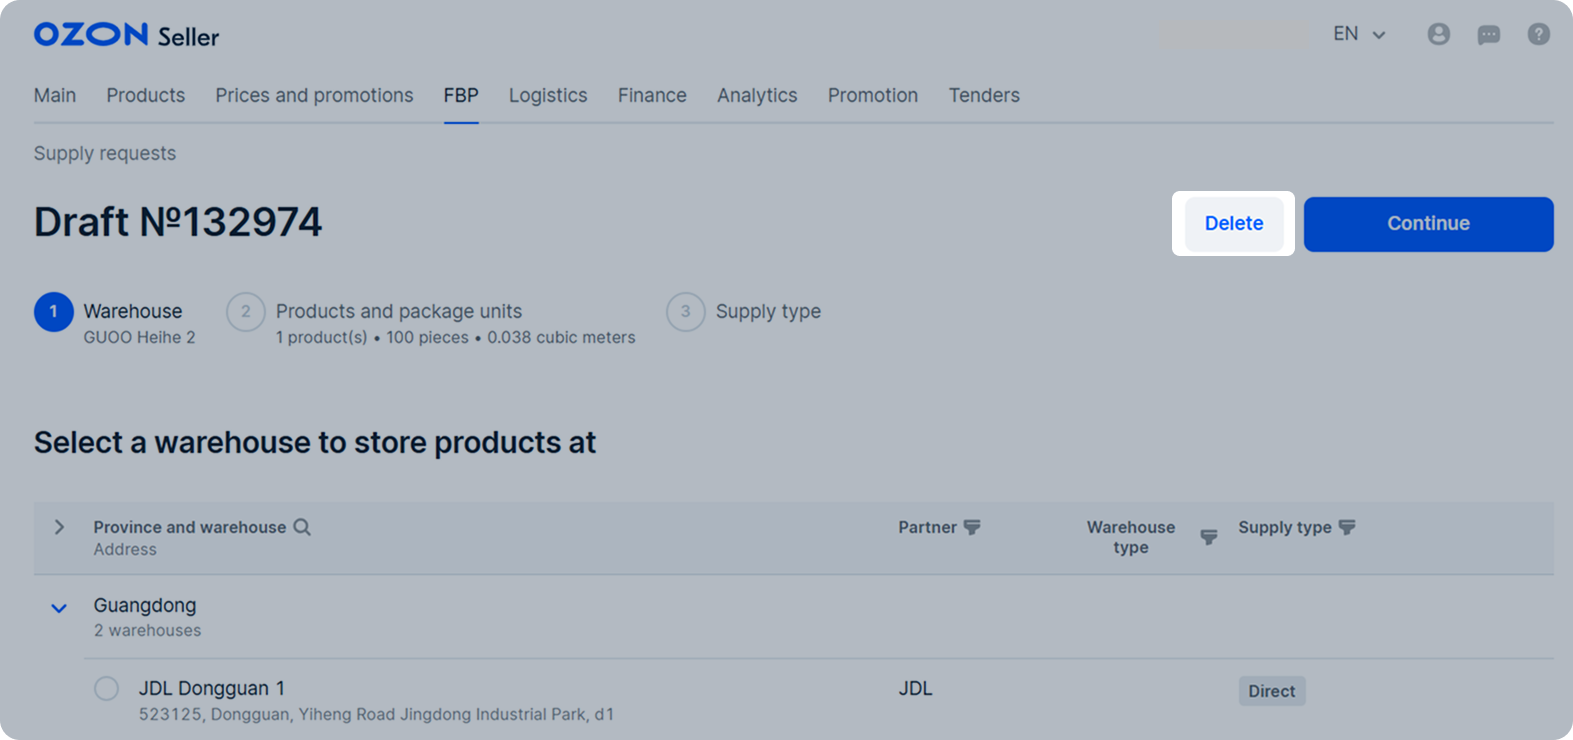
2. In the FBP → Create a supply request section, select the supply warehouse and click Continue.
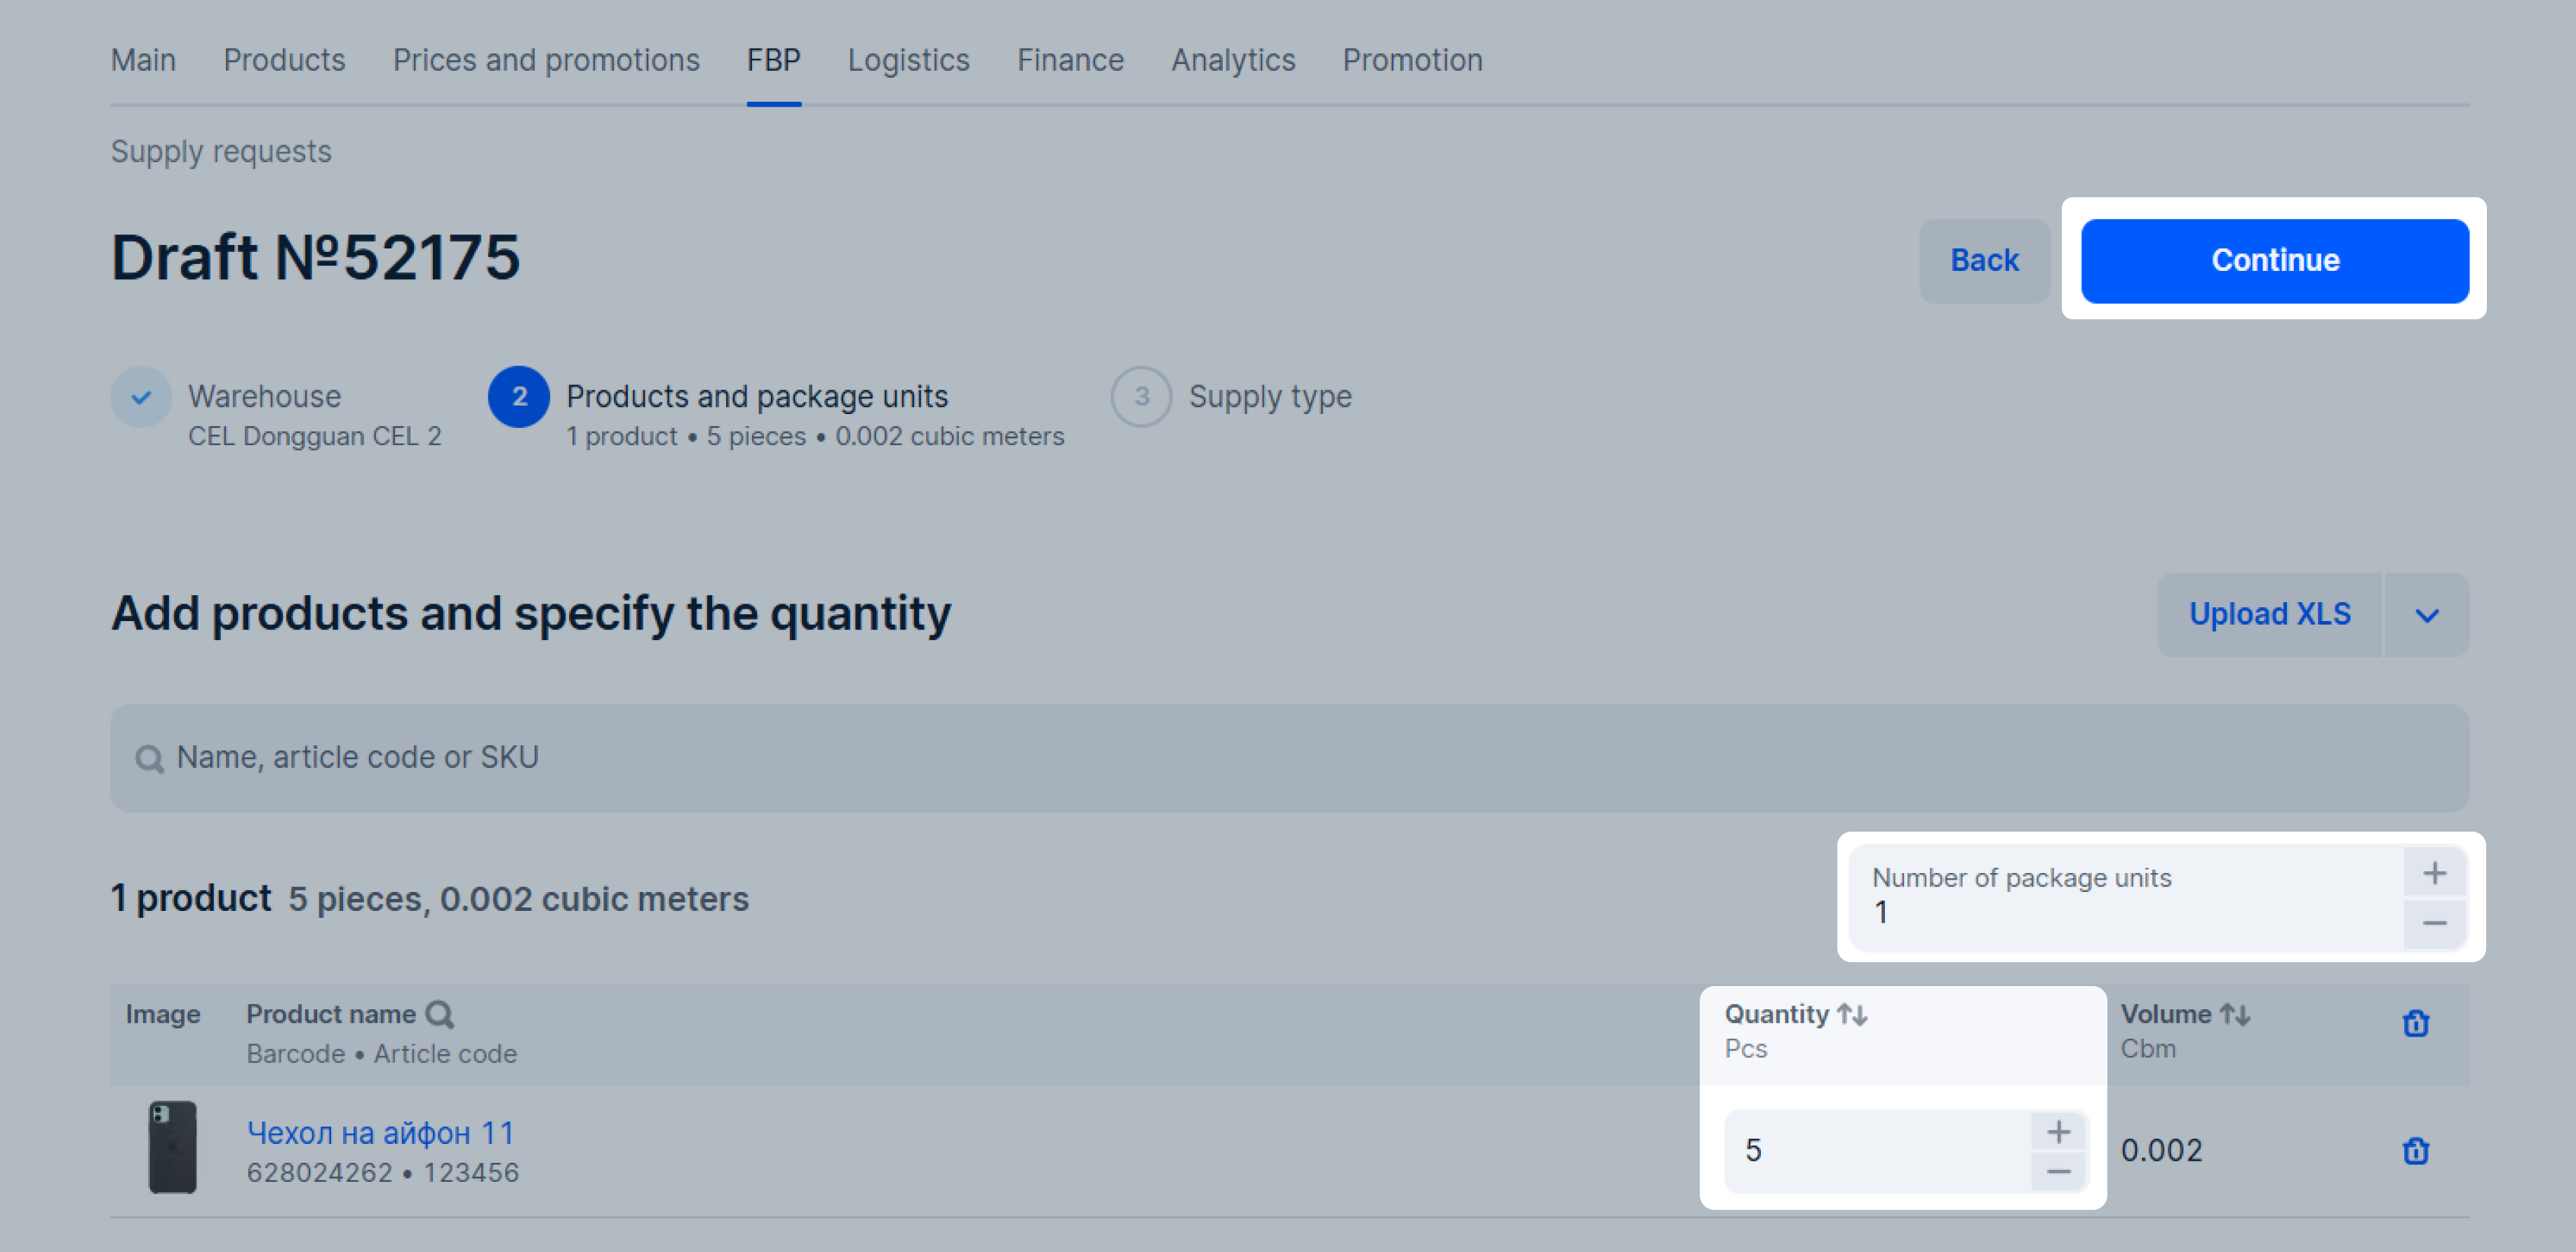
3. Add products and specify their number.
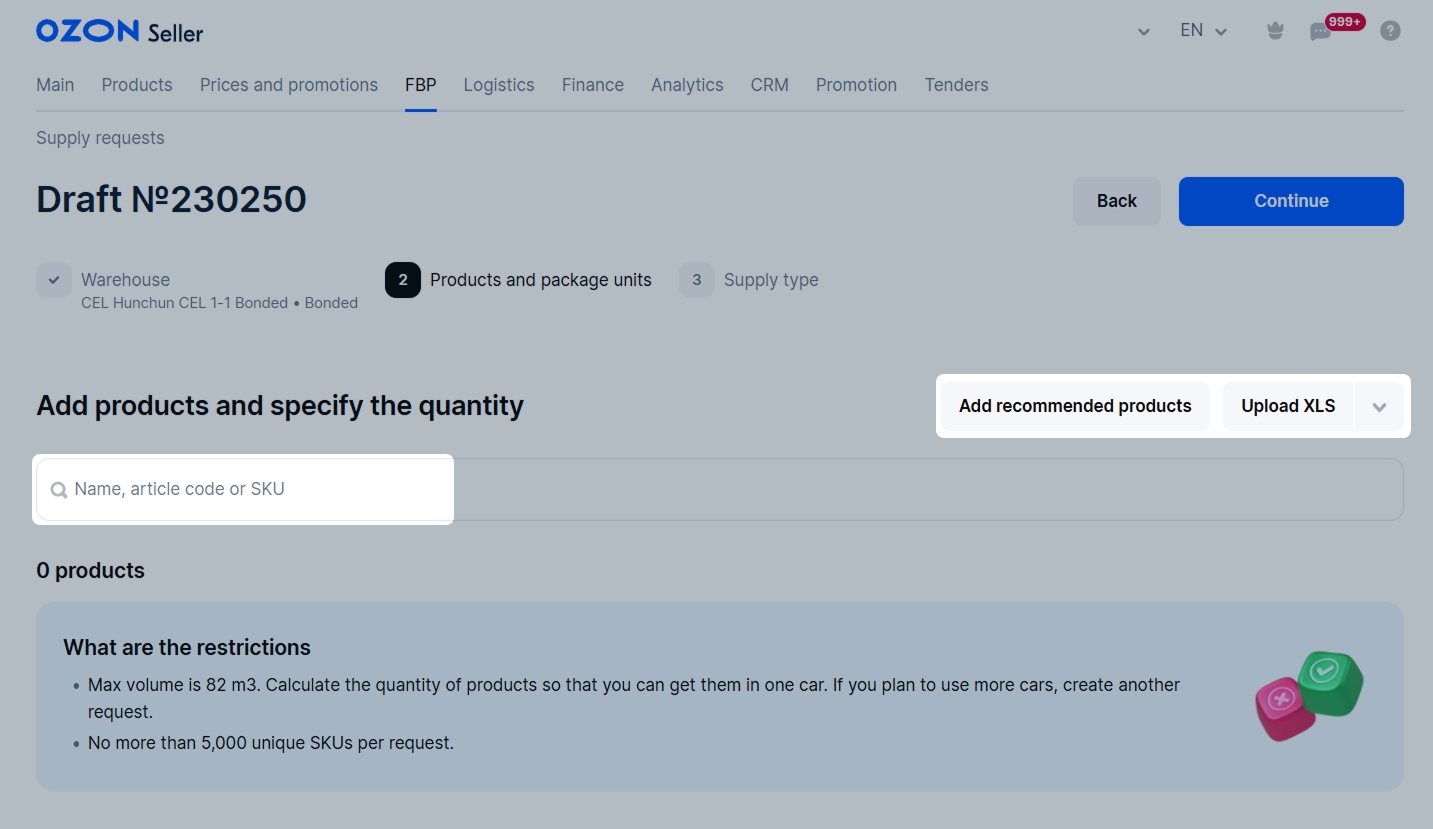
You can add products:
From Ozon recommendations
Click Add recommended products and select the categories for supply.
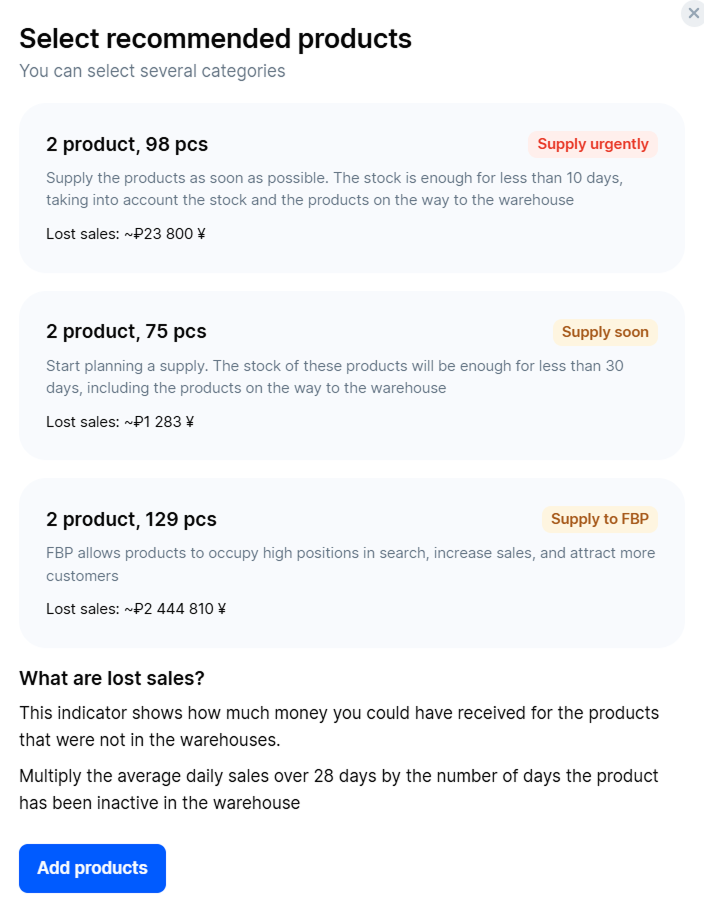
To calculate products correctly, delete outdated supply requests in the Ready for shipment status.
The products will be automatically added to the supply request in the amount calculated for sales within 28 days. We take into account the stocks and products on the way.
Learn more about product availability and calculation of metrics
Edit the list and the number of products if necessary.
By piece manually
Write the product name, article code, SKU, or barcode in the search bar.
Via XLS file with products
Click Upload XLS and select Download XLS template. When you fill in the template, click Upload the completed XLS and add it to the system.

For the system to accept and recognize the file, specify in each line:
- a unique article code of the product from your range;
- the number of product items as a positive integer.
You don’t need to fill in the product name: we add it by article code automatically.
The file should contain no more than 5,000 unique products.
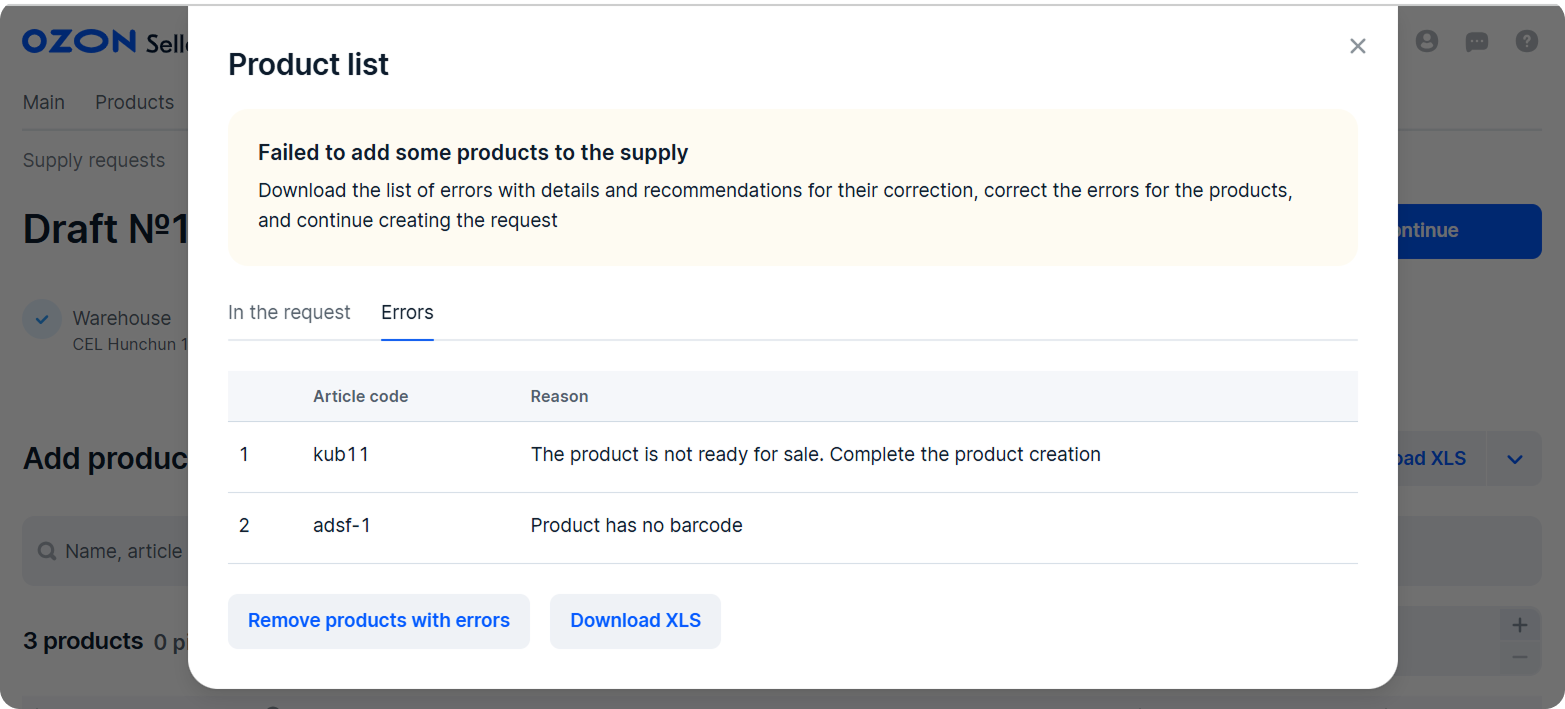
If there are errors when adding products from recommendations or a file, we show them in a separate window. You can:
- click Remove products with errors to add only products that passed validation;
- click Download XLS to download a detailed report with errors for each product and recommendations for correction. Correct the errors as recommended and upload the form again.
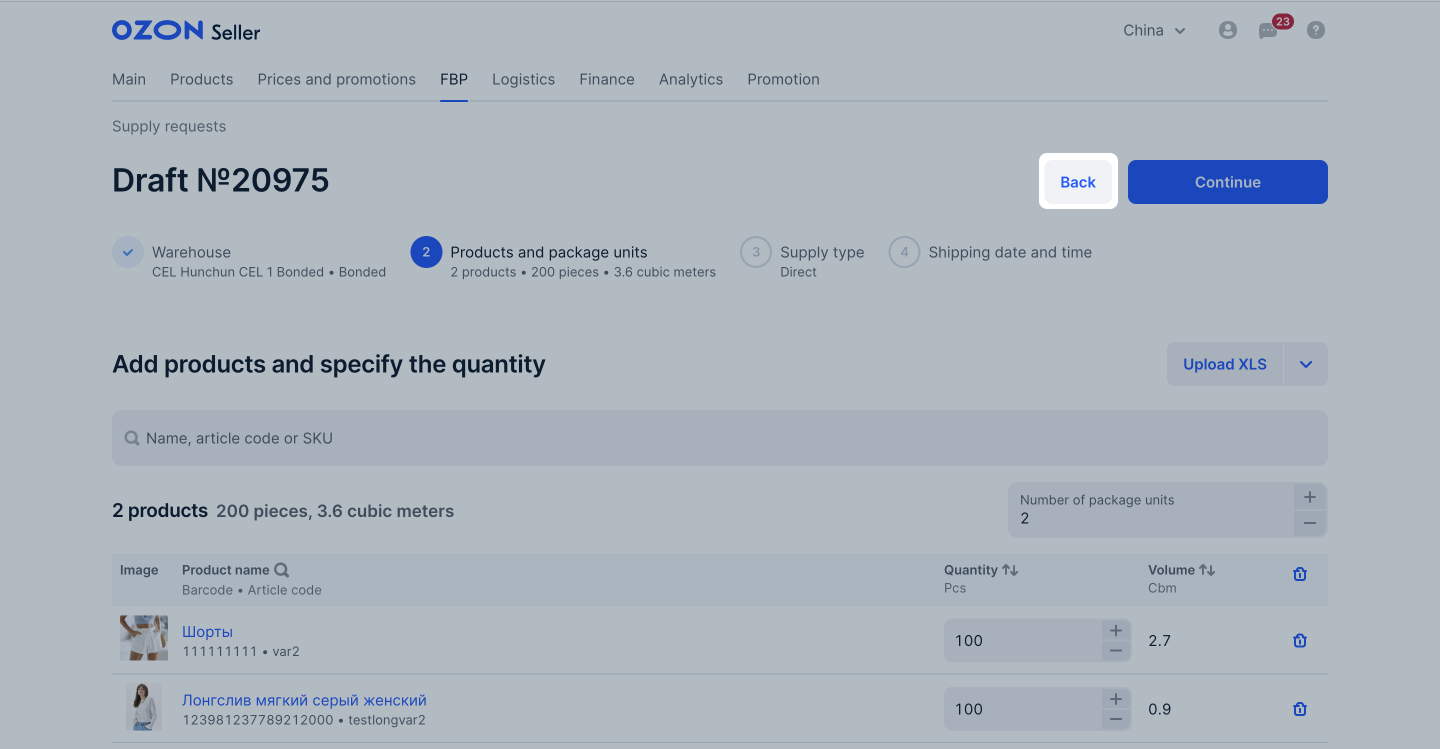
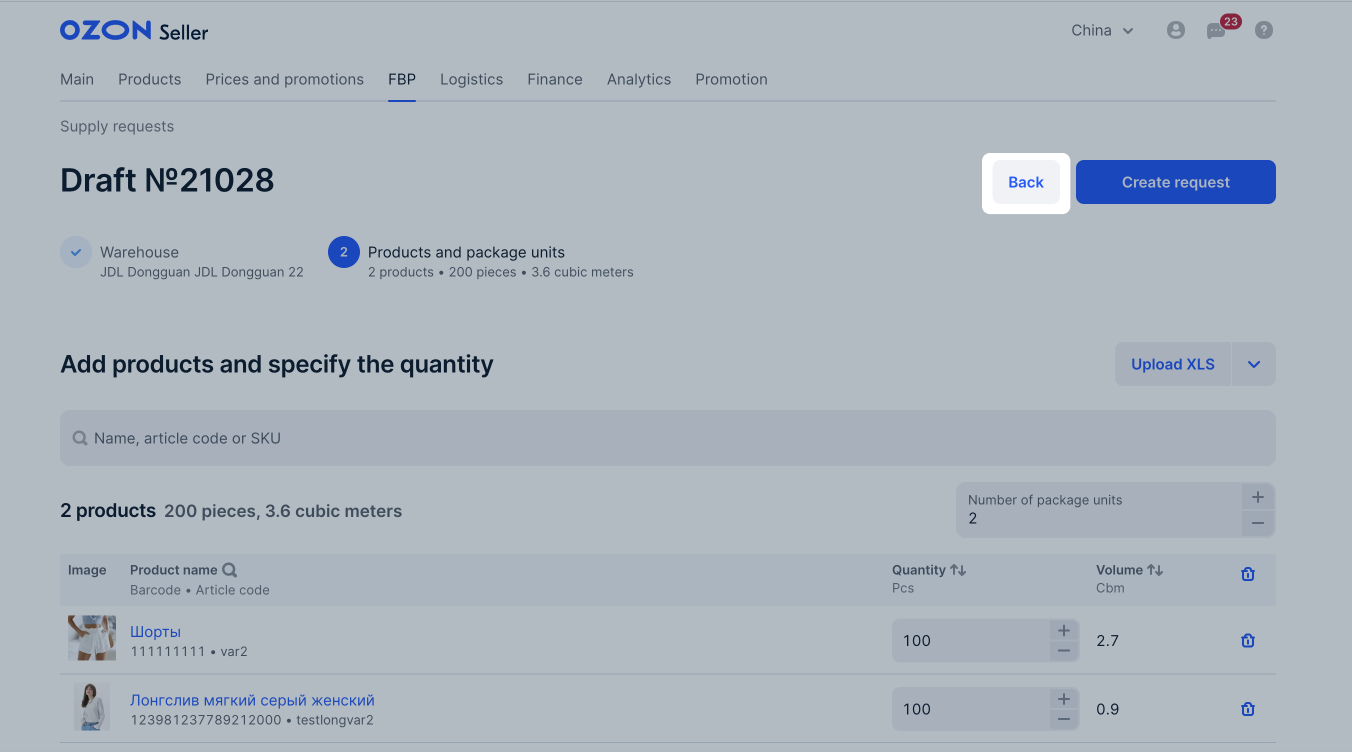
4. Specify the number of products and package units and click Continue.
A package unit is 1 pallet or 1 box. For example, if there’re 3 pallets and 2 boxes in your supply, specify 5.
5. Select the supply type: Direct, Drop-off or Pick-up.
6. Click Continue.
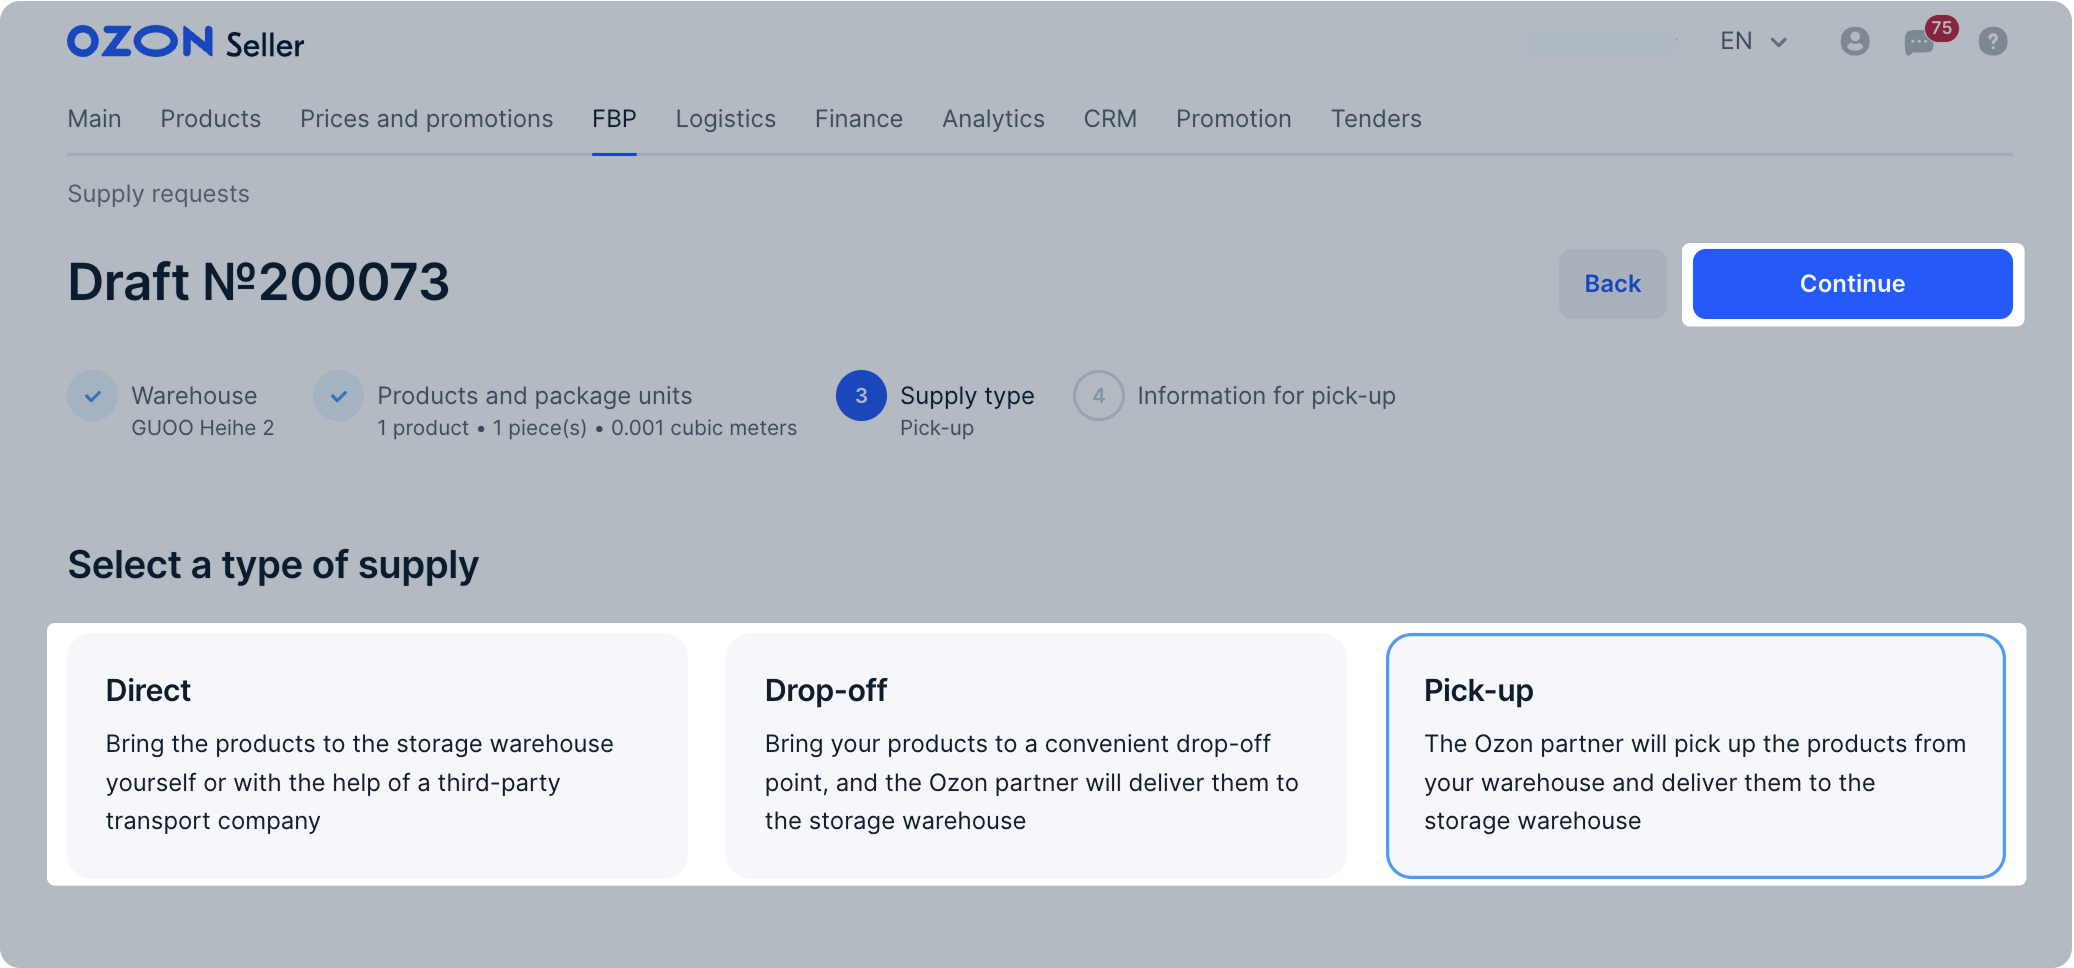
Direct
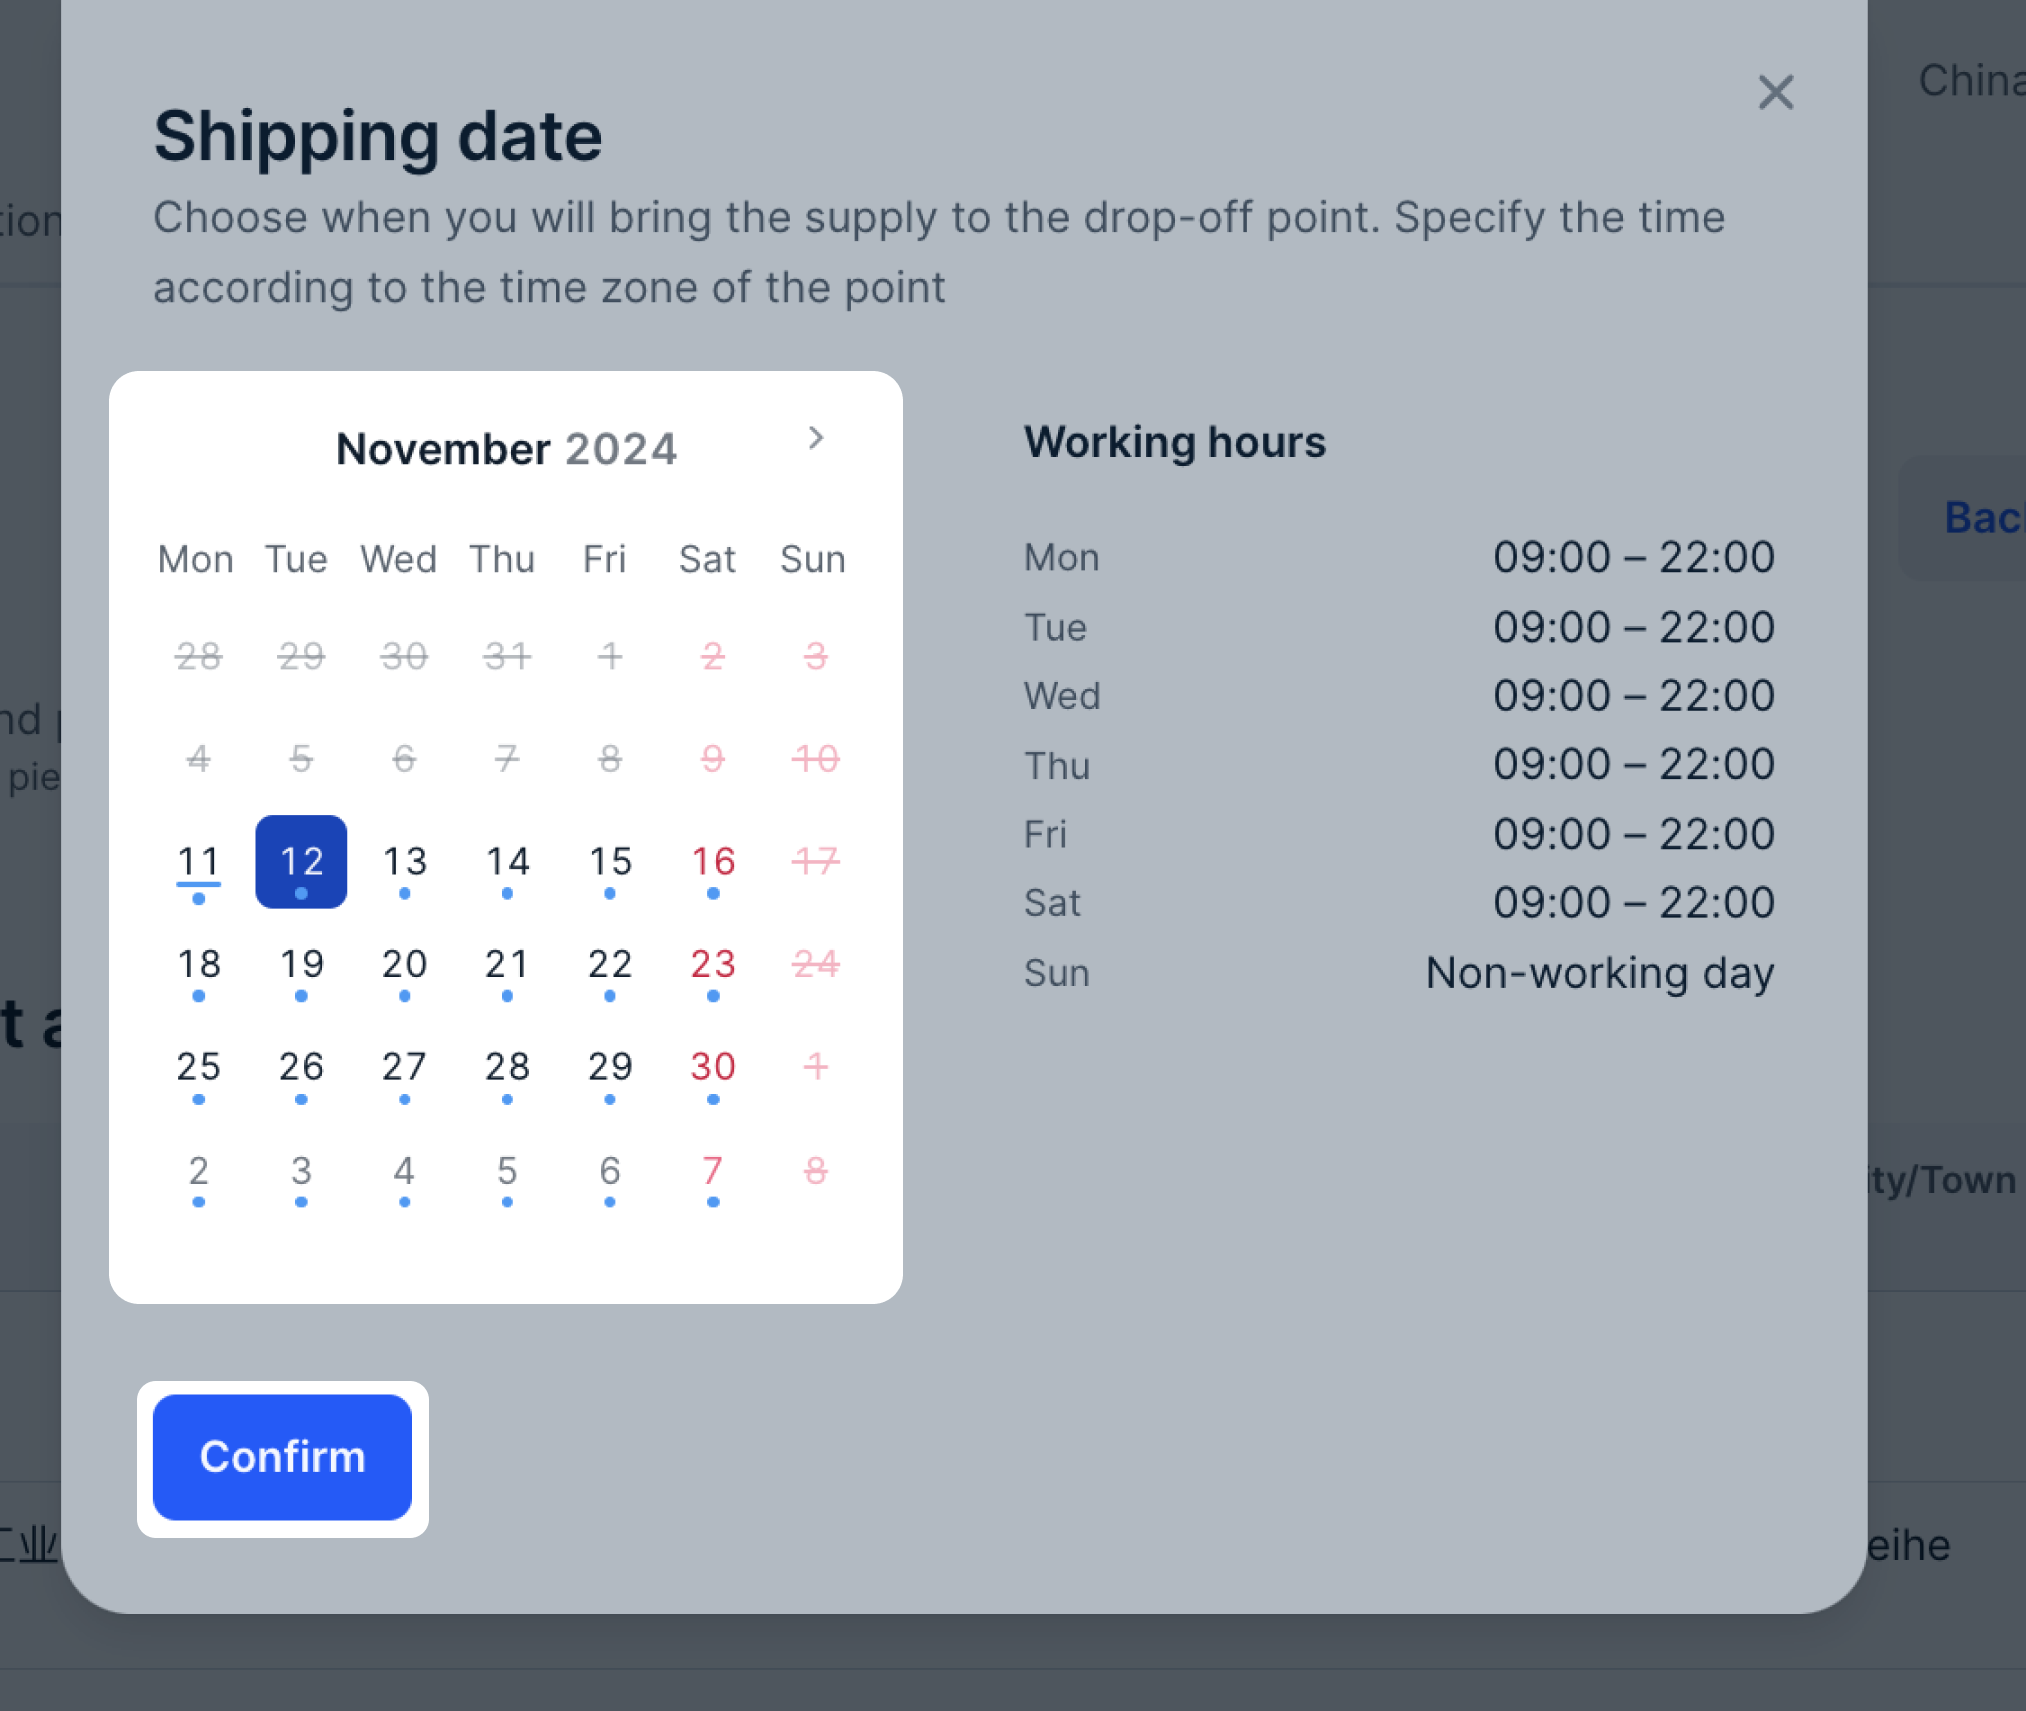
1. Select the shipping date and time and click Confirm.
The days available for supply are marked with the  icon.
Timeslots are given in the local time of the warehouse.
If you want to change the confirmed timeslot, click Edit.
icon.
Timeslots are given in the local time of the warehouse.
If you want to change the confirmed timeslot, click Edit.
2. Click Create request.
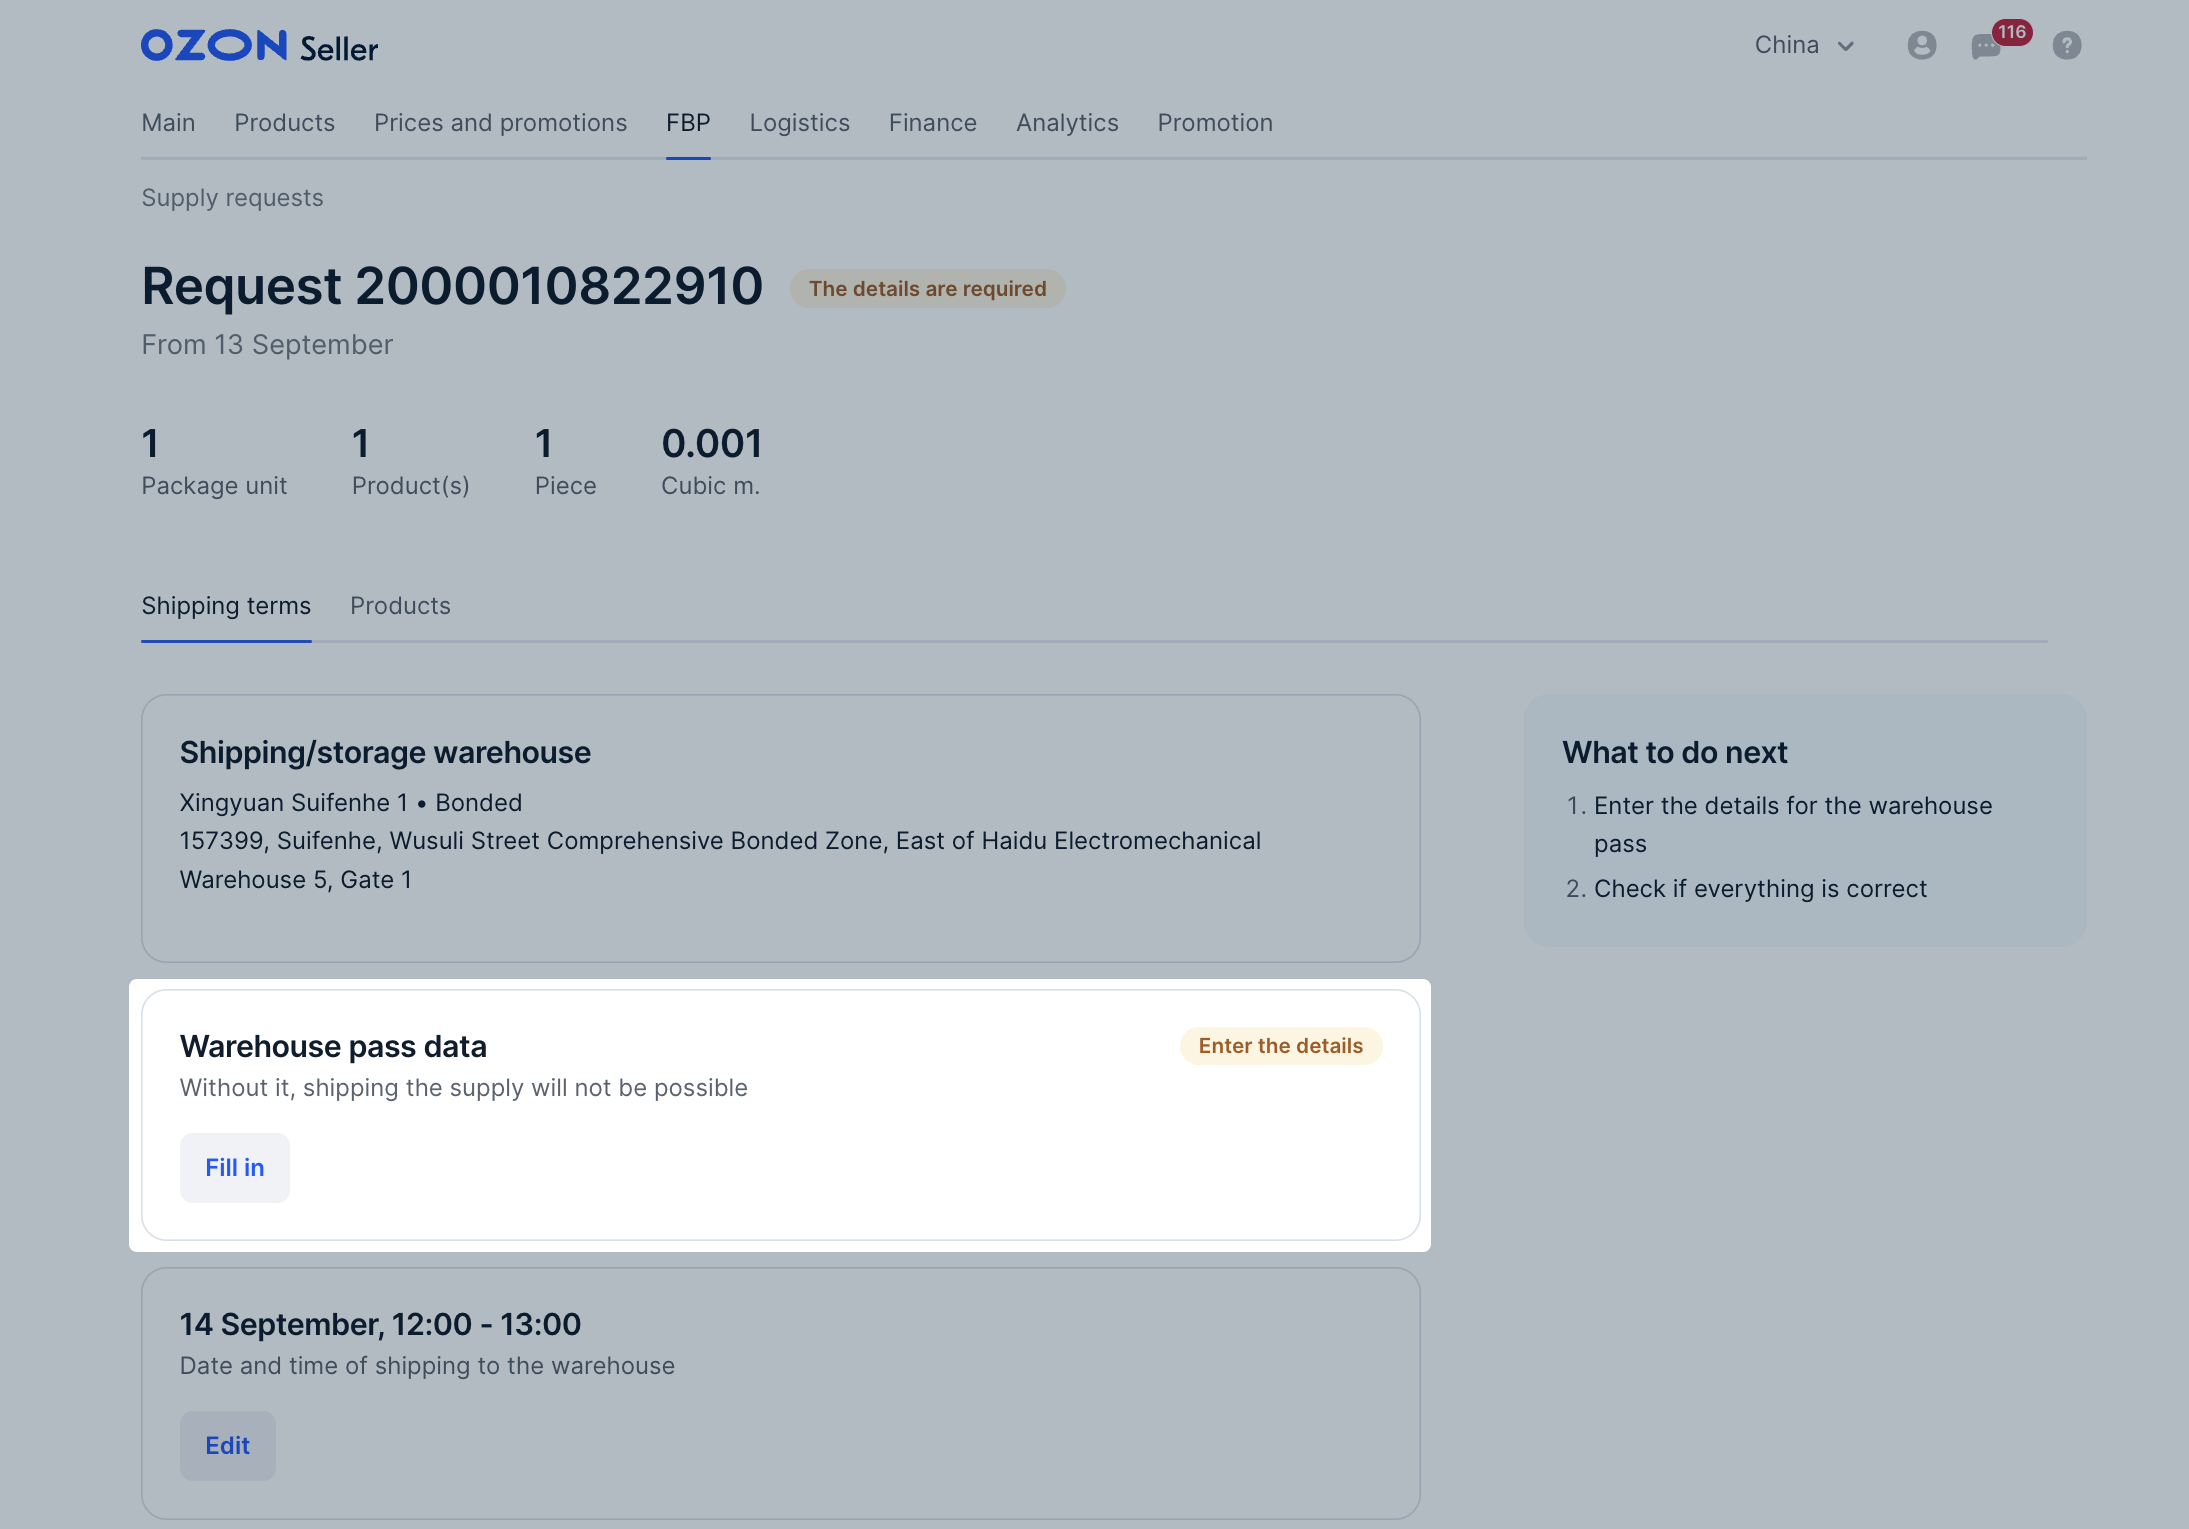
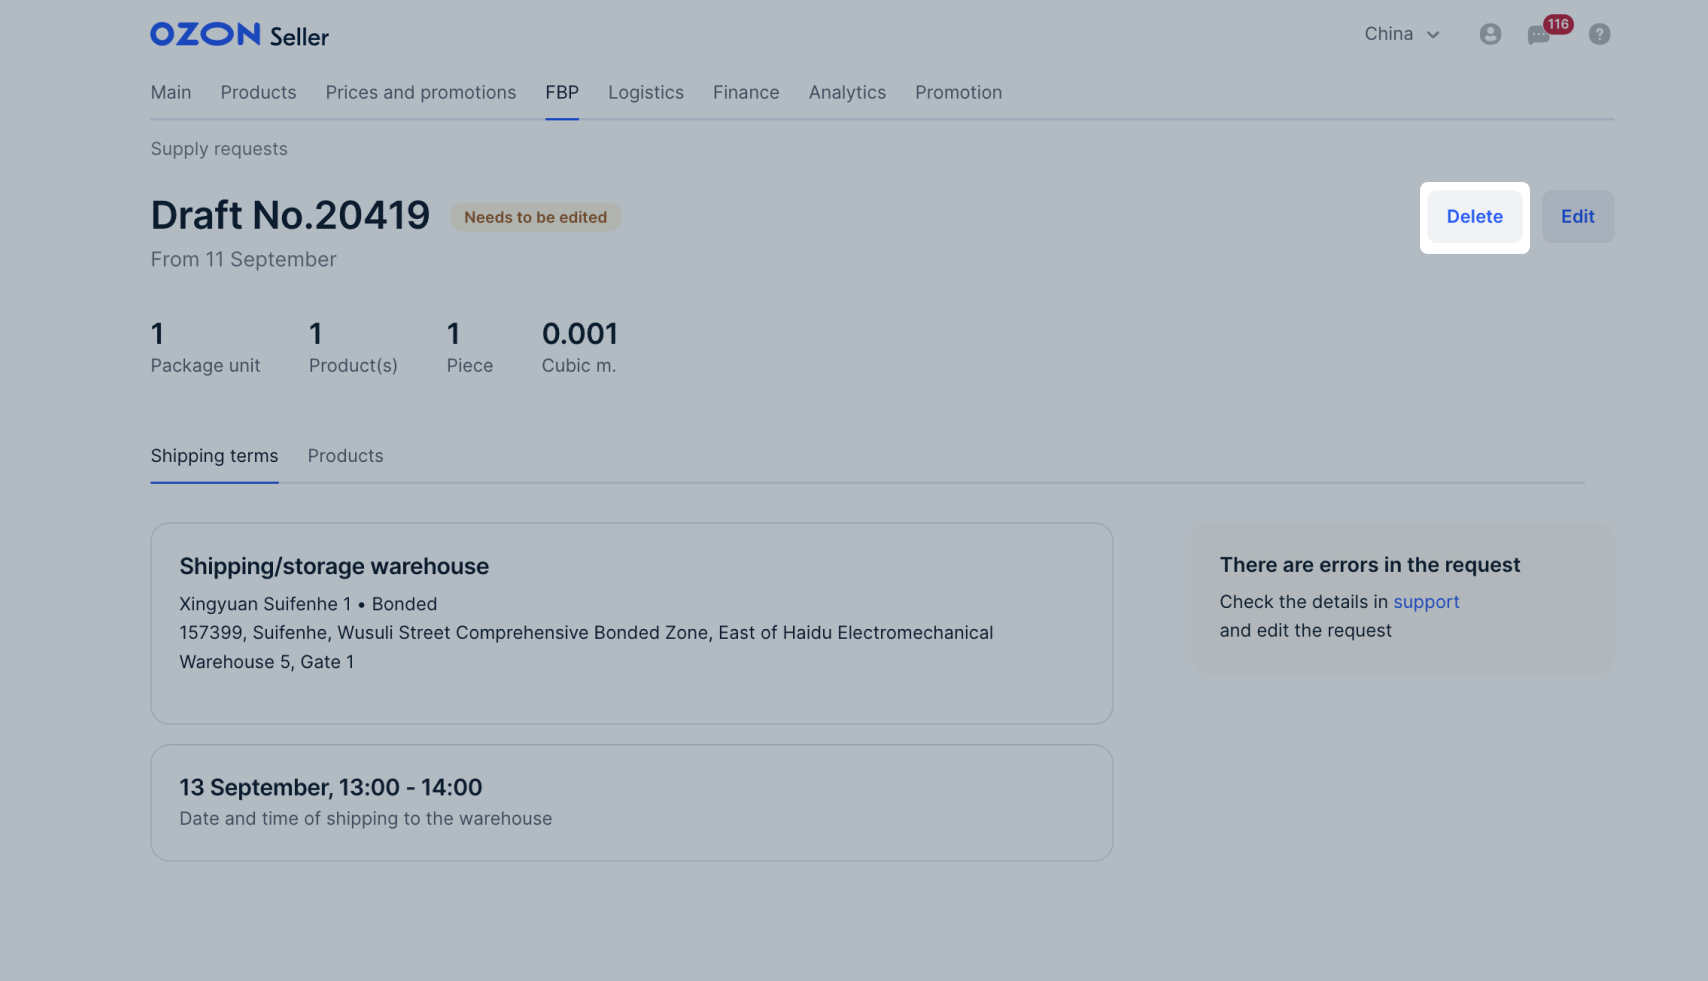
The request gets the “Awaiting confirmation” status and is displayed in the FBP → Supply requests section on the New tab.
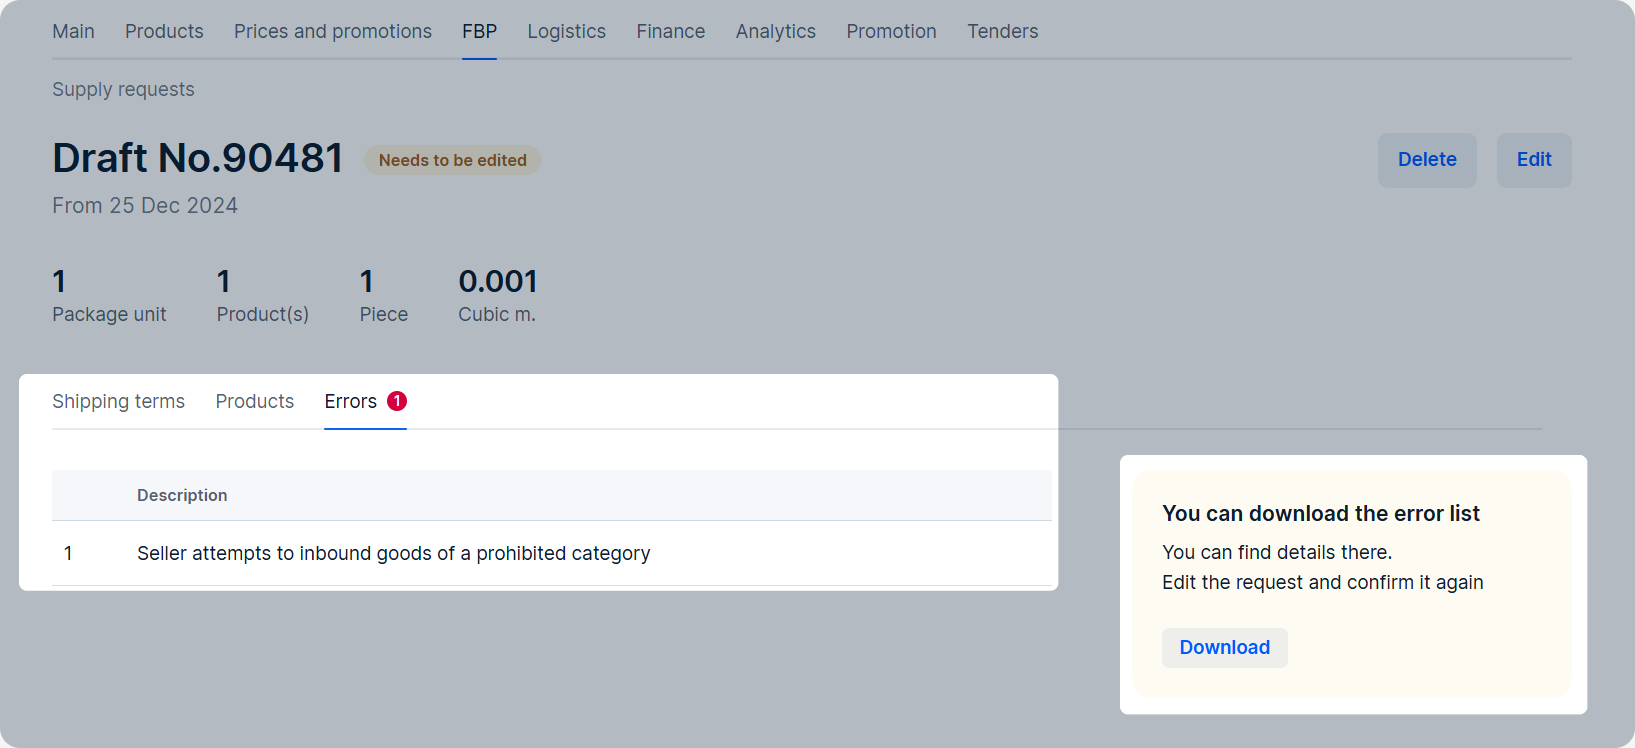
It takes 1 hour to register your supply request in the partner’s system. If the status changes to “Needs to be edited”, edit the request.
Learn more about editing requests
3. Wait until the status changes to “The details are required”.
In the Warehouse pass data section, click Fill in.
4. Select the delivery provider, fill in the details for the pass and click Save.

Bring the products with one car.
To use several cars, create a supply request for each one.
The request status changes to “Ready for shipping”.
5. Click Download invoice.

Print and sign three copies of the invoice.
Give two copies to the delivery provider. They hand them over to the warehouse with the supply.
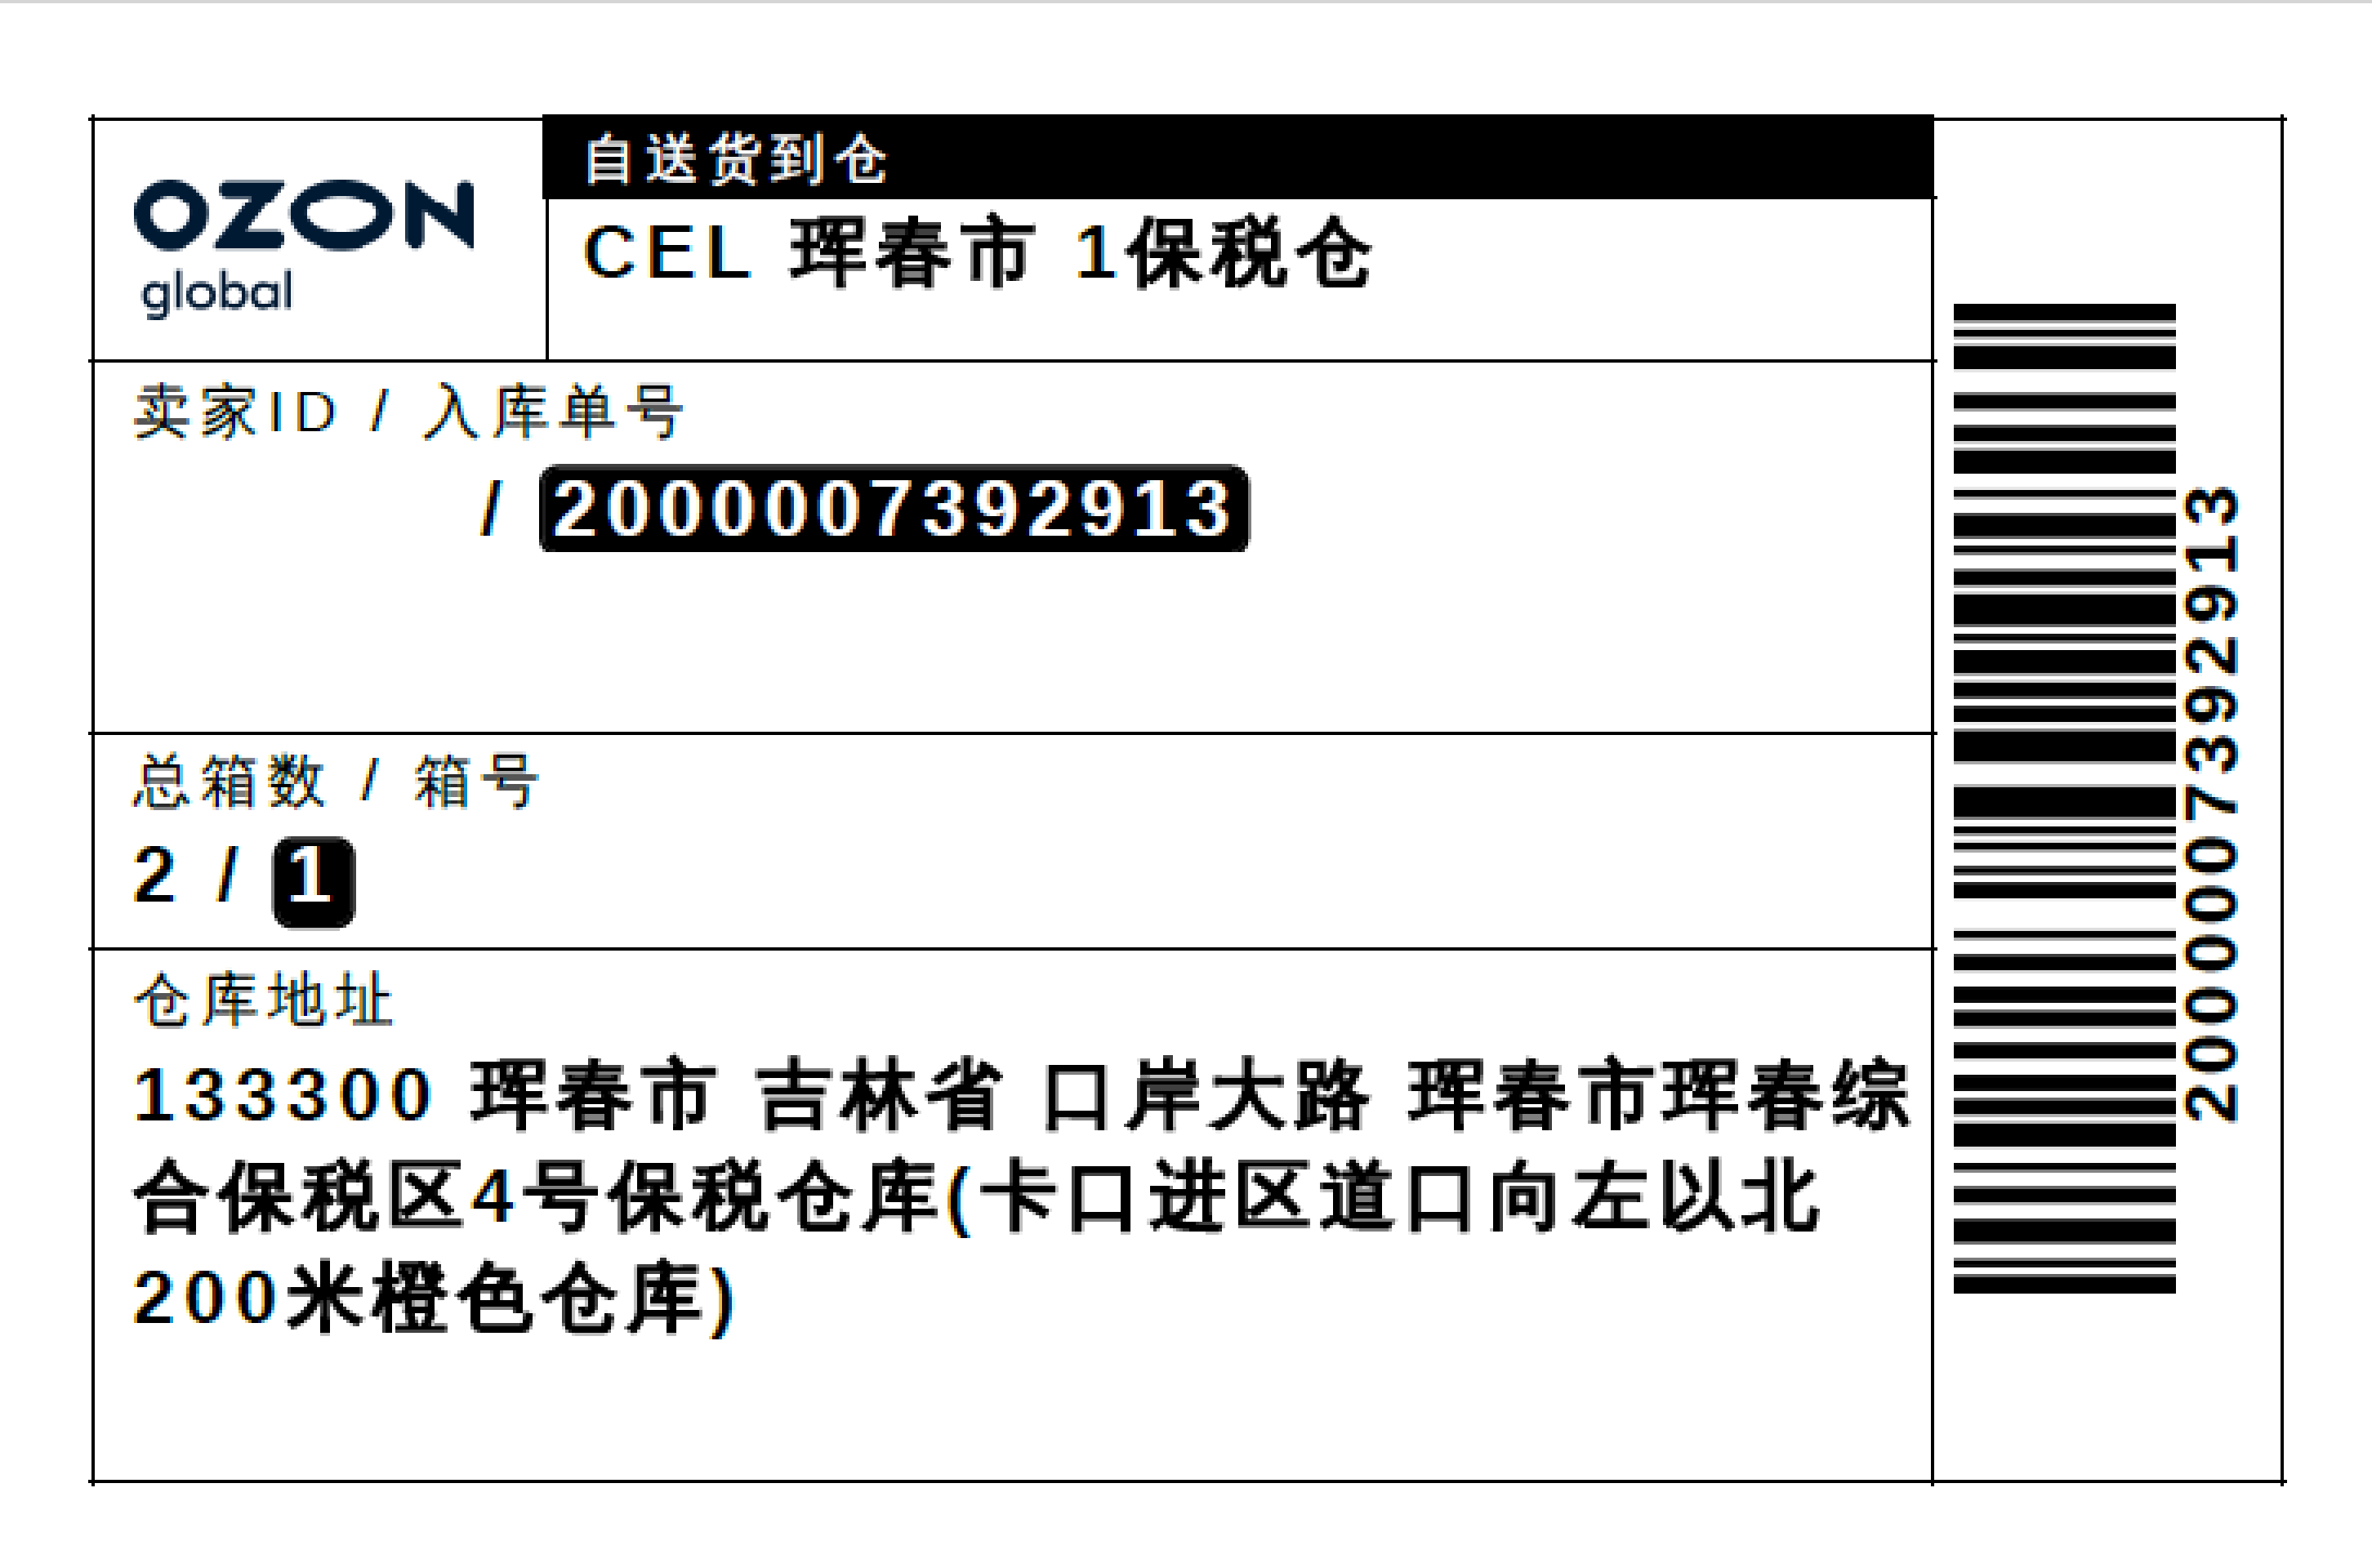
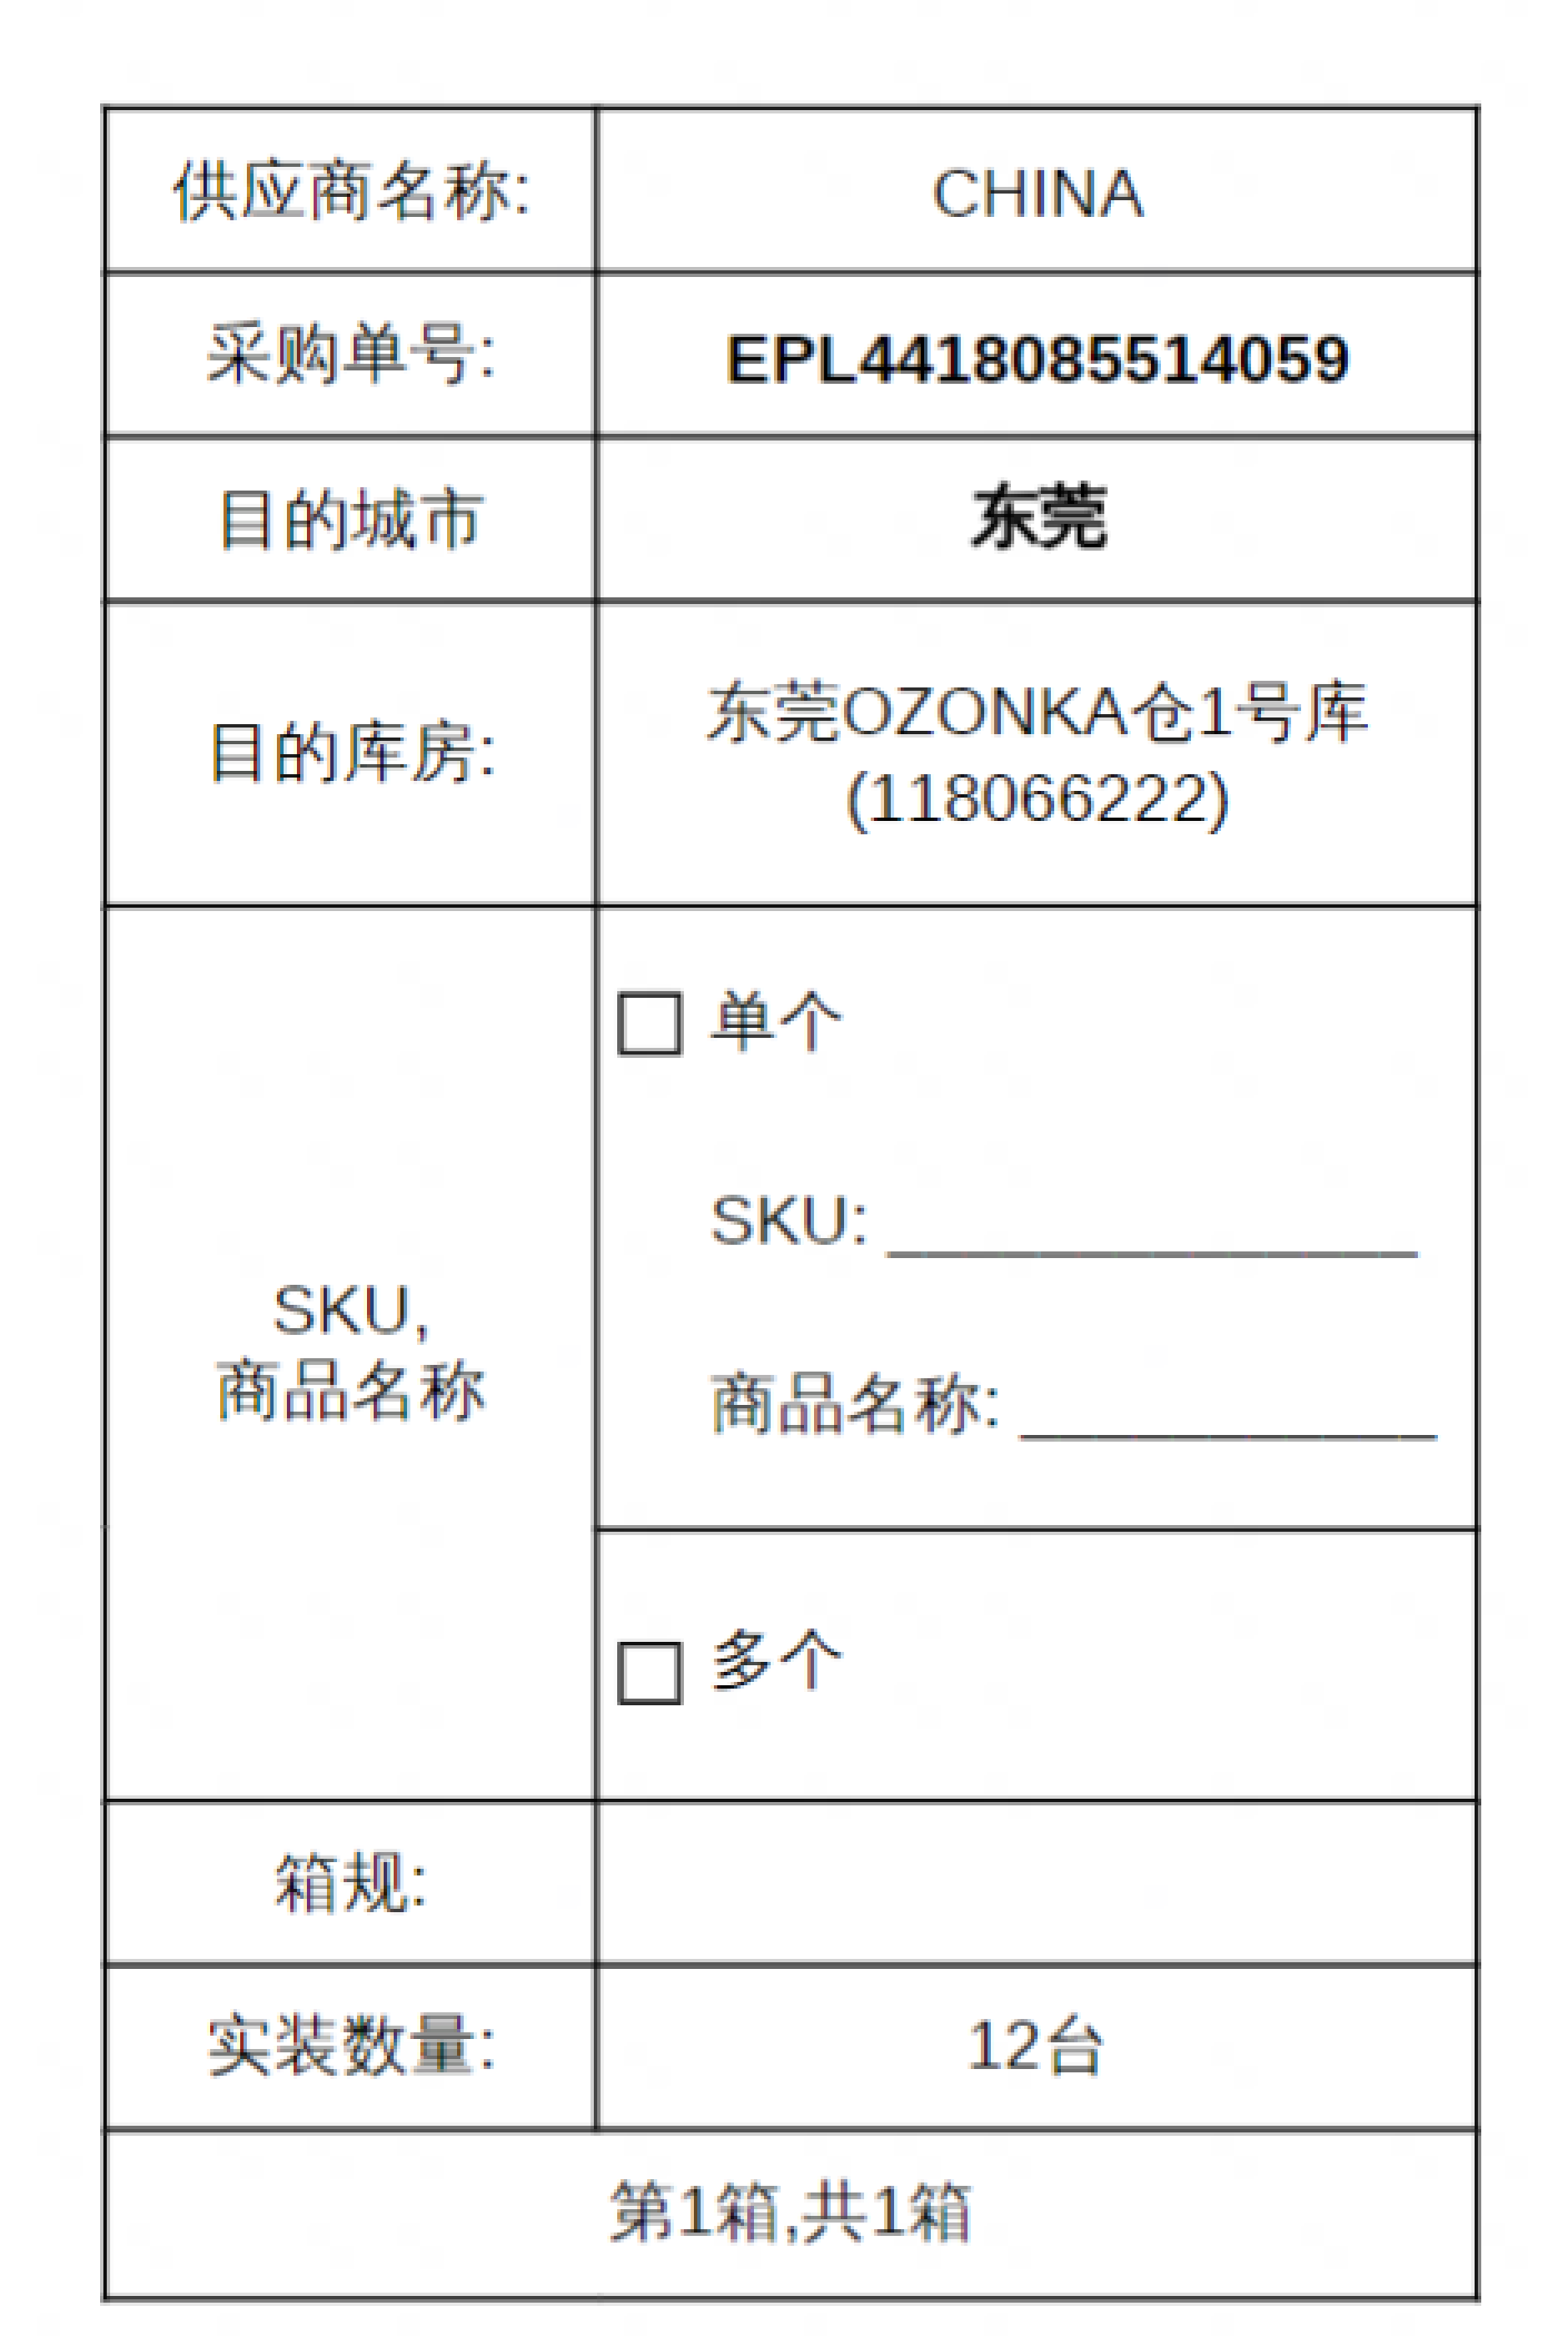
6. Download the labels and label the boxes.
You can edit the shipment date and time. Once they’re edited, download the updated invoice.
Drop-off
1. Click Edit next to convenient drop-off point and select the shipping date.
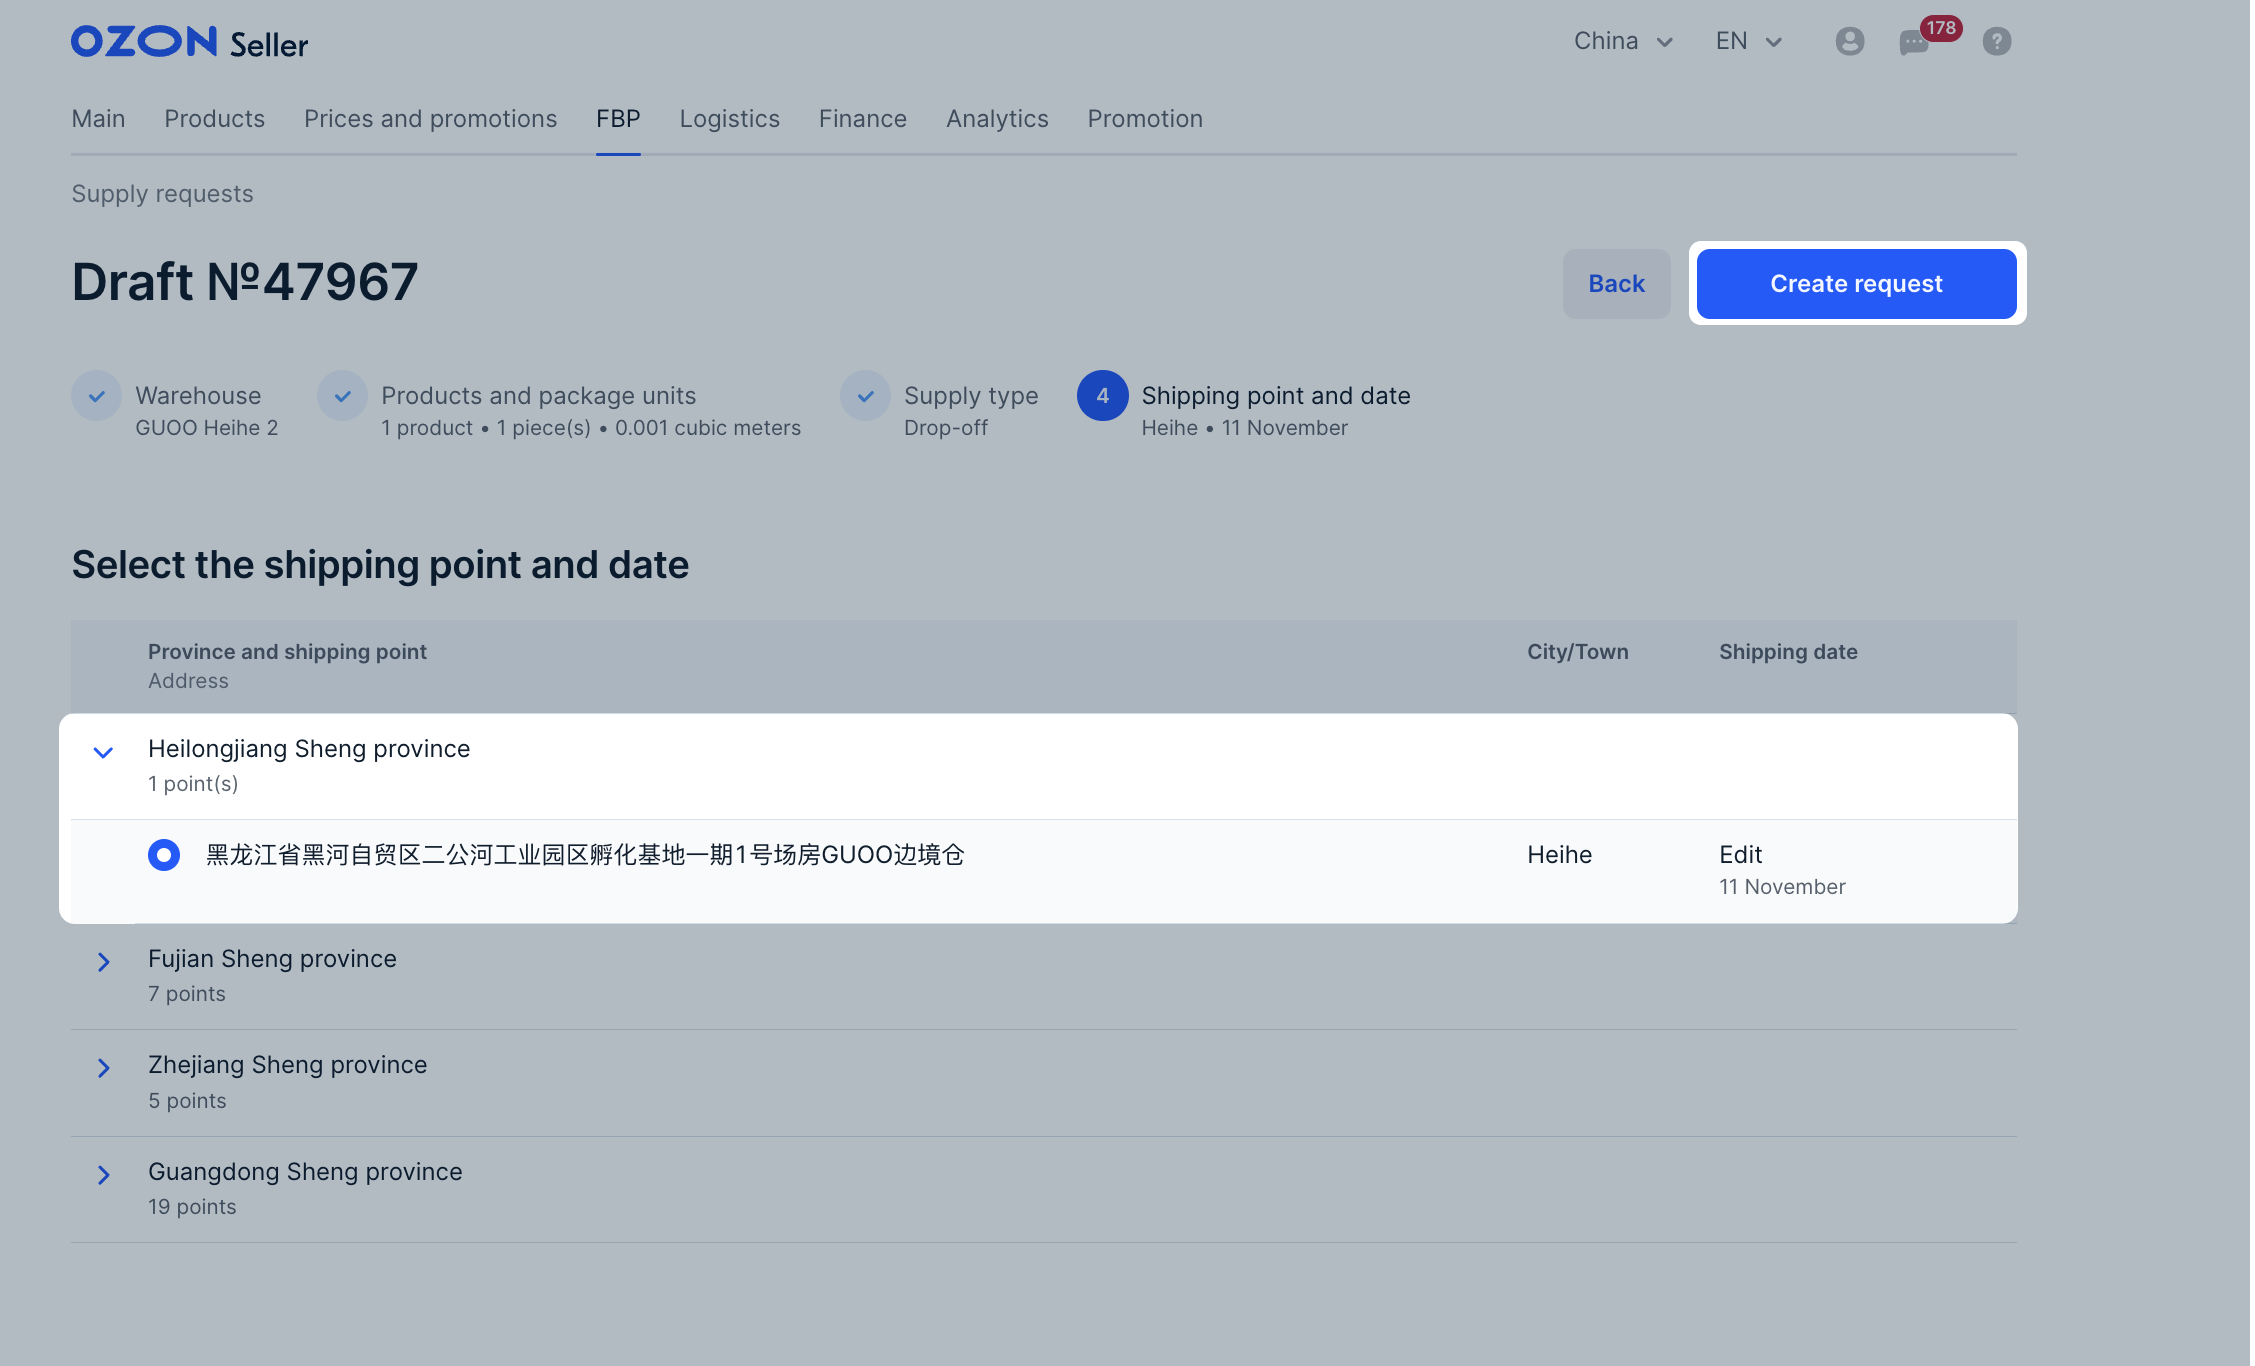
The days available for supply are marked with the icon. If you want to change the selected date, click Edit. If you want to change the drop-off point, select another one and click Select to select the date.
2. Click Create request.
The request gets the “Awaiting confirmation” status and is displayed in the FBP → Supply requests section on the New tab.
It takes 1 hour to register your supply request in the partner’s system. If the status changes to “Needs to be edited”, edit the request.
3. Click Download invoice.

Print and sign three copies of the invoice.
4. Download the labels and label the boxes.
You can edit the shipment date and time. Once they’re edited, download the updated invoice.
Pick-up
1. Specify:
- Shipping date.
- Shipping point: exact location to pick up the shipment.
- Comment: additional information and recommendations for the courier. For example, how to find the location.
- Who hands over the products to the courier: name and phone number of the sender. Specify the active phone number the warehouse can use to approve the shipment.
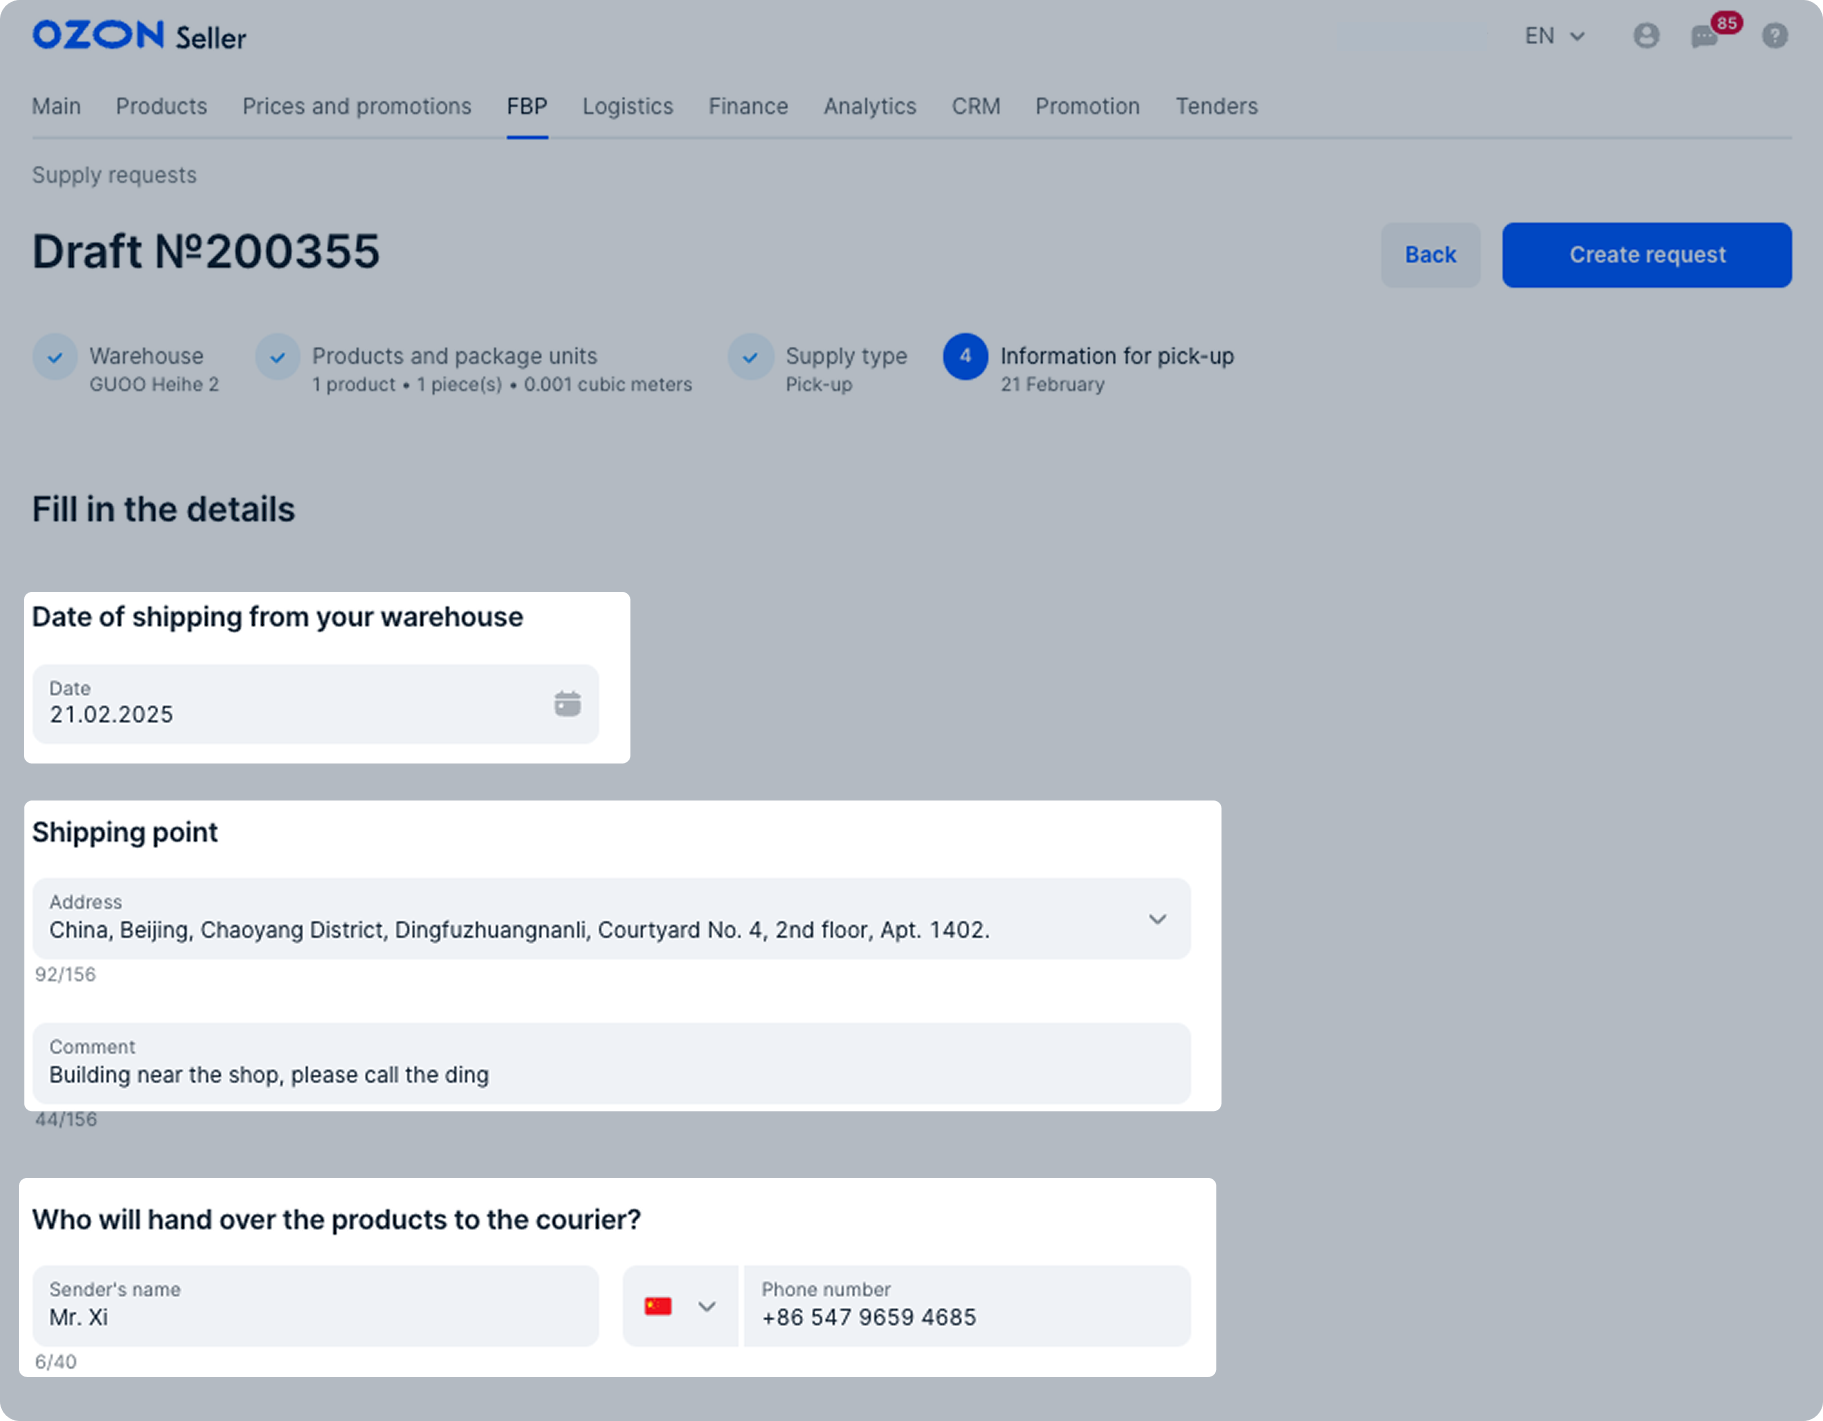
2. Click Create request.
The request gets the “Awaiting confirmation” status and is displayed in the FBP → Supply requests section on the New tab.
It takes 1 hour to register your supply request in the partner’s system. If the status changes to “Needs to be edited”, edit the request.
3. When the status of the request changes to “Ready for shipment”, download the labels and label the boxes.
Wait for a phone call or message in WeChat from partner to confirm the shipment date and time.
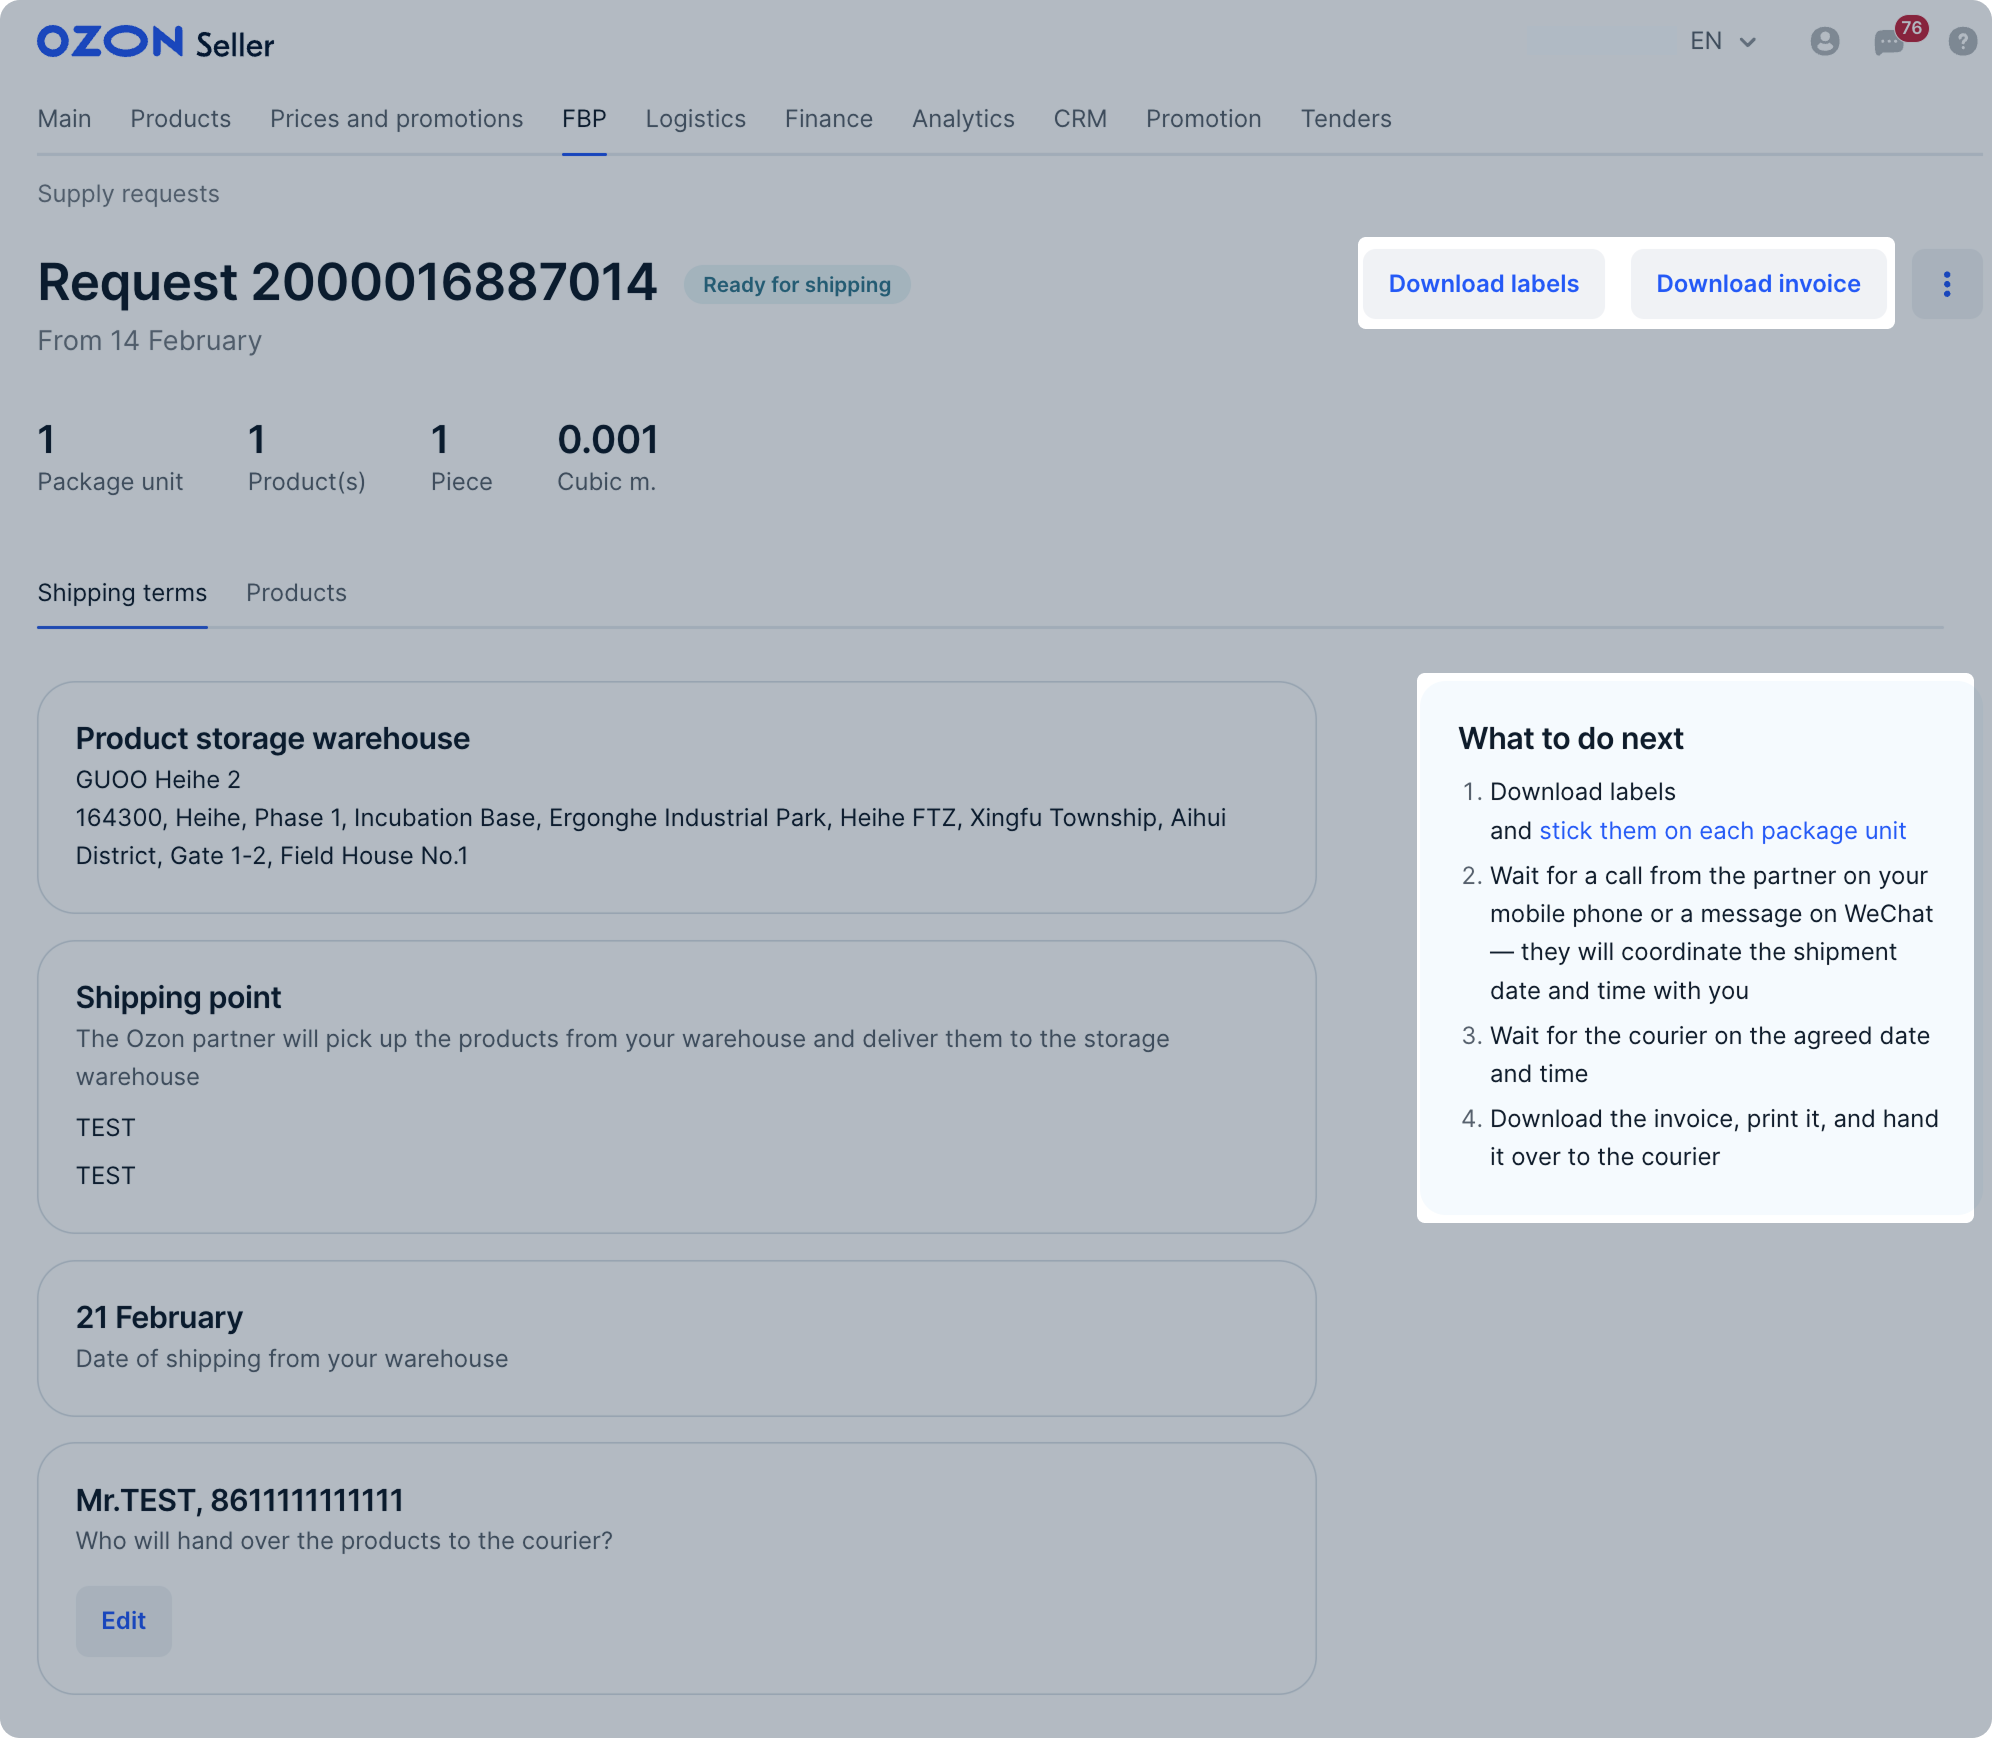
4. Print and sign three copies of the invoice and give two to the courier.
If you want to edit the shipment date after the request is created, talk to the partner and agree on a new date.
1. Make sure your products have barcodes and the barcodes aren’t longer than 25 characters.
2. Sign up on the partner website and add a warehouse in your personal account on Ozon.
3. In the FBP → Create a supply request section, select a supply warehouse and click Continue.
4. Add products one by one or upload them all via the XLS template.
To make a decision on the products and their quantity, check the availability report.
Learn more about products availability
To add one product, enter its name, article, or SKU into the search bar.
To download the template, click  → Download XLS template.
Fill in the template: specify product articles, their names, and quantity. Upload the filled in template to your request.
The file should contain no more than 5,000 unique products. You can’t add to the supply:
- products without barcodes;
- products that haven’t passed moderation;
- products of unsuitable type or size for the selected warehouse.
If the file contains errors or products that can’t be supplied, we show them in a separate window. You can:
- click Remove products with errors to add only products that passed validation;
- click Download XLS to download a detailed report with errors for each product and recommendations for correction. Correct the errors as recommended and upload the form again.
5. Specify the number of products and package units and click Create request.
A package unit is 1 pallet or 1 box. For example, if there’re 3 pallets and 2 boxes in your supply, specify 5.
The request gets the “Awaiting confirmation” status and is displayed in the FBP → Supply requests section on the New tab.
It takes 10 minutes to register your supply request in the JDL system.
6. When the request gets the “Ready for shipping” status, select the date and time of shipping.
7. Download the labels and label the boxes.

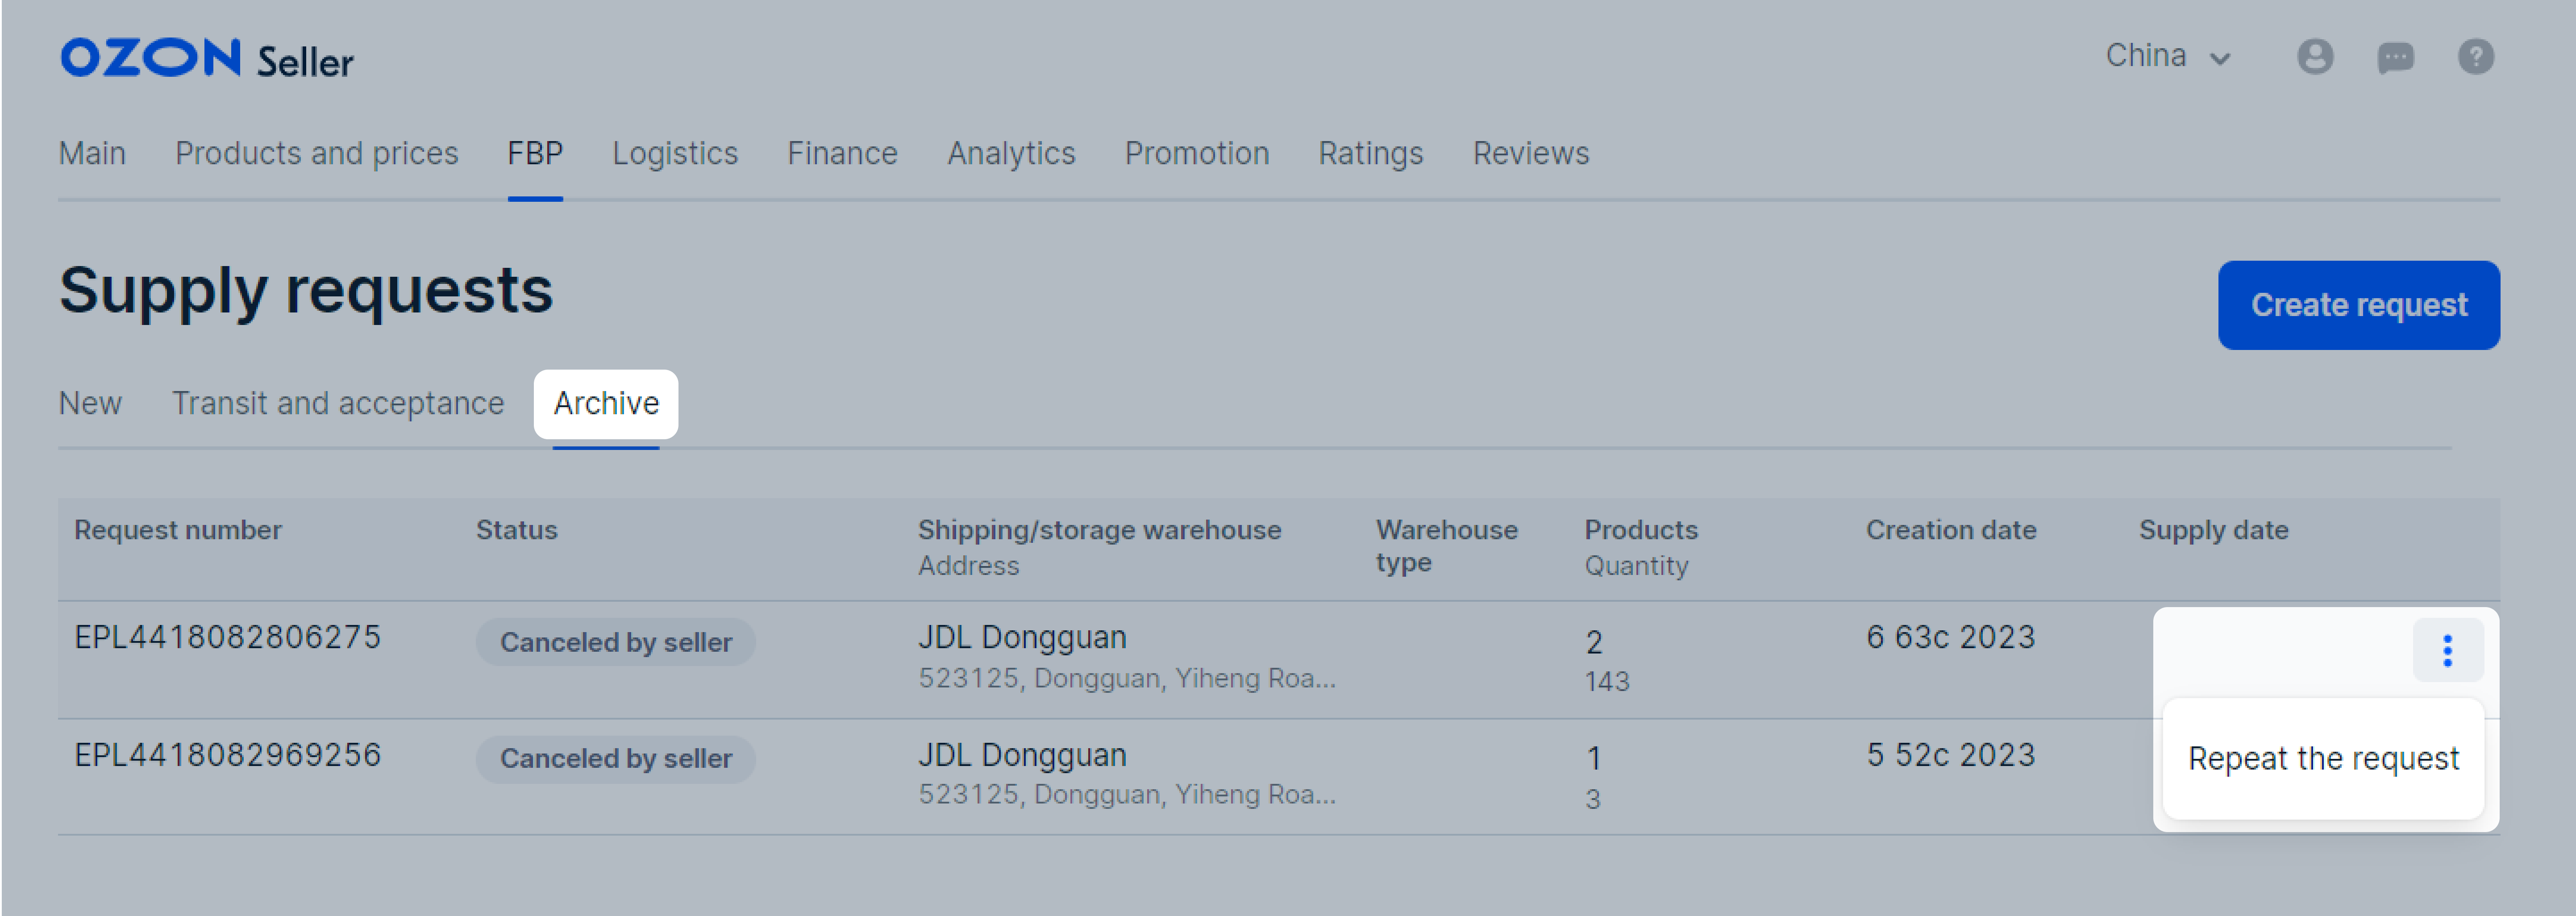
 → Repeat the request.
You can also repeat the request on its page.
→ Repeat the request.
You can also repeat the request on its page.